"That Arrow Was Meant For
Me. . ."
TABLE OF CONTENTS
1) Trailing
The Assassins
2) Breaking
In/ Silver Fire Poker
3) Ramirez'
Bedroom
4) Looting the 2nd Floor
5) The
Basement/ Ramirez
6) Getting
Out
7) Getting Home
Objectives:
- Trail The
Assassins
- Steal
Bafford's Jeweled
Septre
- Break In
- Steal
Ramirez' Purse
- Steal
Ramirez' Purse
- Steal
Ramirez' Silver Fire
Poker
- Get Out
- Get
Home
Loot Requirements: 2000
Loot Available: 2705
Loot Accounted For:2705
For Complete Loot Locations, go to the Loot Map.
For Hints and FAQ's, go to the Secrets Page.
Note:Don't forget to grab as many supplies as you can from Farkus' store- he won't need them anymore. There
should be 3 flash bombs, 3
fire arrows, 2 moss arrows, 2
water arrows, 2 noisemakers,
and 3 rope arrows. Make sure
to check under the counter.
Don't take too long or you'll lose the trail.
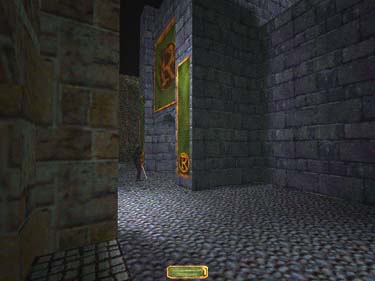
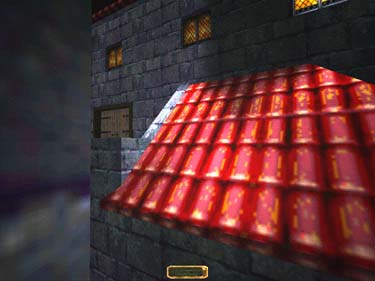
Trailing The
Assassins
Obviously someone's
trying to kill you. Before
trailing them, grab as much
equipment as you can. There are several routes
the assassins use. They will
turn and look back every 30
paces or so. Make sure to
cling to the shadows, and be
sure to use moss arrows to
cover metal bridges and stairs
(fig. 1). Eventually you'll
come to Rameriz' place (fig.
2).
|
|
|
Fig.
1
|
Fig. 2
|
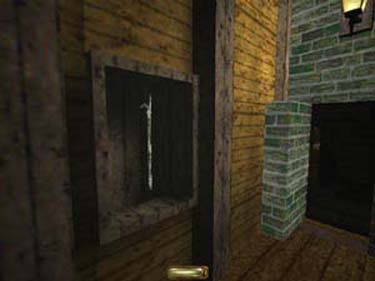
Breaking In/
Silver Fire
Poker
You can climb the wall
here by stacking boxes and
mantleing up, but it is
incredibly time consuming
(see the Assassins FAQ for
more details). To go in thru
the yard, wait for the patrols
conversation to end, and
their footsteps to fade well
away, then fire some moss
arrows onto the red gravel
and go left/West. Beware of
the overhead guard (he may
hear you and leave his post
to come looking. Just stay in
the shadows and move
along). Stick to the left wall
until you reach the narrow
part of the yard, then cross
over in the shadow and stick
to the right wall. There are
two individual guards, as well
as a 3 man patrol in this area,
so move slowly. You will
reach a section of red
roofing. Give yourself time
to pick the lock on the door
opposite the castle, grab the
flashbomb inside and climb
the ladder. Jump across to
the red section and mantle
onto the balcony (fig. 3).
|
|
Fig. 3
|
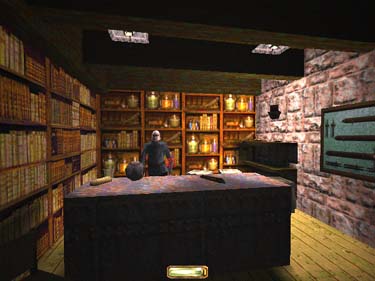
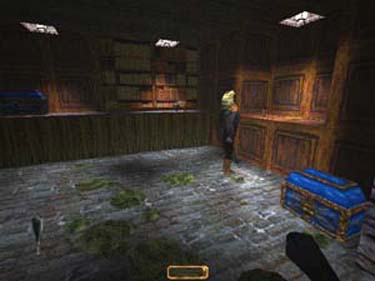
Ramirez'
Bedroom
The chest to the right of
the bed has a basement key.
Crouch down and grab the
ring (100) immediately in
front of it. The door to the
left of the fireplace is empty,
but the bathroom to the
right has 4 candlesticks, 2
chalices, 2 gold bottles, and
an amulet (405 ttl). Grab
the place setting in front of
the fireplace which should
include 2 gold cups, 2 gold
bottles, and I gold plate
(200 ttl). Grab the vase
(100) on the mantle, (the
papyrus is a letter to the
corupt Commissioner) then
extinguish the fire with a
water arrow. Climb inside by
crouching, look to the right
for a gem (100) and to the
left for the switch (fig. 4) to
open the hidden passage.
Rameriz' Silver Poker (fig. 5)
is on the right (200) and the
blue box at the end of the
passage contains a purse
(100).

|
|
|
Fig.
4
|
Fig. 5
|
Looting the
2nd Floor
Leave the bedroom and
head down the hall to the
right/South (there are two
guards patrolling up here).
The next door on the right
has a vase (50) on the
mantle. The next door on the
right has a ring (100) on the
bedside table, and another
vase (100) on the mantle.
Go back to the hallway
Take the last door on the
right/West and go thru the
room to the stairs.
TThe
Basement/
Ramirez
Go left/North at the
bottom of the stairs, then to
the end of the green and
white hall. Descend the stairs
on the left to the basement.
Follow the passage until you
can turn right and open the
the pink metal door with the
basement key. Take out a few
torches and hide in the
alcove across from the first
room on the left (the
�counting room'). You can
see Ramirez at work (fig. 6).
|
|
Fig. 6
|
Launch a few moss
arrows, maybe throw a flash
bomb, and blackjack him.
Steal his purse (250) and
stash his body in the dark
corner to the right of the
doorway. If he has struck the
gong, be aware that there's a
servant on the way with
Ramirez' dinner. Blackjack
him as well. Loot the room.
You should find: 6 water
arrows, 4 moss arrows, 1
speed potion, 1 flash bomb,
some coins (50 ttl), and a
master key which will open
the blue box (25 loot).
There's a papyrus in the box
on the floor containing
some info on Victoria who
you will meet in the next
mission. Leave the counting
room and exit thru the metal
door, going straight up the
hall in front of you until you
can take a right/East, then
swing around and head South
to the stairs.
Getting Out
At the top of the stairs,
use the blue key to unlock
the door. Take the corner
and unlock the first door on
the left. Be aware of the two
guards in the machine room
to your immediate left
having a conversation about
you. They are getting ready
to exit the room. The room
to your immediate right
contains (75 ttl) and is a
good place to wait for the
guards to finish their
conversation. Once the
guards leave, enter the
machine room on your left.
Grab the coins on the desk
(150). The blue box next to
them contains 2 firebombs.
The blue box near the barrels
contains some coins (25).
Climb the ladder in the
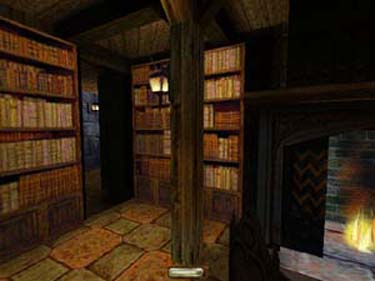
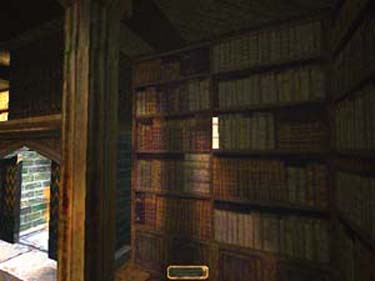
corner up to the library.
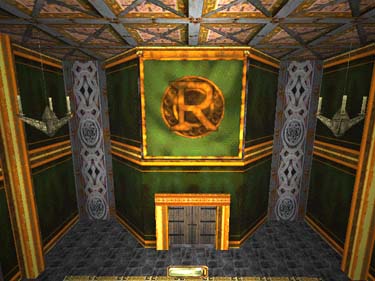
Follow the passage and press
the red button to open the
secret doorway (fig. 7)(this
can be opened from the
other direction using the
highlighted book to the right
of the fireplace in the
library- fig. 8). Go out the
Western door of the room.
The first room on the
right/North contains a place
setting which should include
5 chalices, 2 gold cups, 2
gold bottles, and a gold plate
(275 ttl). The room to the
left/South contains a chest
with a speed potion. Go back
to the library. Take the stairs
in the Southeast corner
upstairs and grab the
candlesticks on the desk
(100). The chest to the left
of the desk contains a ring
(100).
|
|
|
Fig.
7
|
Fig. 8
|
Back downstairs in the
library, pick the lock on the
double doors, go to the
balcony and jump over into
the water. If you've sounded
the alarm or a body has been
found by this time, your
objectives will change (this is
challenging to try so if
you've been very careful and
still want the objective
change, climb back down to
the machine room using the
secret passage and set off the
alarm on the back wall.
Climb back to the library and
proceed as follows.)
Getting
Home
Head South in the water
and take the tunnel to the
East. Ride the waterfall down
and swim left to the ladder.
Head Southwest down the
slope until you see a metal
door. Go thru and drop into
the water. Follow East until
you can mantle up to the left
and take the ladder up (listen
for patrolling guards before
you open the manhole
cover- you can shoot a rope
arrow into the ceiling and
climb up to hide if
necessary). From here, make
a right and head West then
South until you come to the
open door of the shop where
you started on your right.
Pass it and follow the road
until you come to the metal
bridge on your left. Instead
of crossing it, go straight
ahead thru the door and
down the stairs and head East,
crossing the bridge at the
bottom of the stairs and
going South up the wooden
ramp. When you pass the
brick wall on your left, turn
left/South and pass the
abandoned cart on your
right. Continue East toward
the red door until the
mission stops.
Travel to: Keepers' Chapel / Strategy Index / Thief-TheCircle.com (home) / Go Back