"Think I'll Go Make Some
Inquiries About Where A
Heretic Like Me Can Get
Some Holy Water. . . Always
Go Prepared."
TABLE OF CONTENTS
1) Entrance/
Upper-Southern
Vaults
2) Upper
Northern Vaults
3) Where
Am I? (The Burrick
Caves)
4) The Halls
Of Echoing Repose
5) The Horn
Of Quintus
6) The
Mystic's Soul
7) The
Mystic's Heart
8) Getting Out
Objectives:
- Steal
the Horn of
Quintus
- Steal
the Mystic's Soul
- Steal
the Mystic's Heart
Loot Requirements: 2000
Loot Available: 2450
Loot Accounted For:2450
For Complete Loot Locations, go to the Loot Map.
For Hints and FAQ's, go to the Secrets Page.
Equipment
recommendations:Holy
water, water arrows, healing
potions. Save 5 fire arrows for
the end of the mission
Note 1): It cannot be
emphasized enough- SAVE 5
FIRE ARROWS FOR MYSTIC
SOUL OBJECTIVE!
Note 2): All Golden
Bone sub-mission
information will be in GOLD
italics.
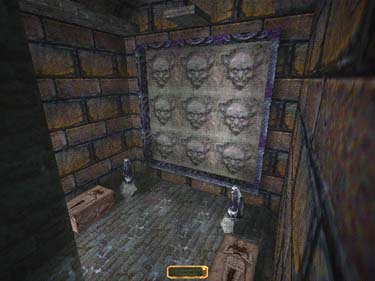
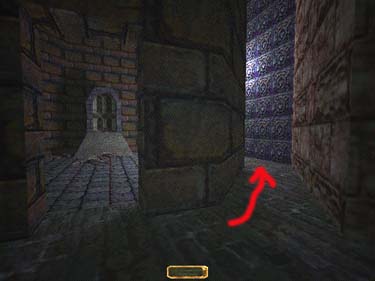
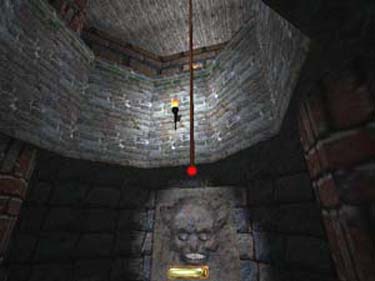
Entrance/
Upper
Southern
Vaults
The crypt to the West has
a chalice (15). Go down the
rope and onto the boards.
There's a zombie below, but
no loot in the room, so drop
and head out the Southeast
corner. Follow the stairs. The
left passage leads to some
info about the Horn if
you're interested. The right
passage leads to a hall- take a
right at the drop off and pick
up a healing potion on the
floor of the Alarus extention
(look close), then go down
the hall into a large room.
Turn right in the room and
go up the green stairs into
the Upper Northern Vaults.
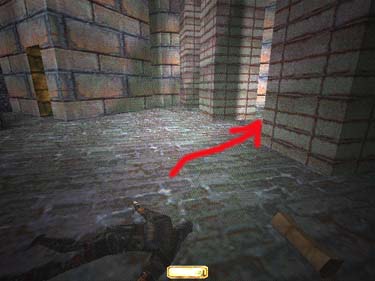
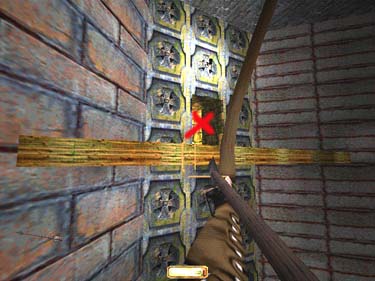
Upper Northern
Vaults
Climb the stairs and pass a
chapel on your left (which
contains a holy water
fountain- remember this if
you have zombie trouble)
and continue on. The first
room you come to has a
vase (100) in the Southeast
corner (beware the floor
traps). In the next room,
climb down the rope on the
left. Go South and open the
blue box by the body for a
gem (100). Go to the next
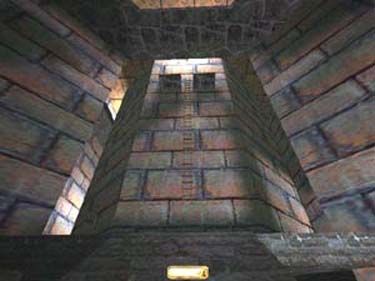
room and jump in the water
(fig. 1) , headed North. You
will emerge in a room
hearing windchimes. Go to
the far end and open the
boxes (they're booby trapped
so stand to the side)- the left
one has a speed potion, the
right one has six fire arrows.
Go back across the pool and
climb down the ladder
(beware falling rock at the
bottom- move quick!). Go
into the red caves.
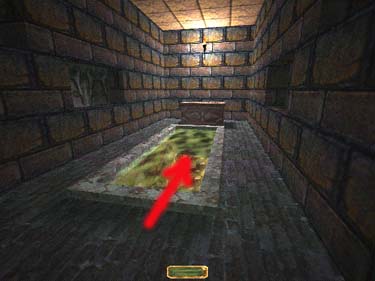
|
|
Fig. 1
|
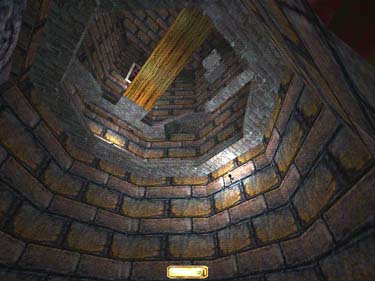
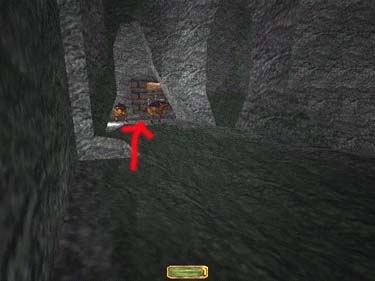
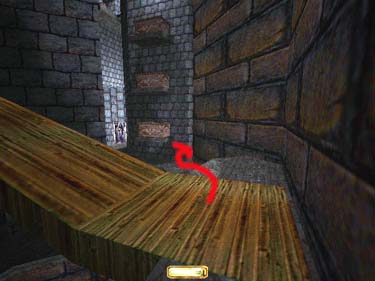
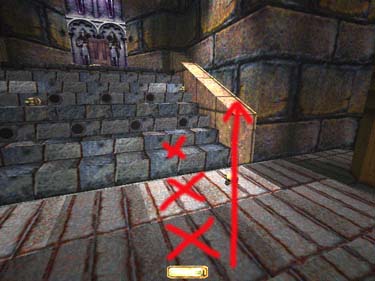
Where Am I?
(The Burrick
Caves)
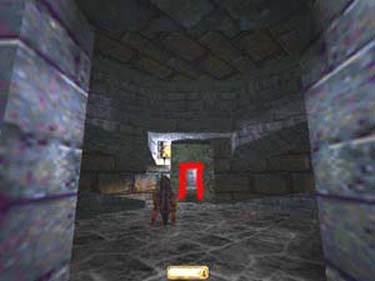
No help from the map on
this one. Follow the tunnel
to the end and watch out for
the burrick patrols. Jump
into the earth tunnel and go
right. Drop through the hole
(fig. 2) and swim Southwest
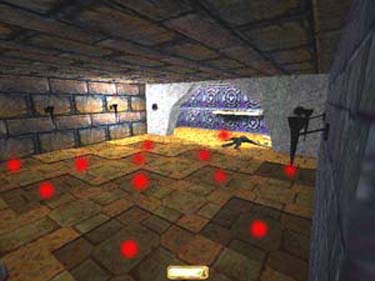
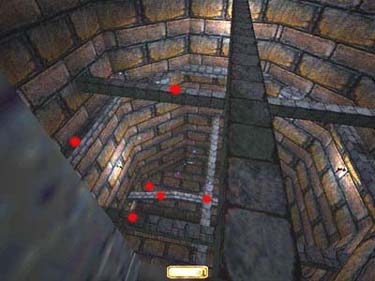
to the set of stairs. Beware
the darkened floor traps (the
best way through here is to
walk diagonally between the
traps- don't try jumping. The
red dots indicate traps - fig.
3).
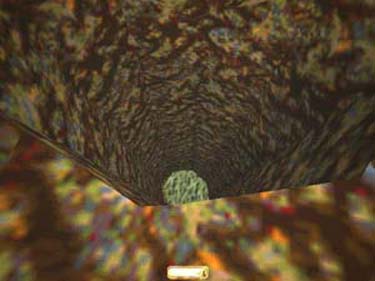
|
|
|
Fig.
2
|
Fig. 3
|
Read the info on the
Mystic's heart, grab the six
fire arrows and the purse
(100). Back down the stairs,
swim over to the East earth
tunnel and use a rope arrow
to climb back down to the
main burrick cave. From
here, go right in the main
cave and go right to the
tunnel in the rock. Head East
to the 4-way intersection.
Go right (East) and right
again at the end. Run past the
burrick in this cave and grab
the rope. In this room is
some info on the Mystic's
Heart and 6 water arrows.
Climb back down and take
the first passage to the right,
thru the room with the dead
burricks, then left back to the
4-way. Take the West passage
till it ends and grab a gold
nugget (50- beware the hole
and very very long drop- the
hole is not present in the
Gold Edition). Back to the
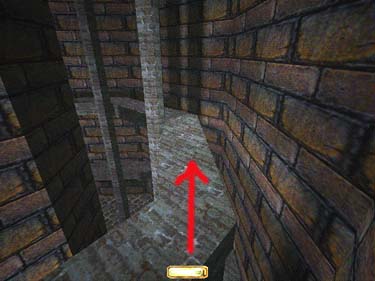
4-way and South to the large
burrick cave again. Head to
the left until you see another
tunnel up high with a rope
dangling (fig.4). Climb up
and follow it till you come
to a huge cavern with several
openings. Drop onto the
ledge and head left to the
next red tunnel. Follow it to
the Halls of Echoing Repose.
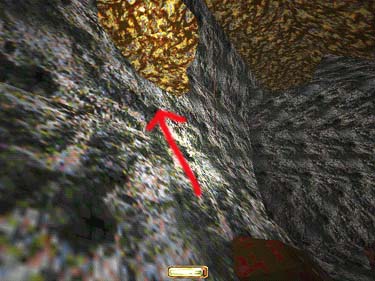
|
|
Fig. 4
|
Scenic route: drop down into
the water and swim East to
the shore. There's some info
on the Mystic's Soul. Follow
the tunnel around to a ledge
and jump across. Drop left,
and enter the burrick tunnel,
staying to the left side. When
you come to a passage too
small for you, take the one
to the immediate right and
follow it to the red tunnel.
Jump out and follow the
water around to a crack in
the ceiling and swim up.
If
you're collecting the golden
bones -which comes in very
handy later- stop off in the
first air pocket and grab the
first of four you will need to
collect.
Climb the stairs and
head East thru the structures
to the red tunnel where the
instructions for the Halls of
Echoing Repose begin.
The Halls of
Echoing
Repose
For simplicity this section
will be divided into three
smaller parts. You will be led
from one objective to the
next, each section starting
with a familiar reference
point: Horn; Main entrance
(where you are now-
hereafter referred to as �the
main entrance'). Mystic's
Heart; Wooden ramp (the
first wooden ramp you'll
come to- referred to
hereafter as �the wooden
ramp'). Mystic's Soul; Main
ramp (the first ramp you'll
come to, with two coffins
near the base- referred to
hereafter as �the main ramp'.
Note:1) Save at least 5 fire
arrows for stealing the
Mystic's Heart. Use holy
water and water arrows on
zombie's as much as
possible. 2)It is beneficial to
collect the �golden bones'- 4
extremities and a skull- for
later in the mission- the
locations will be noted in <>
marks.
First two golden bones: Go
around entrance pillar and
stay to the far left and look
for the staircase enclosed in a
white half-wall. There is one
in the doorway to this area.
For the other (if you didn't
come the scenic route)
descend the stairs and swim
to the first air pocket- the
bone is floating here. Go
back to the stairs, climb up,
and head East back to the
main entrance.
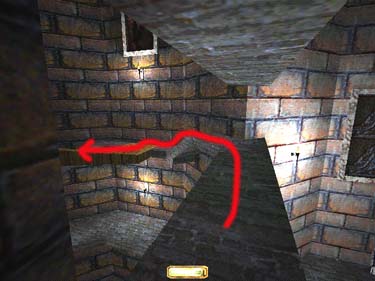
The Horn
Of Quintus
The first room (not
passage) to the right is a
room with 4 bodies, a vase
(100) and a golden bone.
Deal with business, then head
out and take the first left turn
(fig. 5). When you come to
Felix's fine looking corpse
(and his info on the Horn),
you will see a hallway to the
Soutwest. Down the first
passage is a room with a
body (you should hear the
sound of a fire trap above).
Take the second ladder on
the left and climb to the top
coffin for a gold cup (25).
Go back out and to the next
door on the right. Open it
and stand back to wait for
the falling rocks. There are
two bodies here that you can
avoid or destroy. Walk
straight thru the room and
grab a vase (100) behind the
rocks. Leave the room and
make a left to go back to
Felix's body. Pass him staying
to the right (fig. 6). You will
eventually come to the main
ramp.
|
|
|
Fig.
5
|
Fig. 6
|
(At some point, go South
from this ramp thru the next
round room and East down
the first right passage. Take
the first door on the left and
walk the outside ledge to the
other side (the middle is
booby trapped- use this to
your advantage if you can
lure some zombie's in here).
Climb up for a goblet (50).
Don't worry about the
doorway over to the right-
that comes later. Take a right
out of the room and stay left
till you come back to the
main ramp.)
Ascend the ramp and turn
right over the body. This
walkway leads to the wooden
ramp. Go up
(jump the gap) and make a
left up the stairs then go up
the next ramp. Turn left and
stick to the right hand wall to
avoid the purple energy blasts
and turn right down the hall
and into the cave.
The burrick's should leave you alone. Head North toward
the brick edifice and proceed
to the tall column in the
middle of the next room.
There are a series of ladders
you will have to climb to the
top (quicksave between
jumps). At the top grab the
Horn of Quintus. Try to jump
so that you are landing
parrallel to the catwalks (fig.
11).
|
|
|
Fig.
10
|
Fig. 11
|
At the top grab the Horn
of Quintus. At this point it's
easier to jump to the first few
ledges and then to the
walkways than to go back
the way you came. Head
back thru the burrick cave
(they should be good and
angry now) going Southeast.
Backtrack to the bottom of
the wooden ramp.
Before you go after the
Mystic's Soul, pass up the
wooden hall (with the gap-
that leads to the wooden
ramp) and keep going to the
next open area. Go right at
the intersection (with the pile
of bones) and follow the
ramps up to the top room
(the narrow hallway leads to
an outside crypt with no
visible loot.). Shoot a rope
arrow and climb down (fig.
12). Avoid standing directly
in front of the face, but grab
the two eyes/gems (100
each) and four rope arrows in
the blue box behind the back
column. Climb out and
backtrack down the ramps.
When you reach the
intersection with the bone
pile, quicksave, then jump
across to the ledge on your
left. (if you're playing Thief
Gold the ledge is made of
wood and you can shoot a
rope arrow into it - fig. 13).
This is the Marad tomb.
There is a chalice down on
the left (15). Go back out to
the ramp, making a left at
the intersection (at the bone
pile) to the bottom of the
wooden ramp.
|
|
|
Fig. 12
|
Fig. 13
|
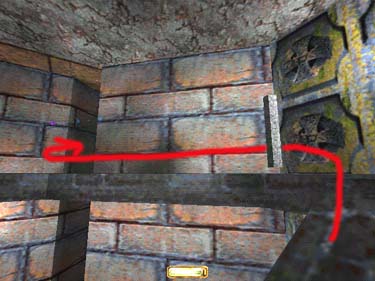
The Mystic's
Soul
From the bottom of the
wooden ramp go left (fig.
14), then turn right into the
hall with the hammer
cutouts on the walls. This
leads to a room with a
hammer pattern on the
floor. Don't step into the
light, but go to the three
extremities and grab the
chalices (45 ttl).
|
|
Fig. 14
|
If you've collected three
golden bones thus far, climb
down one of the ladders in
this room. Throw the bones
into the coffin, along with
the 4th bone and skull you'll
find. The floor will light up
revealing 8 water arrows, 4
fire arrows, and 1 vial of holy
water. Climb back out.
Leave this room and go
to the next one on the right.
(In Thief Gold- there is a fire
beast here that will drop fire
arrows when doused with
water arrows. If you douse
him enough, he will run
away, giving you time to
complete your task). Note
the 4 doors in the floor that
light up when you center
them (fig. 15). That's where
you're going. Using your
fire arrows, light the 5
torches around the room. Every door in the room
opens (including your escape
hatch -fig.16) and it turns into
Night of the Living Dead.
|
|
|
Fig.
15
|
Fig. 16
|
You can take these zombies out with your remaining fire arrows and take a look around (no
loot) or jump through the door in the floor. Swim to the next room. Look around and observe the
traps. At the South end of the room is the Mystic's Soul (fig. 17), but note that the floor in front of
the stairs has two rows of darkened tiles. These set off the arrow traps on the columns to the left and
right, and well as the energy bolt traps embedded in the stairs. The pressure traps on the stairs set off
the engery bolt traps at the north end of the room where you just emerged. The best way to pull this
off is to run up one side of the stairs, jump onto the side rail (fig. 18) and wait till the energy bolts
are finished (there's stragglers, so be careful- this is a good place to quicksave).
|
|
|
Fig.
17
|
Fig. 18
|
Stand as far away from the gem as possible, out of the line of fire traps in front of you. Grab the
gem (500) and jump back to the railing till the traps have all gone off (fig. 19). Be careful of the
floor traps going back to the ladder, which will lead back to the black and white checkered tile room.
Exit the room to the left and backtrack North past the wooden ramp to the top of the main ramp.
|
|
Fig. 19
|
The Mystic's Heart
From the top of the main
ramp (fig. 20), climb the
ladder up to the coffins, then
mantle up into the room.
Drop or avoid the burrick in
the next room and go thru
the back door (fig. 21).
|
|
|
Fig.
20
|
Fig. 21
|
Quicksave here. You will
need to drop down, then
move to the right or left as
quickly as possible, after
memorizing the location of
the energy bolt's impact.
Work your way down and go
thru the door at the bottom
(fig. 22). You'll see a sign
warning you not to step in
front of the statues. Good
advice. The best route (fig.
23)is straight thru the room
between the far Western
statue, but to the right of the
column. Go around this
column, then weave your
way thru the remaining
pillars to the East side of the
room, staying as close to
them as possible. Stick to the
left wall and step into the
next room.
|
|
|
Fig.
22
|
Fig. 23
|
Beware the Haunt
appearing in the middle-
stick to the shadows or drop
him with a fire arrow. The
Mystic's Soul is in the blue
box at the end (1000). Step
into the alcove behind to
teleport back to the top of
the beam/ energy bolt
obstacle.
Getting Out
Go back thru the burrick
room, climb down the ladder
and go down the main ramp.
Head South thru the next
room to the staircase,
stopping to grab the silver
nugget the right window sill
(50), then East through
either of the passages which
lead back to the main
entrance. Once there, go
back thru the red tunnel,
make a right into the cavern
and climb the rope to the
earth tunnel (Hint: if you're
having trouble, try jumping
to the right side of the
tunnel). Climb the rope
down into the burrick cave
and head to the
right/Southeast to the next
tunne on the right. Run up
the board to the red tunnel
(note the yellow arrow marks
on the walls), and follow it
back to the Upper North
Vaults. Climb the ladder and
jump into the pool headed
South. Go thru this room
and climb the rope in the
hall. Go right/South out of
the room with the tiled floor
and down the stairs to the
next room. Turn the corner
and go right again, passing
the chapel on your right. At
the bottom of the stairs turn
right and go out onto the
ledge. Quicksave and jump
back to your rope, climb up
to the boards and head South
back to the entry tunnel,
then up the rope to get out.
Travel to: Keepers' Chapel / Strategy Index / Thief-TheCircle.com (home) / Go Back