"Sounds Like Keeper Talk for 'For We've Rigged The Place...'"
TABLE OF CONTENTS
1) Entrance/ Caverns
2) The Basement
3) The Water Talisman
4) First Floor Boxes and
Flute
5) The Cash Box/ Back
To The Streets
6) 3rd Floor/ Back To
The Streets
Objectives:
- Locate Giry for
Information
- Find and Steal the
Water Talisman
- Find a Way Back
Out of the Caverns
- Find Opera House
- Steal Contents of the
Cash Box from the Ticket Office
- Steal the Silver Flute
- Grab 2000 in loot
- Don't kill anyone
- Get Back to the
Streets
Loot Requirements: 2000 (When Objectives Change)
Loot Available: 2920
Loot Accounted For: 2920
For Complete Loot Locations, go to the Loot Map.
For Hints and FAQ's, go to the Secrets Page
Entrance/Caverns
(Climb to the gateway and jump to the
North roof- then across toward the West
tower. Grab the moss arrow, then jump quietly
to the window sill, grab 6 broadheads around
the corner, and pick pocket the archer if you
like- the key is to the door at the bottom of
the tower.)
Open the North doors and go thru the left
sewer door. Take the ladder down and go to
Giry's body. Grab the healing potion, then run
past the spiders to the next pool and jump in-
either direction brings you around to an
underwater passage in the East. Grab the water
arrow on the bottom and emerge in the
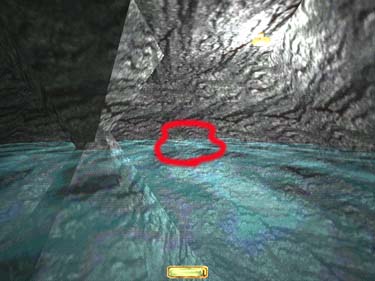
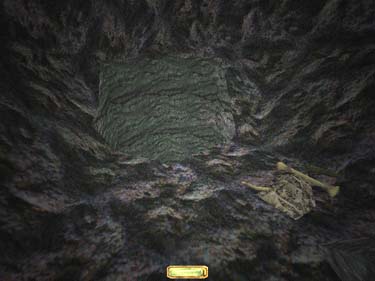
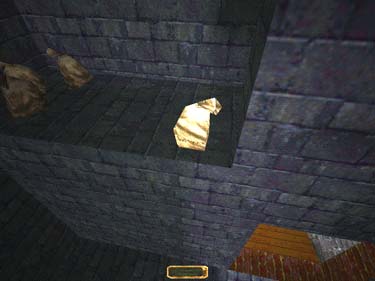
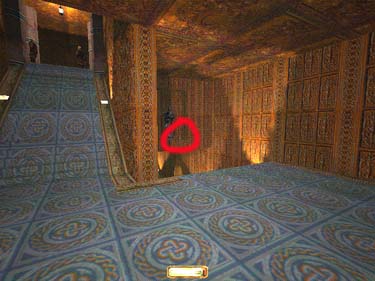
crayman caves (fig. 1). There are 3 craymen
here, but you can avoid them by sticking to
the right wall. Go to the rock near the pool
and turn left (fig. 2).
|
|
|
Fig. 1
|
Fig. 2
|
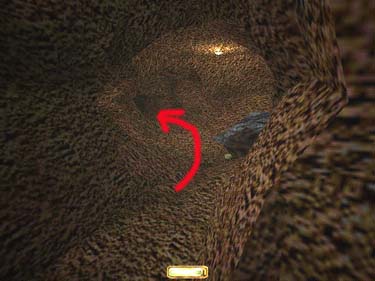
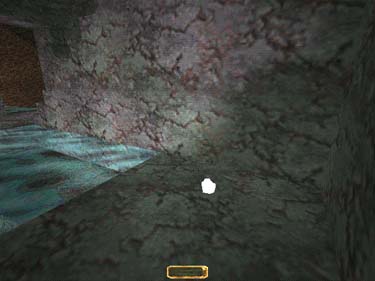
Go down the far right passage staying to the
right. Sneak behind the crayman and jump in
the next pool by the bone pile (fig. 3). The
first tunnel to the left has a breath potion.
Jump back in and go down the South tunnel,
which eventually turns East, using the airholes
along the way if necessary. Emerge at the foot
of the stairs, grab the sivler nugget (50 gold
-fig. 4) on the Northeast ledge.
 |
 |
|
Fig. 3
|
Fig. 4
|
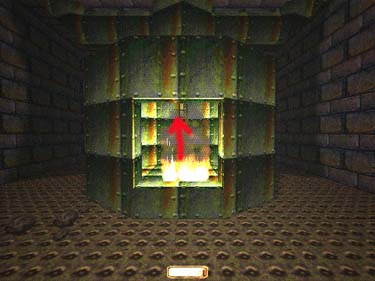
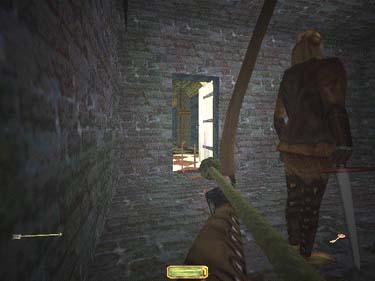
Let the crayman here chase you up the
stairs. In the above room, crouch and let him
follow you toward the empty blue chest- the
arrow traps should finish him off (fig. 5). Grab
the two arrows out of the body and proceed
East to the next pool, and East to the Raoul,
the ex-Opera house owner. Wait for him to
finish babbling, grab the map and key from
him (fig. 6), the moss arrow from the roof,
and head up the rope.
 |
|
|
Fig. 5
|
Fig. 6
|
The Basement
Go left/East at the split and mantle up. Go
thru the crawl space at the end into a prop
room. Turn right in the hall and head West to
the wooden door on the right (beware the
clockwise patrol in this area). Inside the room,
grab 2 fire arrows, 3 flashbombs, and a gas
mine. Continue West in the hall and take the
next hallway to the left. On your left there is an employee walking between two rooms. Let
him pass, then slip into the 2nd room on the
left, and quickly go up the ladder in the
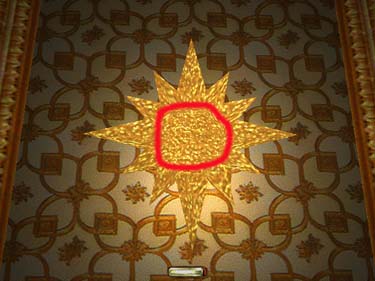
furnace (fig. 7) and slash the banner to enter Raoul's hideout. Grab the lost city papryus
(150 goods) and the two candlesticks (100
gold ttl). The secret door here leads to a high
traffic lobby (if you need to get back here later
from the lobby- push the switch in the middle
of the sun in the adjacent room - fig. 8).
|
|
|
Fig. 7
|
Fig. 8
|
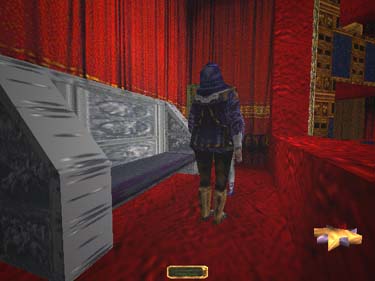
Go back down the ladder and left out of
the small hallway until you reach the long
South hall. Go right/West towards the wine
cellar (fig. 9).
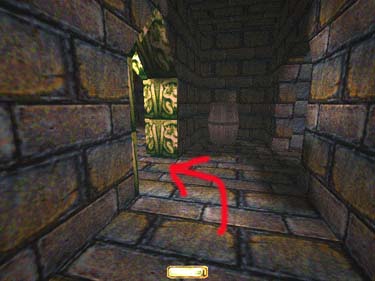
|
|
Fig. 9
|
Beware the employee here, and go to the
back side of the outer hall for a gold bottle
(50 goods) next to the box. In the inner hall,
find a gold bottle (50 goods) in the far left
room in the bottom middle cubby. In the
smaller inner hall, grab the gold bottle (50
goods) in the far left corner. The room at the
far right has a gold bottle (50 goods) in the
top middle cubby (you can jujmp to reach it).
Leave the wine cellar headed East down the
South hall. Look for grey stone to the left and
go down to the bath for two water arrows. In
the South hall, the last room on the left
(before the stairs) has a healing potion in the
crate on the immediate left (in the room w/
the dancers. Beware the patrol here. Stay in the
shadows and you shouldn't cause too much of
a fuss). On the South side of the hall are three
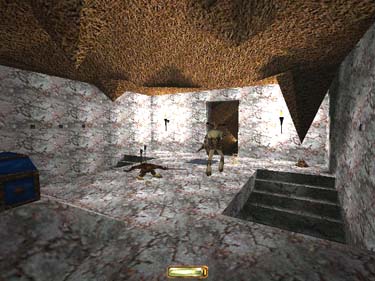
rooms with a patolling employee. Go to the
last one on the East and through the left door
to a round room. Up the ramp (go slowly) is a
chef, but you can grab 2 gold cups (50 gold)
and 2 gold plates (100 gold) from the counter
without him noticing (fig. 10). Go back to
the middle room downstairs, and up the ladder
in the fireplace to the 1st floor (fig. 10).
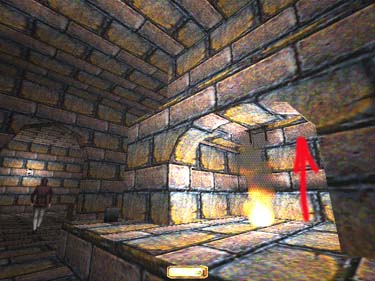
|
|
Fig. 10
|
The Water Talisman
(Remember in the halls that you can use a
rope arrow to climb up and hide when a patrol
approaches - fig. 11.) Go to the right/East and open the hidden door (fig. 12).
|
|
|
Fig. 11
|
Fig. 12
|
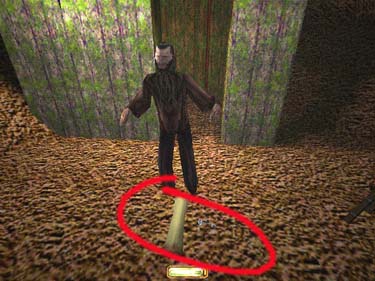
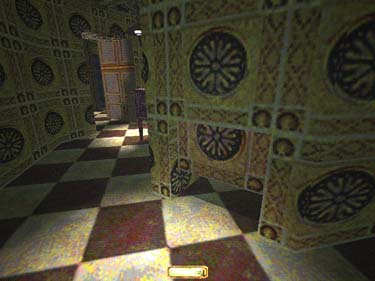
Sneak around clockwise to the table while
the conversation carries on and grab the tiarra
(75 gold/ 50 gems) and healing potion. Lean into the hall
and douse the torch so the performers won't
see you leave the room. Go right in the hall
(the other room on the right contains a note
from Lord Bafford) turn left at the end into
the backstage area. There is a patrol above and
some patrols on the ground, so listen for the
overhead guard to walk away, then climb the
ladder to your right and jump across to the
South ledge (w/ the sandbags - fig. 13). Go
West down the hall to the 1st door on the left
and grab the lost city papryus (150 goods)
from the far right cubby. The last room on the
left has two candlesticks (100 gold). Unlock
the last door in the hall and douse the torches
(beware the guard here). If you're careful you
can sneak behind him and grab the key to the
next door, but be sure to shoot a moss arrow
to the tile before going through (fig. 14).
|
|
|
|
Fig. 13
|
Fig. 14
|
In the next room on the left, grab the three
jeweled cups (45 goods ttl) out front, the 3
gold plates (150 ttl gold) around back, then go
thru the secret door on the bottom West of
the column (fig. 15). Use Raoul's key to
unlock the door up top (the lock is easy to
miss - fig. 16).
|

|
|
Fig. 15
|
Fig. 16
|
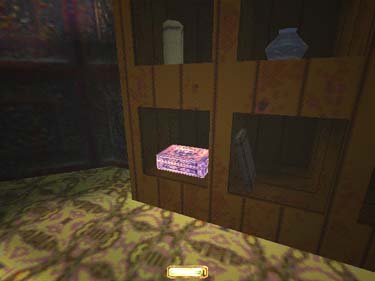
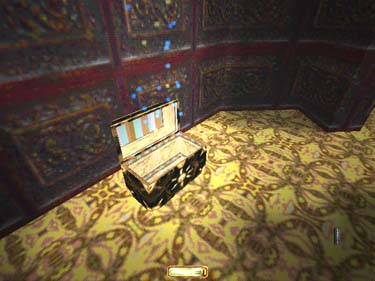
In Lady Valarus' office, find the key to the
Water Talisman chest in the small box on the
bottom shelf (fig. 17), a ring (100 gold) on
her desk as well as info regarding the flute, the
key to Cribb's safe which holds the flute, and
the Water Talsiman in the black box (fig. 18).
Go back down the stairs.
|
|
|
Fig. 17
|
Fig. 18
|
First Floor Boxes and
Flute
Turn left in the hall and into the stairways
on the right (the area w/ the blue floor -fig.
19). Be very careful here-stay to the edges as
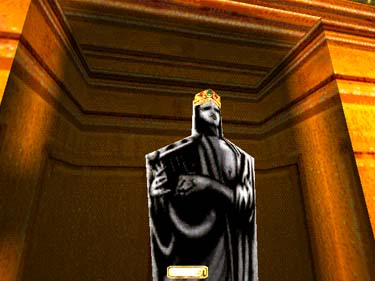
much as possible. It's loud and there are several guards patrolling. The overhead statue on the right has a gold nugget (100 gold) at his feet (fig. 20 -use a rope arrow). Back in the hall go thru the next door on the left/South and into the next room (w/ the fire place) for two gold cups (50). Go back to the hall and head East in the next hall to the boxes.
|
|
|
Fig. 19
|
Fig. 20
|
There is a woman with glasses (25 gold/25
gems) in the far east box on the right. (You
can usually get close enough to pickpocket the
nobles by slipping thru the door and into a
dark corner of the box - fig. 21. They should
make a comment, but will not see you if you
move quickly). An archer with a healing
potion patrols this hallway, but head North to
the middle box and grab the man's purse (100
gold). Continue North to the last boxes on
this floor for another pair of glasses (25 gold/ 25 gems) with the woman.
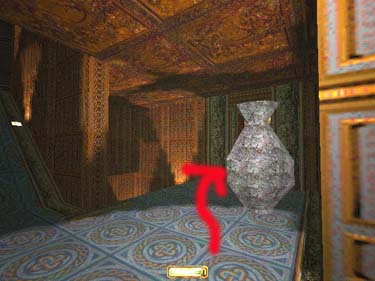
From here you can go West to the
stairways and take a left (very loud floor- stay
to the edges if possible) into the area w/ the
vase (fig. 22). The room beyond has a couple,
the woman has a pair of glasses (25 gold/ 25
gems). It is almost impossible to grab these
w/out raising an alarm, so you may consider a
well placed gas arrow, then hide the bodies in
the corner. Just beware of the patrolling guard (who has a speed potion). Back in the hallway, head West to the breezeway and go around to the right. Grab the necklace (100 gold/ 100 gems) from Lord Bafford, then go back down the hall past the stairways on the right and take the hall on the left.
|
|
|
Fig. 21
|
Fig. 22
|
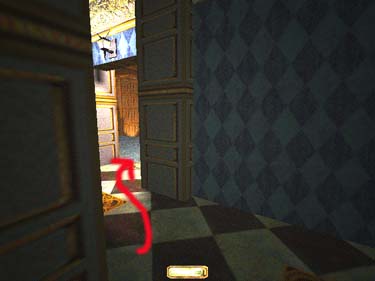
Follow this hall past the library on your left
and unlock the wooden door at the end. Go to
Cribb's office on the left, unlock the door, and quickly use the yellow key to open the wall safe (fig. 23) while the coversation/singing is still going on- once it's over the female will start to pace into the room. Grab the Flute (150 goods) and go left in the hall to the backstage platform. Jump to the ladder and go out the North passage. The second door on the right has two purple vases (200 goods ttl).
Unlock the metal door at the end of the hall
(beware the patrol).
|
|
Fig. 23
|
The Cash Box/ Back To
The Streets
In this hall, the 1st door on the left leads to
the auditorium, the 1st on the right is storage,
the 2nd on the right is a guard room w/ two
guards and 6 broadheads, 2 gas arrows, and a
healing potion, and the 2nd on the left has a
goblet (50 goods), and 3 gold plates (150 gold
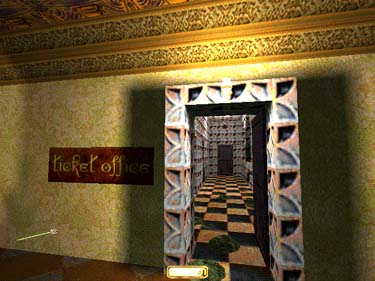
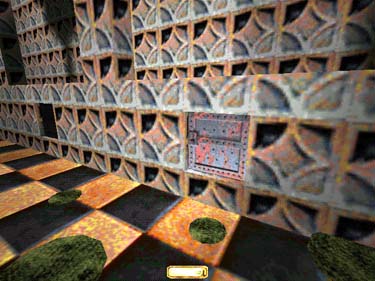
ttl). The metal door at the West end of the
hall is the ticket office (fig. 24). Use moss
arrows here if necessary. The first box on the
right has an employee, and the cash box is in
the first safe on the bottom right (fig. 25).
|
|
|
Fig. 24
|
Fig. 25
|
It contains a stack of gold coins (25 gold)
(Giry lied). Your objectives are now
completed, but if you intend to collect the
remaining loot, skip to the section entitled
‘3rd Floor'. Otherwise, unlock the far West
door (be prepared to deal w/ an archer here).
Go down the stairs and left to the North hall
(beware the patrol here) and right to the prop
room where you entered. Go thru the crawl
space and left in the sewer to the ladder at the end. Climb up and to the streets.
3rd Floor/ Back To The Streets
Go back down the hall past the backstage
prop rooms on the left and to the stage. Go up
the left ladder and jump to the North
platform. Pass Cribbs' office on the right, and
go thru the wood door. Go down the hall to
the library (the metal door on the right).
Climb the stairs to the 3rd floor and leave the
room heading South. Turn left to the boxes
and grab the gobblet on the table to the right.
The man in the first box has a purse (100
gold) (nothing in the next box). Go
left/South in the hall to the next box on the
left for a pair of glasses (25 gold/ 25 gems).
Go back out to the hall and turn right/North,
going counterclockwise to the Southwest
corner of the hall. Slash the banner here (fig.
26) and follow the passage down the ladders to
the coat check thru the secret door. Grab the
purse (100 gold) in the first hold on the
bottom right. There is a woman thru the door
here. You only have one piece of loot left to
collect and it's in a well guarded and noisy
area. The easiest way to do this is to run past
the woman, out the door and straight for the
fountain (there's a guard here)- the fountain
has two water arrows. The statue on the left has
a tiarra (75 gold/ 50 gems) on his head (fig.
27). Grab it and go thru the West doors in
either of the adjacent rooms to the breezeway,
then West thru the breezeway to the streets.

|
|
|
Fig. 26
|
Fig. 27
|
Travel to: Keepers' Chapel / Strategy Index / Thief-TheCircle.com (home) / Go Back