"I've Also Got A Map... It's So Old The Edges
Crumble In My Hand..."
TABLE OF CONTENTS
1) Home Turf
2) Finding The City
3) The Library
4) The Residential
District
5) The Market
6) The Theatre
7) The Emperor's Tomb/Water Talisman
8) The Arena
9) The Fire Talisman
10) Getting Out
Objectives:
- Find the Entrance
- Find the Keeper
Medallions
- Find the Talisman
of Fire
- Find the Talisman
of Water (N/A in Thief Gold)
- Get back out of the
City
- Don't Kill Anyone
Loot Requirements: 2000
goods/500 gems
Loot Available: 725 gold/865
gems/1255 goods (1615 goods if you
buy the Gervasius papryus in the
loadout) - Total 2845 or 3205
Loot Accounted For:725 gold/865gems/1255
(1615 goods if you buy the Gervasius
papryus in the loadout) - Total
2845 or 3205
For Complete Loot Locations, go to the Loot Map.
For Hints and FAQ's, go to the Secrets Page.
Note: If you do not buy the papryus from
Gervasius at the beginning, the masks are
worthless, and you will not get all the available
goods.
Home Turf
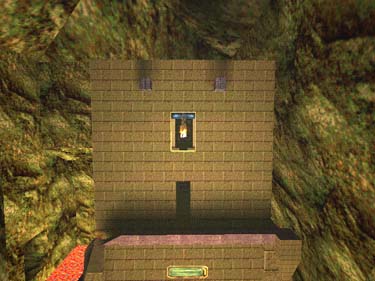
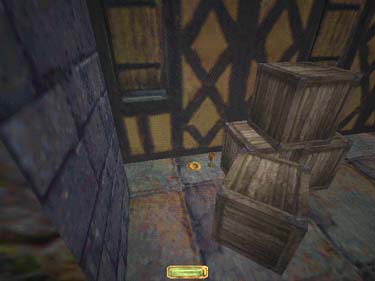
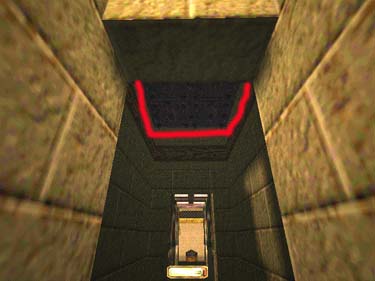
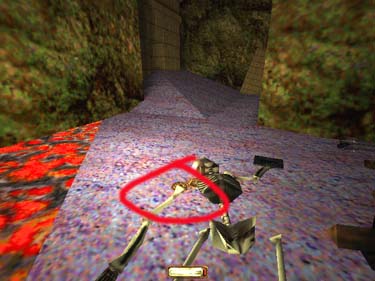
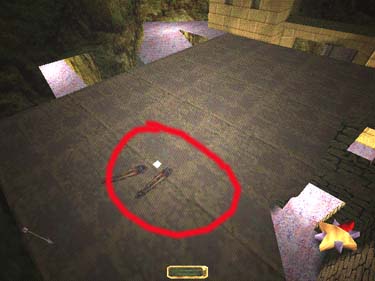
Go forward to the water, then left up the
ramp. Shoot a rope arrow into the wall to your
left and jump the red roof (fig. 1). Try to land
as close to the roof and the wall as possible to
avoid taking damage. There is a plate (50 gold)
and a gold cup (25 gold) under the crates (fig.
2), 2 broadheads, and a rope arrow in the far
NW corner.

|
|
|
Fig.
1
|
Fig. 2
|
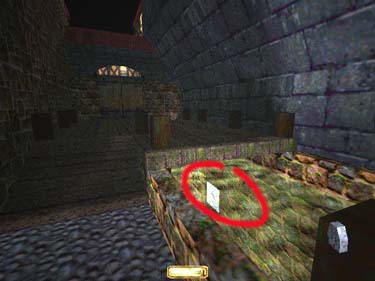
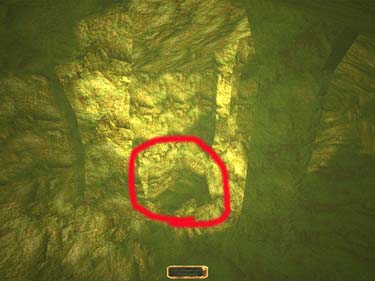
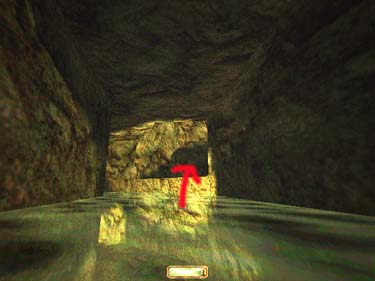
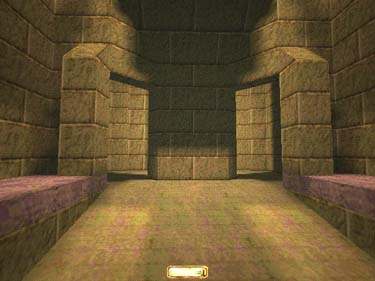
Finding the City
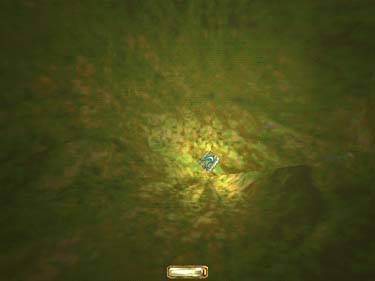
Jump in the water and look to the left for a
highlighted panel. The stone key from the last
mission fits here (fig. 3). Swim through and
pause to get a full breath before diving in. Go
through the tunnels, and head for the hole
toward the bottom where the bubbles are
rising (fig. 4).
|
|
|
Fig. 3
|
Fig. 4
|
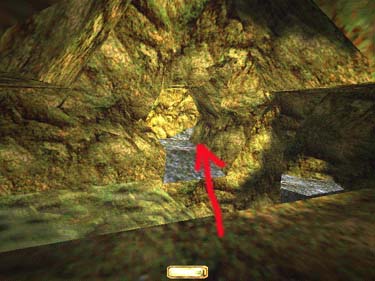
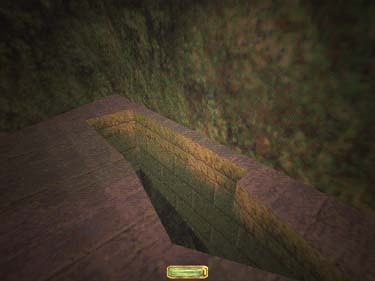
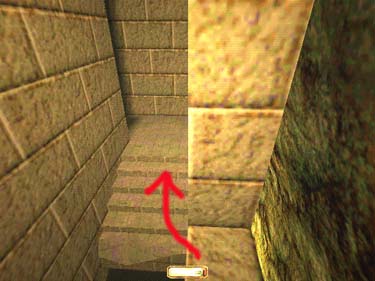
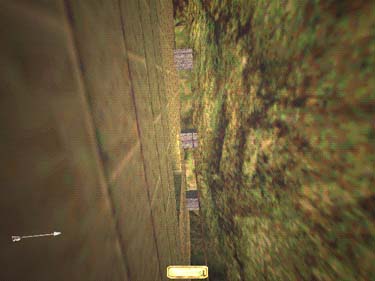
Keep a breath potion handy. When you
emerge, hug the right wall and be prepared to
mantle up quickly before hitting the waterfall
(fig. 5). If you miss the ledge, just climb up
the lower ledges to the top. Listen for the small
spiders. Run to the East and jump the waterfall
(fig. 6), then run South past another spider and
drop to the ledge below on your left.
|
|
|
Fig. 5
|
Fig. 6
|
There are several spiders on the walkway
below- use a gas arrow to take care of them,
or try to outrun them.You can take the right
passage for a great view of the Talisman Tower
(and a few more spiders) but you'll need to go
left/East to get to it. Keep going until you
reach a hole in the roof and drop down (fig.
7).
|
|
Fig. 7
|
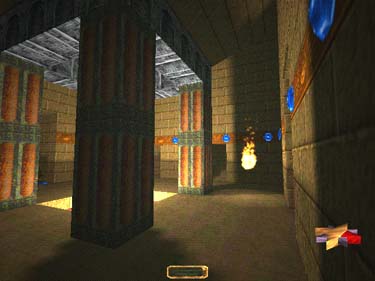
The Library
A Burrick patrols here and the lights are
motion sensitive. Go thru the South door and
grab the 2 chalices (30 goods) in the left
window sill. Go thru this room and the next
until you reach a staircase on the left. At the
bottom take a left/North at the split and then
take the first right. Pass between the columns
and go down the stairs and the drop off and
thru the next room. There are four Burricks
here. Go left past the break in the wall and left
again down a long hall into a room with a
scroll, a jeweled cup (15 goods), and amulet
(75 goods/100 gems) and a gem (50 gems).
Go back to the room w/ the coulmns and
climb/mantle the stairway. Go South to the
second room with grey columns and make a
right out of the library (fig. 8). The book on
the right has some info on the Emperor.
|
|
Fig. 8
|
The Residential District
Outside, go right to the corner and grab a
gem (50 gems). Go South past the Obleisk and
continue to the housing area. A Burrick patrols
here. Mantle up to the first building on the left
and grab a gold cup (25 gold) through the
window, and a fire arrow on the adjacent roof
(fig. 9). Move through the streets or across the
roofs to a gold two story building in the SE.
Upstairs in the second room is a plate (50
gold). Leave heading North, turn right/East at
the pink building.
|
|
Fig. 9
|
(If you need fire arrows, go to the next two
buildings on the left. If you run between them,
mantle to the left and then up to the taller
building on the right, you can jump across the
street to the roof and get 3 fire arrows from
the second story. Go out the South window.)
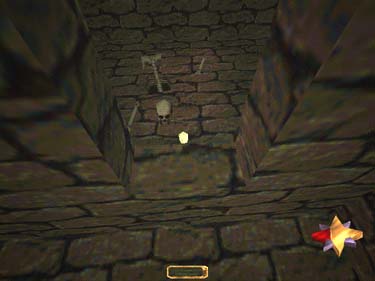
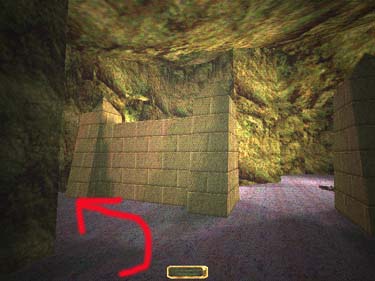
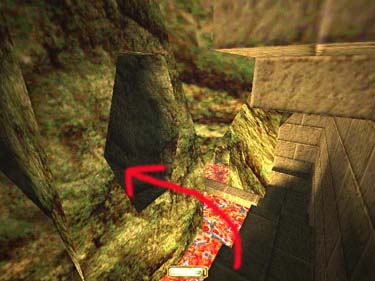
Continue West to the building to the left
of the lava pit. Climb up the hill and go down
the stairs inside to get 3 fire arrows (Quicksave
first and crouch to get the arrows- this is tricky
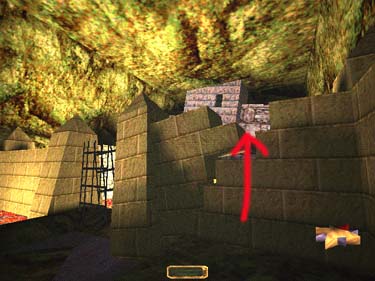
if you try it standing up). Use the broken wall
(fig. 10) outside to climb to the roof and head
South across the roofs and back to the caves
(fig. 11). You'll emerge above the Market
where 2 fire elementals are patrolling.
|
|
|
Fig. 10
|
Fig. 11
|
The Market
If you shoot some arrows into the West end
of the Residental District, the elementals will
go to inspect and most likely attack the
Burricks there (fig. 12). Meanwhile, find a safe
place to jump down and head South through
the square and around to the back of the
buildings. Go upstairs and around until you
reach a balcony on the right You can mantle
up to the next roof here and jump across to
the hole in the roof across the street. Inside is
an amulet (50 gold/ 50 gems). Climb the
front of this building and go back across to the
balcony. Go West into the caves and then
West at the split. There are two fire elementals
patrolling here, and one inside the gate to your
right. Mantle up to the broken part of the wall
on your right (fig. 13) and jump across the
lava.
|
|
|
Fig. 12
|
Fig. 13
|
The first house has a moss arrow outside
and a quill of 10 broadheads inside, the second
has an amulet (50 goods/ 100 gems), the
third has a fire arrow. Climb to the outlying
roof and jump across to the wall - be careful
not to jump over the wall into the lava. Head
South through the Market past the Grain
Obleisk (the 1st house on the right has a
papyrus and a journal, the 2nd, on the left, has
a journal - fig. 14). You will reach an Obelisk
and the Theatre Foyer.
|
|
Fig. 14
|
The Theatre
Two Fire Elementals patrol here. There are a
total of 15 gems on the wall (345 total gems).
Through the first door in the East side of the
Foyer, stay left until you come to a crawl space
on the left with two fire arrows. The second
door on the East side leads to an upstairs room
with a scroll and a passage to the stage. Go
thru the West door of the Foyer into the
Theatre. On stage are two masks (240 total
goods). Go up the seats to the right/South
then right to a break in the wall. Follow the
path down the stairs and past the next Obleisk,
climbing to the rooftops when you can. Head
North, then South until you reach a
(now-deceased) keeper party. You can hide
from the patrolling mage in a small spot on
the left wall (fig. 15). They should have a purse
(50 gold/25 gems), a medallion, (fig. 16) a
scroll concerning the tomb, and a journal. On
the ledge to your right is a silver nugget (50
gold).
|

|
|
Fig. 15
|
Fig. 16
|
The Emperor's
Tomb/ Water Talisman
Go down the steps, jump the gap (or use
some rope arrows in the Gold edtion) and go
down the ladder in the Northeast corner of the
floor (fig. 17). When you reach the grey posts,
crouch to avoid a trap overhead (fig. 18).

|
|
|
Fig. 17
|
Fig. 18
|
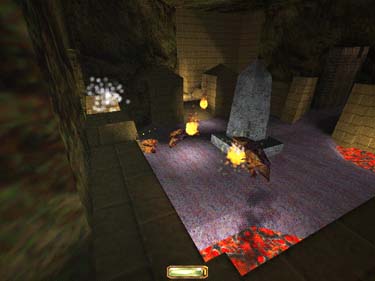
The second room on the left has a lever
you will need at the arena later (fig. 19). (If
you're playing the Gold edition, the level isn't
necessary - you can jump the gap to the arena,
then use the tunnel to get back. In the original
version, you cannot jump the gap to get back,
so be sure to use the lever to extend the
bridge). The niche to the right of the coffin
has an idol (100 goods). The room to the
right has a large jar (20 goods) and a small jar
(20 goods) and a lost city papryus (150
goods). The pool in the wall to the right of
the coffin holds the Water Talisman (at the
very back - fig.20). (If you are playing Thief
Gold, there is no pool here; you will obtain
the Water Talisman in the next mission, "Song
of the Caverns").

|
|
|
Fig. 19
|
Fig. 20
|
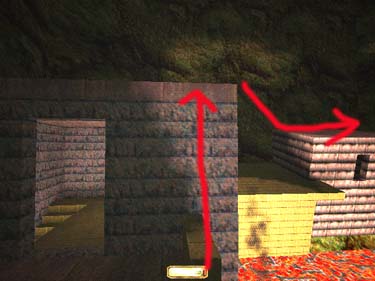
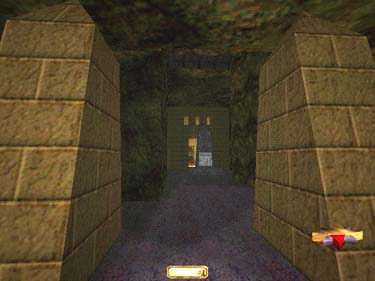
Head back the way you came (beware that
trap again). When you reach the top of the
stairs, 3 craymen will have magically appeared.
Head back across the rooftops and all the way
to back to the Theatre Foyer. Go North and
turn up the hill (fig. 21) to the left/West
before you reach the Obliesk.
|
|
Fig. 21
|
The
Arena
Follow the path South. You'll reach two
houses, the right of which has 2 fire arrows.
Continue South. The next house on the left has
2 water arrows on the roof. When you reach
the narrow bridge across the lava, there are 4
water arrows on the ledge to the left. Jump
across the next lava pit and follow the path up
to the Arena. In the hall headed East, take the
first left and grab the necklace (50 gold/50
gems) in the left window sill. Go East into the
next room and find a large jar (20 goods), and
small jar (20 goods), and a lost city shard (20
goods).
Across the hall to the East are 2 small jars
(40 total goods), and a large jar (20 goods).
Go thru the cubby in the Southeast corner and
down the ladder to a lost city papryus (150
goods), 3 lost city shards (60 goods total), a
ring (50 gold) and a scroll. Go out left and
pass the fire on the left heading South down
the hall. The next room on the right has a lost
city papryus (150 goods), 2 small jars (40
goods total), and a large jar (20goods). Go
out and to the left, pass the fire in the hall on
the right and head North. Take the narrow
passage right of the stairs down to the machine
that extends the bridge. Insert the lever and
move it to the 'up' position (fig. 22- look up
to make sure the bridge is extending). Go back
upstairs and right/West to the bridge (beware
the crayman or mage). Before crossing, rope
up to the upper arena level (fig. 23).

|
|
|
Fig. 22
|
Fig. 23
|
There's a mask (120 goods) around to the
left between the fires. Go around to the main
other room and go left. The room on the
right at the end of the hall has a large jar (20
goods), a small jar (20 goods) and an tiarra
(75 goods/ 50 gems). The room to the left
has a lost city papryus (150 goods) a large jar
(20 goods) and a small jar (20 goods). Cross
the bridge and go thru the Arena. Follow the
wall then the hall to a window w/ a drop down
to a platform. (You can jump to the arena
here if you're playing the Gold version, as
there is a way to get back, but if you're playing
the original you must use the bridge, or you'll
be stuck on the other side).
The
Fire Talisman
Go down the first set of stairs to the keeper
party and grab the other medallion (fig.
24), 5 water arrows, 3 rope arrows, and a
journal. Continue on until you reach a bizare
statue ("Creepy"). Quicksave and jump across
diagonally to the right to the doorway by the
lava pit for a 2 silver nuggets (100 gold total).
Jump back across and go into the three story
building on your left. Rope up, jump to the
adjacent roof, then back across to the third
floor for a gem (50 gems - fig. 25) and two
fire arrows.
|
|
|
Fig. 24
|
Fig. 25
|
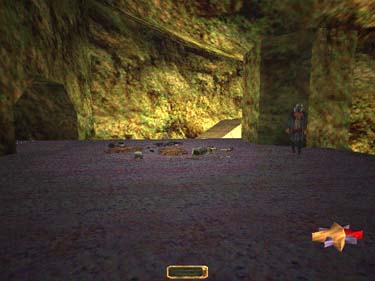
Take the roof across the lava a pit and up
the path past the statue (fig. 26). Mantle and
jump through the buildings until you come to
the last house. The entry to the Talisman
Tower is across the street. Several Fire
Elementals patrol here. Once across, climb the
stairs until they end. In this room grab a lost
city papryus (150 goods), a gold cup (25 gold)
and read the scroll. Quicksave and go out the
window, and around the West side of the
building.

|
|
Fig. 26
|
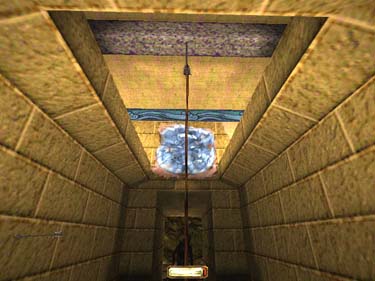
Shoot a rope arrow into the middle beam
above (fig. 27). Quicksave and jump to the
rope. Try to jump to the window ledge, then
to the inside if possible (fig. 28). Quicksave
after every major movement here. Grab the
Talisman (there's nothing in the black boxes).
|
|
|
Fig. 27
|
Fig. 28
|
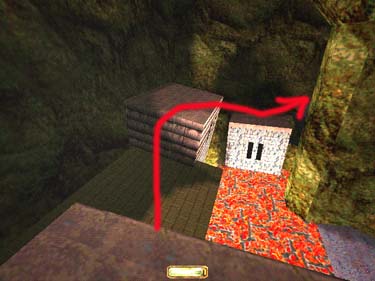
Getting Out
The Fire Elementals pick up heavily now.
Go back across the street, but instead of going
all the way back to the statue, jump out the
first ledge on the right you come to. Head
back thru the caves, past the Keeper party, up
the left set of stairs and around to the window.
Mantle up and go back to the Arena (if you're
playing the Gold version, you can go use the
tunnel to jump across and go back to the area
building - fig. 29).
|
|
Fig. 29
|
Go right up the stairs inside, then south to
the fire. Go right/West from here and take the
last right which leads to the Arena seats. Go up
the ramp and back to the lava pits/caves. Pass
the sunken buildings on the right where some
Fire Elementals are patrolling. Pass some more
buildings on the left and continue North up
the path until you reach the Market. Go North
thru the square to the metal gate and thru the
break in the wall on the right. This leads back
to the balcony in the residential area. Jump
over the balcony and take a left, then a right
and head NE to the 2 story yellow brick
building on your left. Turn left here, then
right, and head for the Obliesk (beware the Fire
Elemental here). Go back thru the library
turning left/West then left/South all the way
up the stairs. Go right/East until you reach the
room w/ the earth floor, and mantle up thru
the crack in the roof. From here you can easily
follow the path back to the waterfall.
*Thanks to Lytha's Loot List & Ghosts Expert
Walkthroughs for the goods/gold/gem
disctinctions.
Travel to: Keepers' Chapel / Strategy Index / Thief-TheCircle.com (home) / Go Back