"I Wouldn't Last Long In A Fight Against The Mages"
TABLE OF CONTENTS
1) The Water Tower
2) The Earth Tower
3) The Air Tower
4) The Fire Tower
5) The Earth Talisman
6) St. Burridngdon's Medallion/ Captain Regalio
7) The Keep
8) The Library
9) The Basement/Sewers/Getting Out
Objectives:
- Find the Library
- Find and Steal the
Talsiman of Earth
- Steal the Jeweled
Reading Glasses
- Steal the Medallion
of St. Burringdon from Capt.
Regalio
- Escape via the
Sewer
Loot Requirements: 1800
Loot Available: 2812
Loot Accounted For: 2812
For Complete Loot Locations, go to the Loot Map.
For Hints and FAQ's, go to the Secrets Page.
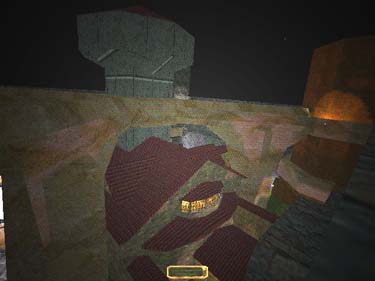
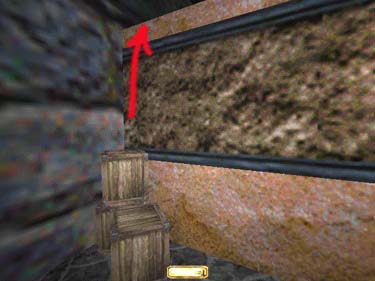
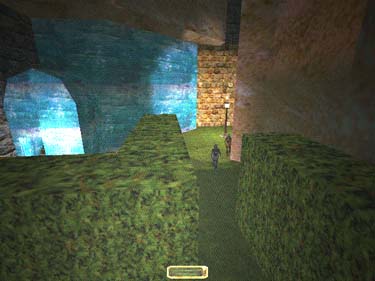
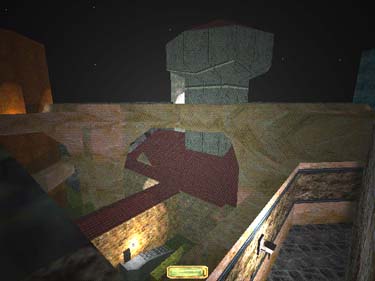
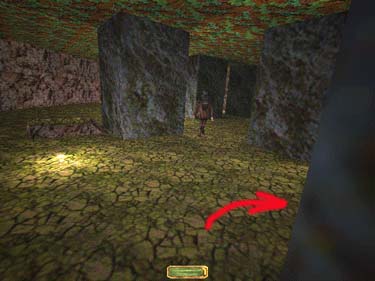
Note:You may choose to travel the
courtyards via the shrubs by shooting a rope
arrow and climbing up (fig. 1). It is easier to
avoid patrols this way, and a great way to score
‘in air' knockouts. Once you've reached the
Earth Tower you can climb to the outer walls
and trusses joining the towers and get a great
view of the complex (fig. 2). (credit to
Lytha.com for this info). There are generally
two mages and at least two guards patrolling
each of the four tower courtyards, so take the
necessary precautions. Pickpocket at least one
gold and one silver key.
|
|
|
Fig.
1
|
Fig. 2
|
The Water Tower
Turn left/East in the main courtyard and go
thru the wooden door, then South to the stone
staircase. Inside, grab the purse (100 gold)
from the table on the right, and go out the
other door, then South to the Water tower
entrance. There are two guards talking here,
one will eventually return to guard the
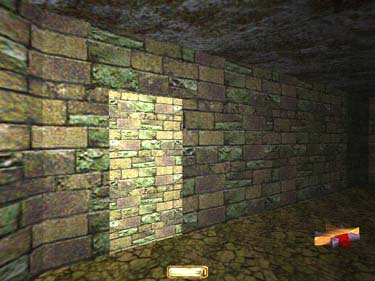
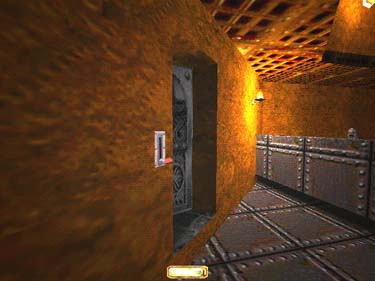
doorway. You'll notice the lock is broken (fig.
3), so go into the tower and upstairs, then
swim and mantle to the island above. Grab the
Earth key from the base on the East spring (fig.
4). The key is a little hard to see, but it's shaped like a spoon and has a silver/yellowish look. Exit the tower and go West (beware the
guard) thru the Western door. The shelf to the
right has 8 silver coin stacks (96 gold).
|
|
|
Fig.
3
|
Fig. 4
|
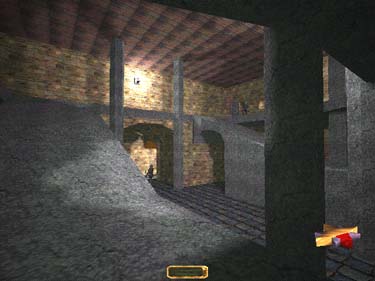
The Earth Tower
Continue west thru the door. Outside there
is a guard to the right w/ his back turned.
Sometimes there can be up to four guards in
this particular courtyard. Go to the Southwest
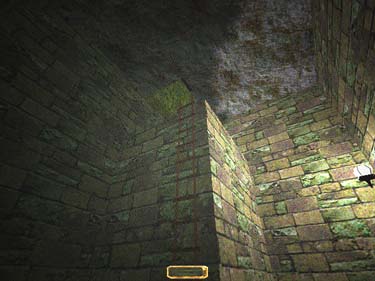
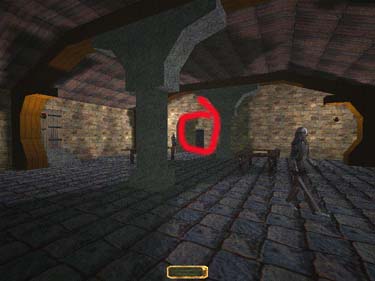
corner of the yard and up the steps. You'll notice an odd looking mechanism to the right of the door. Use the earth key on it, and the door should pop open. Quickly step into
the shadow of the doorway. A mage patrols
here in a counterclockwise pattern. The table
on the right wall has a moss arrow and a
healing potion. At the top of the stairs, (two
mages patrol here) turn and mantle onto the
stairwell, then up to the walkway. Head to the
balcony in the North and rope up (fig 5). At
the top of the stairs, go down the hall and turn
left//South (there is a dead end w/ a moss
arrow to the right). Go counterclockwise to
the ramp, Then take an immediate right and go
up the stairs (fig. 6).

|

|
|
Fig.
5
|
Fig. 6
|
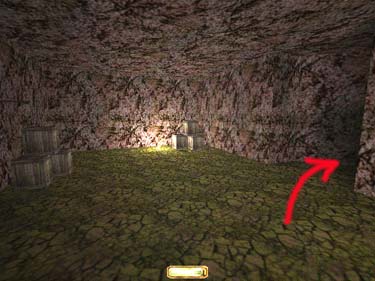
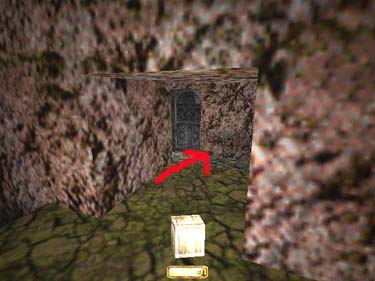
(You can access the roof here by passing the
stairs and entering the room with all the boxes.
You'll see an exit on the other side (fig. 7) -
turn right and go up the ramp. Carrytwo boxes
thru the crawlspace on the left (fig. 8). Open
the door and stack the boxes in the corner (fig.
9), then jump up and mantle to the wall.
Don't fall! You should be able to get almost
anywhere in the complex from here, but
unfortunately the doors to the other towers
only open from the inside.)
Go around to the inner hallway and pass two
tables on your left w/ moss arrows on them.
Stick to the west side, hiding in the small
shadows near the stones (fig. 10) to avoid the
mages. Go up the ramp and South to the stairs.
Grab the rope arrow on the round table and
rope up at the dead end. Jump the gap
diagonally to the left (there's a moss and rope
arrow in the gap and a moss arrow on the far
ledge to the right), and continue jumping and
climbing until you reach the hole in the floor.
The Air key is in the crate (fig. 11), and there is
a rope and moss arrow on the ground. Go
back the way you came, down the stairs, then
North to the next set of stairs. Follow to the
outer hall, then go right at the foot of the next
staircase. Make an immediate left here and go
around and down to the balcony. Jump down
and make for the doorway.
|
|
|
Fig.
10
|
Fig. 11
|
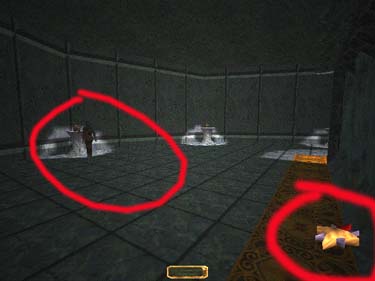
The Air Tower
Go back North toward the (red) Fire Tower
courtyard, stopping to grab the purse (100
gold) on the table in the landing. Go East thru
the main courtyard and East to the Air Tower.
Inside, quickly douse the two torches (beware
the mage) and grab the gas arrow on the table
to the left. Upstairs, the floor surface is very
loud, so use moss arrows to ascend the
staircase to the right, then let the 2 mages
patrol to the opposite side of the tower and
walk (don't run) to the lift, staying opposite
the mages at all times. Take the lift up to the
round room (beware the patrolling mage).
There is a speed potion on the right. Go
around to the inner room. Follow the lifts to
the top (in the room w/ two platforms, take
the higher one). At the top, turn both
telescopes down quickly (fig. 12) and jump to
the pedestal in the middle. Use the square lock
pick first, then the triangle, working quickly.
You will have to frob the tele-scopes at least
twice to open the chest. Grab the Fire Tower
key (fig. 13) and head back out.
|

|
|
Fig.
12
|
Fig. 13
|
The Fire Tower
Go West to the Fire Tower, and up the
stairs. There is no way to be quiet in here, so
take opportunity to hide in the shadows when
necessary. Try jumping straight across the
platforms to the far side, instead of running
around. Beware the highlighted floor tiles. Go
up the stairs to your left and thru the adjacent
rooms. You'll find a healing potion on your
left in a box before the stairs to the next level
(fig. 14). Work your way up the steps and
across the ramps to the West side door (there's
a healing potion to the right of the top door).
Jump the walkways and pick the chest,
grabbing the treasure key. On the way out,
when you reach the area w/ the mages
patrolling in the lava, look for a door on the
Southeast slant of the wall by the top of the
first floor stairs (where the mages are walking
in the lava - fig. 15). This opens to the outer
tower and hall leading to the keep (beware the
archer and swordsman here). Go down the
halls to a circular hall and around to the keep
door. Go up the stairs. There is a mage on the
staircase, and the floor is very noisy here- you
may want to gas him.
|
|
|
Fig.
14
|
Fig. 15
|
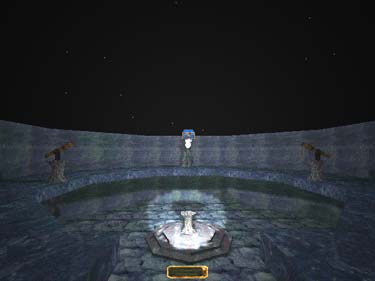
The Earth Talisman
At the top of the stairs, open the door and
hide in the shadows until the conversation is
over between the two mages (you can get
them both with a single gas arrow is you aim
carefully at the floor between them). The
correct talisman is the one on the exact West
pedestal to the right of the door- You'll notice
the two mages stopping momentarily by it on
their patrol routes (fig. 16). In this room you
should also find a small jar (20 goods), a large
jar (20 goods), 2 lost city jars (40 goods ttl),
and two idols (150 goods ttl). Go downstairs
to the blue tile and down the next set of stairs
to the wooden door on the left.
|
|
Fig. 16
|
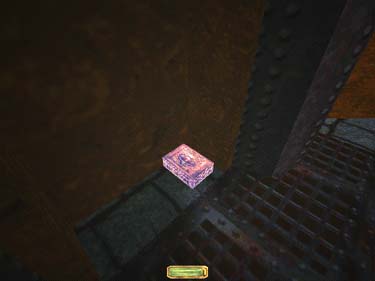
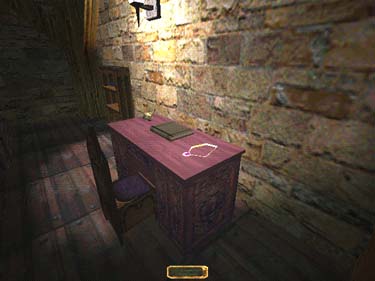
St. Burringdon's
Medallion/ Captain
Regalio
In this hallway are three patrolling guards
and several sleeping guards and peasants. Your
main concern is the pink metal door to your
right. Douse torches and pick the lock on the
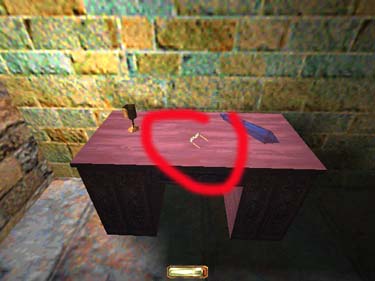
pink door. Capt. Regalio is asleep inside, so
cover the floor w/ a few moss arrows. There
should be a water arrow on the bookshelf, a
gold nugget (100 gold), the Medallion (150
goods) on the desk (fig.17), and a gem (200
gems) in the chest. Go back to the stairs and
down. The loot on this floor is as follows: one
of the patrols has a purse (150 gold), there is a
gold nugget (100 gold) on the first wooden
beam (fig. 18), the first room on the right has
a sleeping guard, a stack of gold coins (50
gold), and 6 broadheads. The first room on the
left/West has a woman with a purse (75 gold),
a gold cup (25 gold) on the bookcase, and a
stack of gold coins (25 gold) in the crate. The
next room on the right/East has a sleeping
servant and a purse (100 gold) on the shelf.
The last room on the left/West has a purse
(100 gold). Go back to the stairs and down.
|
|
|
Fig.
17
|
Fig. 18
|
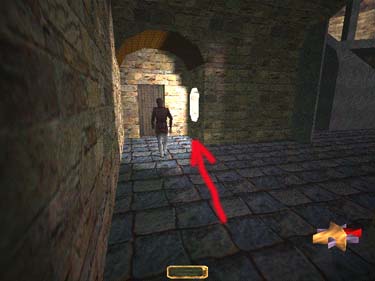
The Keep
Continue down the main stairs to the next
door on the left and go thru a small room to
an area with shelving on the left. The passage
to the North has a purse (100 gold) on the
table. There are usually 3 patrols in this area
(one with a healing potion), including several
mages, work your way thru the big room to
the East, to the door in Northeast corner (fig.
19). The guard station in this room has a purse
(100 gold) on the far table, but you have to
make it past the archers, one inside and one
out. Douse the torch, then try to send the
guard outside by shooting a few broadheads
through the window. Try to do this when no
one else is near enough to come investigate.
Now work South thru the room till you reach
the Southeast corner.There is a healing potion
on the left table before you reach the guard.
|
|
Fig. 19
|
The Library
Douse the torch on the left. There are
several mages patrolling each floor here, one
with a healing potion. There's a water arrow on
the bookcase below you, and a papyrus on the
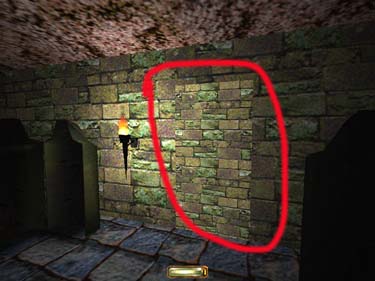
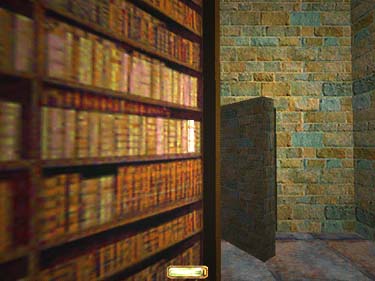
back table with info about the talisman. Go
to the West-most bookcase and look for the
highlighted book to open the wall (fig. 20). In
the secret room find a water arrow, a gold cup
(25 gold), and the reading glasses (fig. 21 -
200 goods).
|
|
|
Fig.
20
|
Fig. 21
|
Shoot a moss arrow to the top of the
bookshelves, and jump to the next floor via
the open area in the center. Go down the
North stairs and take a right before the stone
staircase in the center. Go to the far West
corner of this floor. The table on the right has
a gold vase (100 gold), and there's a water
arrow on the opposite table. Go down the
stone steps to the two doors on the South wall.
The one on the right contains a crate w/ a rope
arrow (you can follow the mages patrol
pattern easily to keep from being seen).
Go back to the 2nd floor of the library (w/
the statues) and out the Northeastern door.
The door on the left in the hall has 3 gold
bottles (150 goods ttl), but beware the servant
and the guard in this area. Turn the corner and
go West to the wooden door, back to the
staircase thru the left/East door and all the way
down to the Basement (fig. 22).
|
|
Fig. 22
|
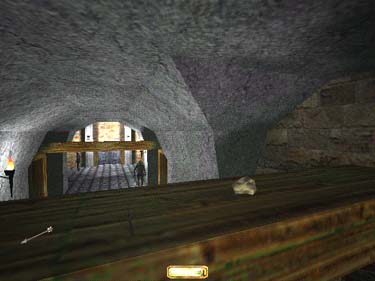
The Basement/Sewers/Getting Out
There are two patrols down here, and you
will need to pick pocket a blue key from one
of them to access the sewer. Go left to the
center hallway. The door on the left (accessed
w/ the silver key) contains a gold nugget (100
gold), a purse (100 gold) on the top shelf, and
some info regarding the sewer passage. The
room on the right contains a water arrow,10
broadheads, a purse (100 gold), a silver coin
stack (12 gold), and a silver nugget (50 gold)
on the top shelf. Turn right/East in the
hallway, then right/South in the circular hall.
Note the odd texture on the left past the torch
(fig. 23). Inside, find a gem (100 gems), some
water arrows, 2 silver coin stacks (24 gold),
and a silver nugget (50 gold) on the top shelf.
The ladder across from the boxes leads up to a
secret passage to the Water Tower courtyard
(fig. 24).