"Little Is Known About
Constantine Except That He's
An Eccentric New Face In
The City."
TABLE OF CONTENTS
1) Breaking
In/First Floor
2) Second
Floor
3) Third
Floor/The Sword
4) Gardens/Evidence
5) Getting
Out
Objectives:
- Steal
Consatntine's Sword
- Find
Some Incriminating
Info About
Constantine
- Get
Out
- Don't Kill Anyone
Loot Requirements: 1500
Loot Available: 2636
(Gold Edition -
2656)
Loot Accounted For:2636 (Gold Edition
- 2656)
For Complete Loot Locations, go to the Loot Map.
For Hints and FAQ's, go to the Secrets Page.
Breaking In
The easiest way in is the
North balcony. Shoot a rope
arrow up and jump onto the
balcony. Grab the coins to
your left (36 gold) and go
down the ladder. Grab the
flashbomb in the last stall
and go to the door. (If you
are unable to pick the lock
you will need to blackjack
the guard patrolling out
front for his purse (100
gold) and shoot some moss
arrows onto the steps. Either
blackjack or sneak by the
guard here to get in. Go left
down the hallway to the first
room on your left, pick up
the flashbomb in the last
stall, then climb the ladder
and grab the coins on the
floor (36 gold) Climb back
down to the door).
The following is a
difficult, but lucrative path.
Open the doorway and watch
for the patrolling guard (if
you've not already
blackjacked him). Shoot a
moss arrow onto the tile,
douse the torch, then nab
him when he turns to walk
the other direction. Make
sure to hide all the bodies on
this mission. Grab his key
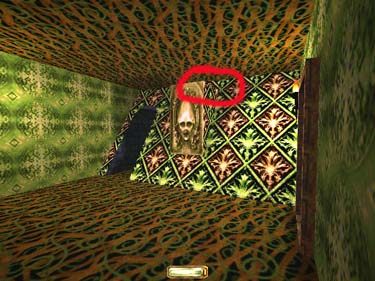
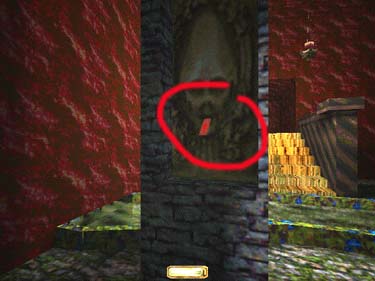
and cross the hall to the
corner room. The column at
the end has a safe at the
bottom (fig. 1) which
contains 1 healing potion and
a gold plate (50 gold). Leave
the room going North down
the hall to the next room on
your right. Two guards patrol
in here, one circling thru the
hallway every pass, so be
careful. Slip into the dining
room, douse the torches and
hide in a corner, either by the
doors or by the wall behind
the table. Shoot a moss
arrow to cover the floor
between you and the carpet
where you will blackjack each
guard. One has a purse (50
gold) , the other a key. Grab
the candlestick on the table
(50 gold).
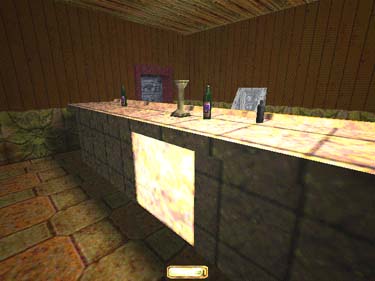
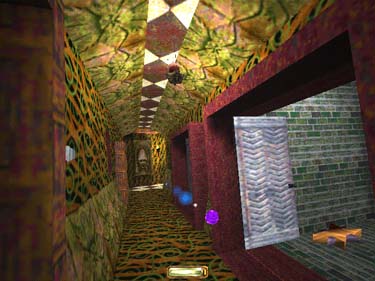
Go thru the North door
to the kitchen and grab the
gobblet (50 goods) on the
counter, then go back to the
dining room and cross East
thru the large room with the
stairs and green ceiling (you
can go upstairs from here,
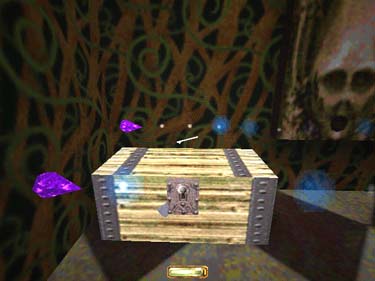
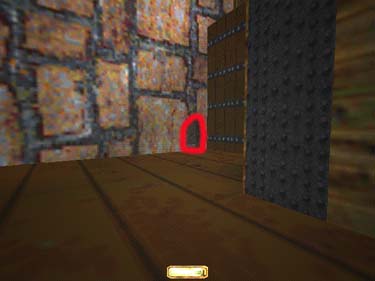
but the guards are thick) into
the bar. There's two gold
bottles (100 goods ttl) on
the counter behind it and 3
gold cups (75 gold ttl) in
the sliding door underneath
the bar itself (fig. 2).
|
|
|
Fig.
1
|
Fig. 2
|
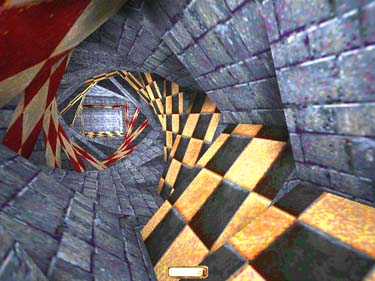
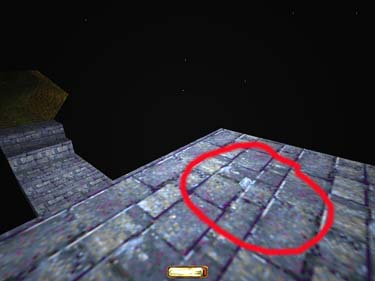
Second Floor
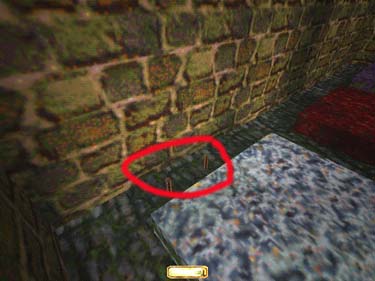
This floor is the best place
to collect loot because the
guards are scarce. However
there are many traps so
proceed with caution (fig. 3
- the trigger, fig. 4. - the
energy bolts).
|
|
|
Fig. 3
|
Fig. 4
|
Jump the gap into the
room across the hall. There is
a gold nugget (100) under
the mouth of the facetrap.
Listen for the patrol, then go
thru the north door and
douse the torches. (The door
in the floor leads to the
downstairs dining room).
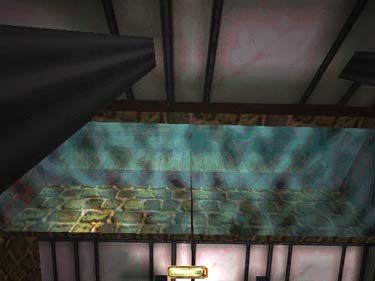
There's a gobblet (50 goods)
on the table. The ceiling in
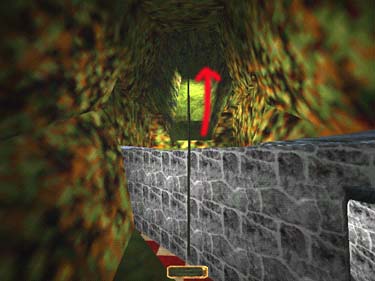
the Southeast corner opens
up (fig. 5)- shoot a rope
arrow into it's edge and
climb up. Beware the floor
traps (fig. 6). This room has
a mine, a gemstone (100
gems) in one and a ring (100
gold) in the other.
|
|
|
Fig. 5
|
Fig. 6
|
Jump back down (always
try to retrieve your rope
arrows if possible on this
mission), and go out the
door to the North. Take the
first left thru the metal door.
There is a water arrow to the
right of the bed and one in
the tub in the adjacent room.
Back to the hall, go thru the
bug room on your right-
open the chest on the ceiling
and grab the gemstone that
falls (100 gems). Go out the
far door and jump the gap in
the hall (beware of the floor
trap on the right- if you fall,
just go back to the eastern
staircase). Take the corner
and go East to the bunk
room on the right for a
healing potion in the left
chest (deer leg in right
chest). The guard you hear is
most likely downstairs, but
be cautious anyway.
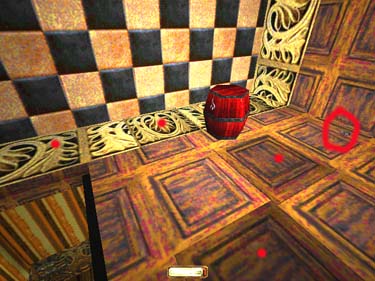
Go around the corner.
Beware of the energy traps
shooting down the middle of
the halls. The first room on
the right is booby trapped so
stand to the side of the chest
and grab the gold nugget
(100 gold). Douse the fire
and climb in and mantle left
for another gold nugget
(100 gold - fig. 7). Leave
the room going North to
the next door on the right
which contains a newspaper
and two jeweled cups (30
gold ttl -look behind the
plant). The next two doors
on the left are Constantie's
rooms. There's nothing in
the �bathroom', but the
picture sill to the right of the
bed is booby trapped and has
two silver nuggets (100 gold
ttl) in it (Don't stand directly
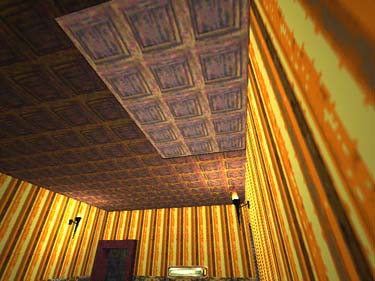
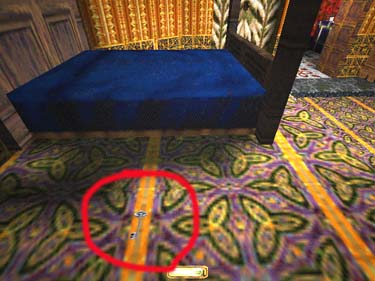
in front of it). Very
important: Go to the left side
of the bed and crouch down
(fig. 8). Grab the blue key-
you will need it later to
obtain your incriminating
evidence on Constantine. If
you are playing the Gold
version, the key is on the
table in the adjacent room.

|
|
|
Fig. 7
|
Fig. 8
|
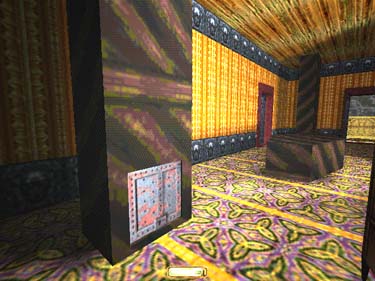
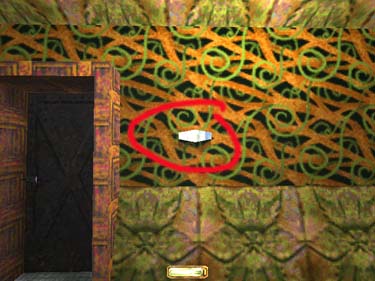
The papryus in the
adjacent room is not it. The
next room on the right is
booby trapped so open the
door and stand to the side.
There is a silver nugget (50
gold) on top of the facetrap
(fig. 9). Back in the hall, go
left/North to the end of the
hallway and grab the
gemstone (100 gems) in the
blue chest. Beware of the
energy traps here- you can
pick the lock if you stand in
just the right place (fig. 10).
Go back to the 1st set of
double doors on the East side
of the hall and climb the
stairs to the third floor.
|
|
|
Fig. 9
|
Fig. 10
|
Third Floor/
The Sword
There are several ways
to the Sword, some by way
of the second floor, but the
following seems to have less
guards patrolling. At the top
of the stairs take the next two
lefts, then go into the
earthen tunnel to the East. In
the �space room' to your
right there are a gold nugget
(100 gold) and a gemstone
(100 gems - fig. 11) on the
last step of each landing.
Jump across and head back
out to the tile floor, taking
an immediate right/North
into the other earthen
tunnel. Follow it until you
can jump across to the vine
(fig. 12), then to the other
tunnel (the guards here are
very sharp so be careful- this
is a good place to quicksave).
|
|
|
Fig. 11
|
Fig. 12
|
There is a conversation at
the top of this tunnel so wait
until it's over, then move
slowly, extinguishing torches
and shooting moss arrows
onto the red and white tile.
This takes a lot of patience.
Once the coast is clear, find
the darkest opening and
shoot a rope arrow into the
roof. Jump to the rope and
grab the sword, getting only
as close as you have to so the
guards below don't notice.
Bring yourself level with the
doorway you jumped from
(quicksave here) and jump
back. Head back thru the East
tunnel, across the vine to the
other tunnel and follow the
tile floor. Go North until
you reach the stone window
frames on your right (you
will hear laughter).
Gardens /
Evidence
(If you're playing the
Gold version, you'll notice
that the 'mystery key' that
used to be in the garden has
disappeared. And we had such
high hopes for it...)
Quicksave and jump to the
beam then to the flower bed
and grab the moss arrow.
There is a patrol in this area
with a purse (100). Go thru
the earth tunnel to the North
and then take the right/South
passage. There's a gold
nugget (100) on the floor
here before you reach the
tree. Go thru the next room
to the Northwest- there's a
dead end here w/ a moss
arrow under a plant. Leave
headed West back to the
gardens. Pass the tree trunk
and exit this room to the
West. Cross the bridge and
go out the West door. You
will come to a four way
intersection:
The right passage:
Stay
right and go down the hall to
the river and staircase. Jump
across. There's four gold cups
(100 gold ttl) on the altar.
Don't worry about the pink
door- you'll come to it in a
later mission. (If you're
playing the Gold Version, the
left of the two pillars outside
of this room houses a switch
(fig. 13) that opens the
underwater gate to your left.
Follow the stream, beware
the guards and have fun.
When you reach the house,
there are some supplies in
interesting places on the
shelving to your left, and two
coins (20 gold) in the sofa
cushions. There's a
mousehole near the crate in
the bedroom (fig. 14) that
you can use to climb back to
the 'sideways' room in the
garden - the one with the
candlestick on the table).
|
|
|
Fig. 13
|
Fig. 14
|
The middle passage: Go
West past the square tile pool
and straight thru one of the
West passages.Take a
right/North down the hall to
open the door above and
shoot a rope arrow into the
border of the overhead
stained glass window and grab
the candlestick (50 gold).
The next doorway up leads
back to the room where the
Sword was. Go back down
the hall. Go thru the left
doorway to an open area
with a flashbomb on the left
and a moss arrow on top of
the structure in the West
corner.
The left passage: Go past
the pool, then past the huge
tree and pool on the left, and
the tile hallway on your
right. Continue past the next
circular pool, then right
down the hall to the metal
door on the right. There's a
guard in this area with a purse
(100 gold). Keep going past
the next circular pool and
down the next hall. Go South
thru the garden room on the
right into the room with
water on the ceiling. Grab
the gold coins in the
Southeast corner (50 gold ttl
- fig. 15), then shoot a rope
arrow up (fig. 16) and mantle
into the above room for a
goblet (50 goods).
|
|
|
Fig. 15
|
Fig. 16
|
Go back to the garden
room, grab the gobblet in
the corner (50 goods - fig.
17), and go out to the
right/East, then take a left in
the hall to the metal door on
the left. Unlock it for two
vases (200). Go out and
right/South to the nursery
on the left. There's a door
in the Northeast corner (fig.
18). Open it with the key
from Constantine's
bedroom. In the middle of
the next room under the
table is the evidence your
looking for, plus a jeweled
cup (15 goods) and a gold
wine bottle (50 goods).

|

|
|
Fig. 17
|
Fig. 18
|
(If you decide to swim
around in the garden
waterways you will find a
total of 6 water arrows. Don't
miss the tunnel in the area
where the huge tree is).
Getting Out
From the evidence room,
make your way back to the
big tree/pool. Take the 2nd
left into the tile hallway.
Watch for the patrol- the
wooden landing on the left
makes a good place for an
ambush. Go South down the
hall, past the stairs. The next
room on the left has a vase
(100), the next on the right
has 2 jeweled cups (30 goods
ttl). Go around the corner.
The next room on the left
(flashbomb/blackjack the
guard) has a healing potion
in the chest (be aware of the
window and guard outside).
Go out and continue West.
There's a fire arrow on the
main altar to your right, and
the guard outside has a purse
(100 gold).
Travel to: Keepers' Chapel / Strategy Index / Thief-TheCircle.com (home) / Go Back