 |
|||||||||||||||||||||||||||||||||||||||||||||||||||||
Lord
Bafford's Manor
Cragscleft
Prison
The
Bonehoard
Assassins
The Sword
Haunted
Cathedral
The Lost
City
Undercover
Return To
The Cathedral
Escape
Strange
Bedfellows
Maw Of
Chaos |
Note: This walkthrough is for Thief: The Dark Project, and does not cover the changes and additions in Thief Gold. If you need a Thied Gold walkthrough, see here. THIEF is a rather rare
first person non-shooter. That is, the character relies on sneaking, stalking,
and stealing to reach the game goals. As a matter of fact, if you play the entire
game in "expert" mode, you are not allowed to kill anyone - anyone human, that
is. It was done by Looking Glass Studios, the people who gave us Ultima Underworld
and System Shock, and published by Eidos Interactive. The game consists of twelve missions in which our thief gets some rather explicit instructions about goals to accomplish. It supports 3D hardware acceleration and the gameplay and graphics are superb. I look forward to Thief II.
E quipment Expended Water arrows: 6 1. The large building in front of you is the manor. Consult your map and notice there's an arrow cache in one of the streets. Keep the manor on your left and walk down the street through a stone arch. Follow the street past two streetlights. The cache is just past the second one in a niche in the left wall of a narrow arch.2. Continue to the next streetlight where there's a uniquely oval shaped sewer cover. Open it and climb down the ladder. Go north and take the first right east. Go past one intersection to a second. Just past this intersection, to the east, the passage is barred. Just before the intersection, on the right, is a door. Open it and get gems and gold from the floor and pull the lever on the wall. It unbars the passage to the east which gives you access to a sewer entrance near the wellhouse, behind the drunken guard watching it. Into The Manor's Basement 1. Go east from your sewer exit, around the wellhouse, and approach the guard from the rear on the opposite side of the wellhouse. The drunken guard will always face away from you, but there's another guard who patrols up and down the street in front of him. Wait till the second guard has started away from the drunken one. Creep up behind the drunken one and pickpocket the key, open the wellhouse, enter and close the door before the sober guard returns.2. Jump into the sewer and swim west into a round room with water flowing into it. At the bottom of this room, on the south wall, is a tunnel. Swim into it and surface in a room with a box on a ledge and four nasty spiders guarding it. Climb out on the ledge farthest away from the spiders. Shoot the spiders with broadheads. Three will probably stand still but the fourth will come after you. Go to the box and get some more gold and gems. Return to the round room and swim west until you can exit on some land. Enter the room full of barrels through the hole in the wall. You're in the basement. Basement To The First Floor Open the door in the south wall of the barrel room and enter. Hide behind the stack of boxes in the center of the room. There's a slit window in the far wall and you can hear two guards talking. When you see a guard walk past the window heading to your right, go through the opening in the far left of the room and go right. Go to the end of the corridor, take another right and go until you enter a group of storage rooms. Be silent because as soon as you enter the first storage room, there's a guard off to your left in a corridor guarding the corridor to the stairway and the manor's first floor. Blackjack this guard and take his body into a dark corner of the storage room, return and get flashbombs from the box near where he was standing. Follow the corridor and climb the stairs to the main floor. Through First Floor To Second Floor 1. Get gold and gems from the box leaning against the wall at the top of the landing. Exit the stairs and go right past the first hall on the right and past the room with the sleeping servant. Just past this room take the first right and go to the end of the hall. Turn left and go until you come to a door.2. Open the door and you see a carpeted hallway. There's a guard walking this corridor. When the guard turns at the door and goes back up the hall, follow him to the end of the corridor and go left. Watch for other guards at this turn and quickly go into the the side corridor on the right to avoid being seen. When the time is right exit this sheltered spot and continue to the end of the corridor and enter the hallway in the far left corner. 3. Go into the first room on the right and get some goodies from a bench. The other door in this room leads back into the corridor at the end of step 2 - in plain sight of the guards. Don't open it. 4. Exit the room through the door you entered and go right (make sure you shut the door). You must be very sneaky and quiet since this trip leads through the manor's main foyer. Straight ahead of you along the right wall is a table. Forward and above, you can see a guard standing in an alcove looking down. Directly above and behind you is another. Just past the table and on the right is a corridor where a guard is patrolling. This guard comes out into the foyer to investigate any noises you make. To the left of the table is the main foyer with a circular entrance. Beyond that entrance the way is grated and there are three guards outside. To avoid the lighted spot where the hallway is between the tables, we have to go left through the foyer, through the circular entrance and out the other side. 5. Crouch and creep towards the table. As soon as you get a clear shot, waterarrow one of the torches by the circular entry. This provides some additional darkness. Turn left at the table and creep through the dark patches toward the circular entrance. When you can, waterarrow the other torch in there. Creep through the circular area and out the other side. Continue until you're back against the wall by the second table. Continue north and enter the first room on the right. 6. Get a stack of coins from the table. Ignore the other door in the room. Go back through the entrance and go right. Follow the hallway around until it enters a larger corridor. Wait for the guard to pass then go straight across the corridor and into another door and collect some gold from a fireplace mantle on the left. Quickly crouch in the dark spot in the middle of the room and wait for the patrolling guard to go through. 7. Exit through the door at the far end. You're now back in the corridor mentioned at the beginning of step 2. Dodge the guards and go right across the corridor and up the staircase to the landing. 8. Get some gold from the top of the bookcase and bread and cheese from the desk. Take the next set of stairs up to a tower room above the mansion's second level. Get more gold from the table and prepare to go down the second set of stairs to the manor's second floor. The Second Floor 1. A guard patrols the hallway at the bottom. Wait until he is passing to your left then go down the stairs, turn right (east) and enter the door at the end of the corridor. Close the door after you. Get a gold ring from the top of the bookcase to the right of the door. Exit the door at the other end of the room into a dark hallway and face left toward the intersection.2. Two guards patrol this corridor in a counter-clockwise direction. One has a key we need. Go down the corridor, past a door on the right, and past a recessed alcove with two doors, also on the right, to where the hallway narrows. Stand with your back to the right wall just past the opening and around the corner from the narrow doorway. You should be facing west with the opening on your left and your visibility gem should be dark as it can get. If not, you're the one who's going to get surprised. Have the blackjack ready and when the guard comes through smack him. If you get the wrong guard, just pick up his body and go left (north) to the end of the corridor and dump him. Notice the door here. Just wait until the second guard comes around and turns the corner and passes to your right. Then go back to your ambush spot and get him. Actually, it's best if you whack both guards anyway. You'll be working in this corridor and it would be nice if nobody was there. 3. After whacking and disposing of the guards, go back toward your ambush spot. Enter the door on the left just before you get there. It's Lord Bafford's bedroom. With the crown and stacks of coins on the table, you should have enough valuables to satisfy that portion of the mission objectives. 4. OK, let's go get scepter. Exit the bedroom, turn left and go to the recessed foyer with the two locked doors. Either locked door leads to a another foyer where a guard stands in front of the throne room - where the scepter is. He also has a key we can get. The foyer's well lighted so we'll have to darken it up a bit. 5. Unlock the north (left) door. You may have a few keys by now, so make sure you use the correct one. Crouch and creep into the dark spot beyond the door and turn right. If this guard discovers you he runs to a gong by the wall and bongs for help. Use a waterarrow on the torch just outside of and left of where you're hiding. 6. Creep into the now darkened area and turn to face the guard. Waterarrow the torch on the far wall behind and to the right of the guard. Creep forward against the wall to your left toward the carpet and the gong. When you've gone far enough, face hard right and water arrow the torch high up on that wall. The other locked door in the foyer exits there. 7. Creep toward the rug in front of the guard until you can get a shot at the last torch in this area. It's high up to the left of the guard. Once it's out, creep up to the guard, pickpocket the key, stand up and blackjack him. Sounds easy doesn't it? Time your critical moves when he turns his back to you. Dump his body in the throne room and get the scepter. Another goal accomplished. 8. Go back past Bafford's bedroom to where you dumped the two unconscious guards. Follow the corridor around to the left and enter the stairwell on the right. Follow a winding passage to a stone stair way. Go all the way to the bottom into a room with a desk, chair and a chest. Read the book on the table, get the key hanging from the wall, open the chest and take the gold. 9. Return once more to where you dumped the two unconscious guards and enter the door there. It's a library. View painting Read the ledger on the table and get a description of the scepter and a treasure box with a false bottom that the Lord may now have somewhere. Get some gold from another table on the right and read a personal message to the Lord from a papyrus roll on a table at the room's far right. 10. If you want to climb the battlements of Lord Bafford's mansion and see the view, open the second door and enter the hallway heading west. Avoid the guard and go into the courtyard on the left and climb the stairs and explore. There are no guards up there. If you don't care about the view, or if you're done and returned to the hallway, continue west to the end. Ignore the two stairways and go left at the end. Just around the corner is a dark patch close to the left wall. Crouch in there until the guard coming up behind you reverses his direction and goes back the way you came. 11. There is an entrance to a guardroom on the far side of the hall. Inside on the left is a fireplace and to the left of that is an alcove where a guard patrols. This is one of the two guards that look down into the main foyer you crossed earlier. He patrols inside his little alcove and can see you if you enter the room at the wrong time. Inside and to the right is a set of stairs leading up to the bunkroom. When the guard isn't looking creep in and go up the stairs. There's gold in one of the footlockers next to the bunks. 12. Creep back downstairs and out of the guardroom. Stop in the same patch of darkness you were in earlier and wait for the other guard to pass. Go right (south) past the stairway and enter the room on the right just before the corridor ends. This room is a mirror image of the last one. It has a foyer with another guard. Sneak upstairs to the storage room and get some gold from a chest. Creep back down and exit the room and go right. Wait in the shadows at the end of the corridor until the guard comes by, turns and goes the other direction. Creep along behind him. He'll turn left into the courtyard. Continue to the end of the hall and enter the door. 13. You've been here before. It's the room in step 1. Exit through the opposite door, turn left (north) and go all the way down the hall and back into the library. Escape Back To The Street 1. Exit the opposite end of the library and take the first staircase on the right and go up. There may be a guard coming down the stairs. If so, wait until he passes. At the first landing take the stairs down to another room. Get some gold from a chest there.2. Go down the next set of stairs, turn left at the bottom and immediately turn left again. You may have to dodge a guard here. Go through the archway ahead and look for a lever on a pillar to the right. Pull the lever and exit the manor through the opened gate. Top
E quipment Expended Water arrows: 21. Walk into the water and swim into the mine until you can walk out on dry land. Follow the tracks past a small mound of rubble past a body (an Undead) swarming with flies. Stay clear of the body. 2. Walk down the track to where it branches. Take the branch to the right (with tracks). Take the first right and follow the tunnel and find two gold nuggets on the ground near the end. When you see the dead body and flies turn around and go back. Continue through the intersection to another "T" intersection with tracks running from left to right. 3. Turn right and follow the tracks a short distance to where a cart lies off the tracks. There's an arcing electrical device at the end of the room and an Undead on the ground next to the cart. There's also a ledge in the wall to the right of the Undead. You need to avoid the Undead and jump up to the ledge. 4. Follow the incline to a room with three bodies. Hug the left wall and climb the ledge in the corner. As soon as you get on the ledge, face left into an opening. Notice the broken bridge. Climb up on the narrow ledge in front of you and face left. Follow the ledge around the cavern to the other side of the bridge. 5. Walk out onto the broken bridge and step up on the left railing, turn left and mantle up to the corridor above. Walk up the incline and stop next to the flashing light. The box next to the light is an elevator call box. Ahead is an Undead walking in a cloud of flies. To the right is another tunnel. 6. Go to the call box and push the top button then run down the corridor to the right. You'll probably have to dodge the Undead by then. Keep running you'll leave it behind. Follow the tunnel to the end and turn right. Stay to the left of the tracks when you see a skeleton sitting in the middle of the rails. As you approach he explodes and his skull comes flying at you. You better dodge it. 7. Follow the tracks around until you come to a cavern with a ladder on the right-hand side of the far wall. Just before the cavern is a door on the left. Take it and walk up the incline. Take the first right (there's a light hanging in front of it) and climb down the slope to the bottom of the cavern. Climb the ladder to a ledge you can explore and fine more gold nuggets. Return to the top of the slope. 8. Go left and into the right corridor just past the light. Creep towards the guards voices. Just after you enter the corridor you'll see the guards off in a corridor to the right. There are two guards - one stands by the stairs and the other patrols between the stairs and a corridor off to the left. Waterarrow the torch above the standing guard. Wait till the patrolling guard leaves, then creep up the stairs to the right of the standing guard. It looks like there's too much light, but with the torch out you can make it. Through the Factory1. Near the top of the stairs are two doors. Enter the one on the right (the power station entrance) and crouch in the corner next to a crate and listen to the guard's footsteps. When they tell you the guard has started turned and started away from you, stay crouched but don't creep, around the corner and follow him up the stairs, across a short landing and when he turns right quickly go up another set of stairs into the corridor beyond. You don't have much time and you must follow right on his heels else he'll turn and see you. 2. Bear to the right and follow the corridor. Take the first branch to the right and cross the wooden catwalk, past the worker below, all the way to the end and go down the stairs. Directly across from you at the bottom of the stairs is a worker. Two guards also patrol back and forth in the corridor. Wait until the worker is busy and the patrolling guards are around the corner to the left. Creep right down the hallway and stop in the only dark spot. Your vision crystal should be dark. Wait until the guards come and go again, the worker is busy, and continue down the corridor and turn right and go up the stairs. Into the Prison1. At the top of the stairs you'll hear two guards talking about Cutty in cell block 4. Sneak around the corner to the left and you may have a chance to pickpocket a key from one of the guards as he walks away. If you miss your chance, wait a few minutes and he'll return. Get it then. Go up the stairs to the right. 2. At the top follow the signs to cell block 4 (turn left). Follow the corridor until you make a right turn and see an open area with a blinking ceiling light. On the far right wall is a door, just under the light. This side of the door is a waist-high opening with a guard inside. Immediately to the right is a crawlspace in the wall. Take this crawlspace down to some flooded cells. 3. Enter the water, turn left and go all the way to the end. On the left end of a small platform you'll find a corpse. You can get mossarrrows, waterarrrows, several stacks of coins and a "Felix's Notes" - a parchment copy of a note to Cutty about a plan to steal the Hammer of Quintas. Go back to the corridor where the guard is. 4. Sneak up to the guard in his cubicle and lift his key. Backoff and then sneak past him by hugging the left wall. Go up the stairs and go left toward cell block 4. At the top of the stairs turn left. There's a guard on an archway looking down. Creep to the end of the corridor by zig-zagging through the shadows. 5. At the end of the corridor turn left, as the sign says, and go toward level 2. At the top of the stairs turn left and go until the corridor splits. Left, down a long corridor, you'll see a guard in a cubicle. Creep to the end of the corridor and crouch with your back to the wall, facing the way you came, with the door of the cubicle on your left. Jump up and down to make noise. If you do it enough times the guard opens the door and looks out. After he aggravated enough, he'll stand in the opened door and you can blackjack him. Dump the body inside the room. 6. Read the book on the table to find Cutty's cell number. Pull the lower left lever on the wall panel to open Cutty's cell. Don't open any other cells. The occupants will run around and set of alarms and make your escape very difficult. Go back downstairs and it's the first cell on the left. Cutty tells you Felix has gone after the Horn of Quintas in the bonehoard and that his notes have been put in the evidence locker in the Officers Quarters. You have to get them. Then he dies and the mission objectives change. Notice the two changes: The line about releasing and escaping with Cutty is "X-ed" out and the line about the evidence locker now has a green check in it. I guess this is because the found the stuff needed on the dead guy in the flooded cells. Finding Basso the Boxman1. Basso is in cell block 3. From Cutty's cell go left (north) to the end of the cell block, turn left (west) and follow the passage back to the intersection where the signs direct you go cell blocks 3 and 4. Keep going straight and up the stairs into the lower level of cell block 3. Creep north through the cell block and follow the stairs up to level 2. 2. The upper level of this cell block is a little different than block 4. There are two guards here. At the top of the stairs where you turn right, there's a door on the left wall. Ignore it, it's empty. Around the corner (left) from this door is a standing guard. The corridor to the right leads down to the guards cubicle - same as block 4. Blackjack the standing guard and dump his body in the dark corner. 3. Creep down to the guards cubicle. This guy is easy. Crouch outside the door, open it and creep inside and blackjack him while he looks into the cell block below. The book on the table says Basso's in cell 4. Flip the middle switch in the middle row. When you get back downstairs to Basso's cell you find he's unconscious and you'll have to carry him out. Leave him for now. We've other things to do. Finding Issyt and the Hand of Glory1. Go left (south) from Basso's cell and cross the cell block. Turn right at the end and follow the stairs to the intersection where the signs direct you to blocks 3 and 4. Turn left (east). Sneak back past the guard like you did in "Into The Prison", step 1. Once past, follow the corridor to the signs directing you to cell blocks 1-3 and 3-4. Keep going straight to cell block 1. 2. When you get to the guard's station creep against the right wall. There's a row of pillars whose shadows will conceal you from the guard. Once past, go up the stairs to the intersection where signs direct you to cell blocks 1 and 2. Go left toward block 1. 3. Block 1, lower level, has the typical cell block layout. Creep across it to the end. There you'll see two signs, one directing you to level 2, and the other directing you to the barracks. Go to level 2 and creep down the corridor to the guard's cubicle. This guy's just like the guard in cellblock 3. Open the door, creep in and blackjack him. 4. The book tells you Issyt's remains are in cell 9. Face the control panel and flip the next to bottom lever in the third row from the left. Exit the cubicle and find the remains in the second cell on the right. Take the hand. Now we need to do something about our loot quotient. Into the Barracks1. Go back to the lower level and cell block 1 and follow the sign to the barracks. Close to the turn to the barracks there's an open area you must cross to get to some stairs. There's a guard around the corner to the right. Waterarrow the torch and very carefully creep around the corner and blackjack him. He's not a normal guard but some sort of priest. If he sees you he'll throw fireballs at you. 2. Guards are all over this area. At the top of the stairs a corridor goes off to the left. A guard patrols there. Ignore that area for now. There's also a guard patrolling the corridor you're in. Wait in the shadows on the right side of the corridor until he passes you then comes back. Now creep right on his heels down the hall with him and enter the first door on the right. Get some gold. 3. Listen for the guards footsteps to pass the room, go out, turn right and enter the next room on the right. Get some arrows here. When it's clear, cross the hall into the open room and crouch in the right near corner until the guard passes. Go through the door in the far left corner. It's the kitchen. You find some gold here on the right counter. 4. Wait till the guard passes and go back to the corner you hid in previously. When the guard passes in the hall outside, going right to left as you face the entrance, exit and turn right. Go back to the area you ignored in step 2. 5. As you face the stained glass window, there are two pieces of furniture against either wall at the half-way point of the room. Get some gold from the top of each. When the guard passes going to the left, go right to the end of the corridor and up the stairs to the right. This is the Officer's Quarters. The Officer's Quarters1. Follow the corridor to a "T" intersection. Turn left and go into the room on that end. Immediately turn right, open the next door and go through. Follow the corridor to the end and enter the door there. 2. There's a guard patrolling outside and we need his key. He patrols the left side of the building. You have to be fast to get his key and not so very sneaky. Turn left and walk to the edge of the building. When the guard's footsteps tell you he's been to the corner and has turned and started in the opposite direction, run around the corner and up behind him. Pickpocket the key while you're following him, immediately turn and run back in the direction you came and around the corner before he reaches the end of his walk and turns. 3. Go back to the room. Be creepy in here because the guard you just lifted the key from can hear you inside the room. On the top shelf of the bookcase to the right of the desk is scroll. Reading it tells you someone has run off with half the contents of the evidence safe. You don't need to find it, anyway, since the corpse you found in the flooded cells had the map on it. This satisfies the mission objective of finding the evidence locker and getting Felix's map. 4. In the far corner of the room is a wall safe. Use the newly won key and empty it. Leave this room, go left and enter the room at the other end of the hallway. Loot the wall safe there. You should now have at least the 1000 loot required by the mission objectives. All that's left now is to go back and get Basso and get out. Getting Out of the Mines1. Follow the corridor back down to the barracks level. Go between the two pieces of furniture where you got the gold and turn right (north) and go back down to the lower level of cell block 1. 2. Go straight through the cell block (south) and turn left. Follow the corridor to the intersection where the signs direct you to cell blocks 1 and 2. Turn right (west) and use the pillar shadows to sneak past the guard booth. Follow the corridor to the intersection with the signs directing you to cell blocks 1-2 and 3-4. Keep going straight (west). 3. Creep past the guard booth and go up the short stairs to the intersection with signs directing you to cell blocks 3-4. Head right (north) to cell block 3. Pick up Basso from cell 4. Now for the long haul out. Go back and creep past the guard booth again. 4. Follow the corridor to the intersection where the signs point to cell blocks 1-2 and 3-4. Turn right and creep down the stairs past the guard where you heard them talking about Cutty being in cell block 4. Follow the corridor back into the factory. 5. Go past the worker and the guards and up the stairs to the left and follow the wooden catwalk around. Once off the catwalk a sign points to the mines. Turn left and go in that direction. 6. There's no way you can carry Basso past the guard you sneaked past in the power station. Leave Basso at the top of the stairs and when the guard's turning to walk away from you, run down the stairs and hide in a semi-dark corner to the left of a piece of equipment. Have your blackjack ready. When the guard comes back you'll have seconds to smack him before he sees you. Go back up, get Basso and go through the power station to the door that exits into the hallway. Exit the door and turn left to get back to the mines. 7. You should now be at the bottom of the stairs where you waterarrowed the torch to get on the stairs past the two Hammerite guards. Creep past them and into the corridor straight across. Go past the torch on the right and when the tunnel forks, stay right. Go to an intersection. Left you should see a light hanging in front of two door. The distant door has a body with swarming flies. To the right is a tunnel with tracks. Take the tunnel to the right and follow the tracks. 8. Go past the overturned cart, turn left and go down an incline to some more tracks with a beam lying on them. Go right and follow the tracks back past the remains of the exploding skeleton to the end. There's a cart and on the wall to the right is a sign pointing to the factory - the direction you just came from. 9. Go left, run past the Undead and get on the elevator you summoned way earlier in the game and push the second button from the top to drop the elevator. You may have to put Basso down to push the button. 10. When the lift stops there's only one way to go. Turn left and follow the tunnel until you come to a ladder. Climb down then jump to the next level. Follow the tunnel until you exit the mines. Top
E quipment Expended Fire arrows: 5 (6 found during gameplay)Holy water arrows: 2 1. Stay clear of the body at the entrance. Jump to the rope, climb down and find yourself in some rafters above a room with a rope hanging in the center of it. Face north, walk to the edge of the planks and look down. There are three ledges on the north wall an Undead patrolling below, although you may not see it now. 2. Climb down the rope and jump to the middle ledge. Jump to the lower ledge and face the room. You'll see a passage on the left side of the room. Ignore the exit through which you can see a crypt. 3. When the undead isn't looking, jump down and run through the left passage and up to the top of the stairs. Follow the hallway until you come to a ramp going down. 4. Go down the ramp, turn left and go into the large room. Immediately turn right and take the stairs up. Upper Vaults - North1. Follow the passage, ignoring the fork to the left, and go into an area with four crypts in the walls. There's a golden urn in the top right crypt on the east wall but it's protected by projectile traps. Notice the slightly indented floor tiles in front of it. Don't step on them while you're standing. Crouch and creep over to the urn. When the spears are released over your head, stand and get the urn, crouch and then creep out of danger. 2. Go north up the short staircase into the next room. Immediately turn left and climb down the rope hanging there. At the bottom go left into a room with an Undead on the floor next to the far wall. Left of him is a chest in an alcove. Run up to the chest, open it and when the Undead awakes, turn and run back to the rope. Go past the rope into another room and jump into the water. Swim down and straight ahead. Ignore the underwater passage that comes up on your right. Surface in another room and climb out on the south side where you can see two blue chests on pedestals. 3. Stand to the side of the chests when you open them to avoid the missile traps. Get a speed potion from the left chest and 6 fire arrows from the right. 4. Walk around the pool and take the ladder down. At the bottom of the ladder is a pressure plate that drops a boulder down on you. Jump off the ladder and move down the corridor quickly to avoid the boulder. Turn right into the tunnel and enter the Burrick Caves. Burrick Caves1. Follow the cave to a "T" intersection and pause. When the patrolling Burrick moves to your right, drop down into the tunnel where the Burrick is, then go left a short ways to see a board you can walk down into another tunnel (or just jump down). Go left in this tunnel until it opens into the main burrick tunnel. Drop down into the main tunnel and go left hugging the left wall. After a short ways this tunnel will turn right. As soon as it turns right, look up and to the left to see a green-tinted tunnel. Do this all quickly as there are more Burricks coming up behind you. Climb up into this tunnel and go forward until you come to a cavern. 2. Step down to the ledge under the opening. Follow the ledge to the left until you can enter a reddish opening. Follow the tunnel to the Halls of Echoing Repose. Halls Of Echoing Repose1. There are a lot of Undead in the next section but they're really no trouble. Don't bother trying to be sneaky. Just run past them, they're slow and you can get by without taking any hits. Once in the Halls of Echoing Repose, go around the right side of the room and run through the first right out. 2. From here on just take a right each time you can and keep ignoring the Undead. Go until you come to a room with a stone ramp in the center of it. Run up the ramp and climb the ladder at the top. The Undead will follow you up the ramp, but not up the ladder. At the top of the ladder, turn around the jump to the ledge bordering the room and exit the opening on the opposite side. 3. Go until you come to a room with a ramp going up either side and a Burrick guarding the far exit. Now get back in sneaky mode. Creep up either of the ramps and down the other side. Go through the door in the far wall and follow it to a room with crisscrossing beams at different levels. The goal is to get to the floor by using the beams and dodging the purple missiles flying through the room. 4. Walk to the center of the top beam and turn south (left) and look down. Position yourself over the beam below. Notice where the lower beam enters the wall, there's a small ledge below it. When you see the purple missile travel along the beam below toward the wall, jump down and run to the far wall, turn left and jump to the ledge below. against the wall. Directly ahead and below is another beam. Time your jump down to it. Walk north to the center of this beam and turn west (left). Center yourself over the beam below. Time your jump with the missile going toward you along the beam below. Jump down to this beam, run to the center and jump left and down to another beam before the missile hits you. Jump to the floor and go to the doorway. Mystic's Heart1. Read the plaque in the floor of the entrance by right clicking it. It says "He upon whom the gaze of the Guardian falls, he shall be destroyed", which means if you cross in front of any of the statues inside you'll be incinerated by a fireball. 2. The statue immediately in front of you points toward a statue to your left by a golden pillar. Walk around the right side of the statue in front of you, and keeping it on your left, walk toward the statue by the golden pillar. Don't cross in front of the statue on your left and make sure you stop in the row of floor tiles before you get to the statue by the pillar. Turn right (southwest). You should be centered in a row of tiles that leads directly into a pillar with another statue to the right. Walk down the row of tiles directly to the pillar. 3. Go around the right side of the pillar. Notice the two statues by the door. We can get by them to the door by using the pillars to the left as shields. Go around the left side of the first pillar. Stay as close to it as you can. Once around it go around the right side of the next pillar. Walk northeast and go right between the next pillar and a statue. With the wall on your left you should now have a straight shot at the dark doorway. 4. The Mystic's Heart is at the far end of the room in a chest. Hug the left wall when you enter the room. Immediately on your entrance the lighting changes and a ghostly warrior stands in a pool of light in the middle of the room. Creep around the left side of the room, get the gem from he chest and go into the alcove behind you chest. You'll be transported back to the corridor by the entrance to the room with crisscrossing beams. Now we go all the way back to the ladder at the top of the ramp where you left the Undead waiting for you. Mystic's Soul1. Turn east and go back to the room with two ramps and the Burrick in the center. Avoid the Burrick as you did before. Enter the room with the ledge bordering it, step down to one of the ledges on either side of the ladder then climb the ladder down. 2. At the bottom go south, ignore the Undead at the bottom of the ladder, and follow the ledge past a wooden ramp that leads off to the left. Continue hugging the right wall and take the first right, then the next right into a corridor. 3. Follow the corridor to where it widens at the end. Stay out of the path of light in the center and do all movements crouched down to avoid missiles. Creep through the shadows and get some gold from a crypt to the right. Creep into the room at the end and get some more gold from atop the crypt there. Go back to the other end of the hall and the ledge you were following in step 2. 4. At the ledge turn right and go until you find a doorway on the right. Move through the room and into the next. This room has five doors, a torch above each, and a set of sliding panels in the center of the room closing off a well. Use your fire arrows to light the torches. When the fifth torch is lit the doors will open and release the five asthmatic Undead. Immediately run and jump into the well and swim straight down then forward until you can surface and climb out. 5. Look closely at the stairs at the far end of the room. There are holes in the risers, the floor in front is strewn with bones, and the tiles there are slightly recessed. Looks like a trap to me. Stepping on the tiles releases a barrage of missiles and purple light balls. Walk along the left wall and just before you reach the pillars, turn and pick up the corpse to the right and throw it at the foot of the stairs and watch the light show. 6. Walk along the left wall then sidestep to the stair railing. Climb up on it (the missile barrage should miss you). Walk up it to the top, then step down to the top platform. Stand in front of the gem. If you pick it up you're blasted with fire balls, so pick up the skull on the floor to the right. Drop the skull on top of the gem, then pick up the gem. If you don't get blasted you did it right. 7. Walk back down the stair rail and work your way to the ladder above the hole you surfaced through to get into the room. Climb the ladder, follow the corridor and climb down the ladder at the end and drop into the room just before the room with the 4 torches. Run away from the 5-torch room and turn left at the doorway. Make your way back the ramp to the ladder you climbed to find the Mystic's heart. Horn Of Quintas1. Back at the ladder go straight and time your movements past the fireball. Follow the ramp and turn right whenever you can (twice) until you come to a tower where the stairs wind around the inside walls. Follow the stairs and climb the steep ramp at the end. 2. Go to the left and stay on the left edge of the ledge to avoid the purple missiles. Time your move past the missiles and exit the room through the passage you find on the right. Follow the passage to the end and enter the Burrick caves. 3. At the large round cavern, creep along the right wall to avoid the Burrick guards and go into the rightmlost passage. At "T" intersection there is one Burrick with his back to you on the left, and three facing you on the right with a door behind them. Creep across the intersection to a dark spot against the far wall near a passage that leads left. Turn right and creep down into the passage and turn left. 4. Take first right into a huge cavern and climb into a short passage way that brings you behind the three Buricks that were facing you in step 3. Creep left along the wall and into the room. Cross the room to the hallway beyond and follow it to the next room. 5. This room has three platforms at different levels circling the room. Go left and climb the ladder to the first level. Go clockwise around the ledge until you find the second ladder. Climb to the top, turn around and jump to the second level platform which is now below you. 6. Walk around to find another ladder against the the wall, climb it, turn and jump down to the third level. Walk around and find the walkway that goes into the center pillar, climb up the ladder there and claim the Horn of Quintas. Getting Out1. After getting the horn, turn around, walk back past the opening where the ladder is and jump to the ledge on the far tower wall. Turn north and jump down to the next level, turn toward center and jump down again. Now follow the ladders back to the ground floor. 2. Go back to the room behind the Burricks, turn right outside the door and creep back into the passage on the right and into the round cavern. Exit the cavern and at the intersection sneak left (Burrick guard to right). At the next intersection, two Burricks on left, one on right, just stand and run straight across into the passage on the far side. 3. Turn right and go into the next cavern, bear left and go into the first passage on the left. Follow it out of the caves back into a hallway, through the hallway to the room with the purple missiles and the ramp in the center. 4. Go down the ramp, down the circular staircase in the tower, and follow the ramp until you come to a fork with a skeleton laying at the intersection. Bear left, follow the trail and dodge the fireball. You're now back at the ladder you climbed to go get the Mystic's Heart. 5. Go down the ramp, turn left, go through the door, bear right and follow the ramp around to take the first right. Go until you find a passage on the left that leads into the central pillar. Walk around either the left or right ledge to the ladder (the center way is trapped). Climb the ladder all the way to the top and get gold from the lid of one of the crypts. Go back down the ladder, around the wall to the passage leading out of the central pillar. 6. Turn right, go back to the circular room, bear left and go through the door back into the room with the ramp (step 5). Go across the room, under the ramp and take the passage left of the statue. Run into the next room and take the first right. Follow it to the next room and make a sharp left into a doorway. This room should have a shrine at the far end with a gold chalice on it. Keep dodging the Undead until you can get the chalice then exit the room and turn left. Go into the next room. This room should be the Halls of Echoing Repose. Follow the left wall and enter the tunnel and head back to Burrick land. 7. At the end of the tunnel stop and turn right. Side-step left until you can see along the narrow ledge below the tunnel opening. Run forward and drop down onto the ledge and go to a hanging rope at the other end. Climb the rope and jump into the opening. 8. Follow the tunnel up an incline until it opens into a cavern guarded by Burricks. Exit into the cavern and turn right, run a short ways and turn left up another incline. Watch for an opening above and to the right. Run into it, under a plank sloping up into another tunnel, and continue to the end of the tunnel and drop down a shaft into water. 9. Surface and swim southwest into a square opening through which you can see some stairs. The room is full of pressure plates (dark floor tiles) that release missiles from the wall. At the top of the stairs, crouch and make your way across the room to the body. Go into the alcove on the left side, approach the shelf, stand and get the fire arrows. Then crouch again and collect a parchment and gold from around the body. 10. Go back into the water and swim to the opposite end of the pool and climb out into the green tunnel. Follow the tunnel a long ways up until it opens into a cavern. Across the cavern to the right is another entrance with a fork right at the start. There's also a Burrick hanging around there. Slide down into the cavern, turn right, climb up into the entrance and take the right fork. 11. Go to the first intersection and turn left. Keep following the tunnel up until it ends in a "T". Turn right. Just inside the entrance is a gem. Take it and retrace your steps back down to the intersection and turn right. Follow the tunnel down to the end. 12. At the end climb up and bear left. If there are any Burricks around just run by them. Run straight down the tunnel and climb up at the end. Run a short ways and climb into a green tunnel on the left. Climb up the leaning plank into the next tunnel and after a short ways climb up into a reddish tunnel on the right. Follow this tunnel to a stone corridor and turn left. 13. Jump over the boulder and climb the ladder. Jump into the pool, swim straight down the passage and surface. Climb out and exit the room. About halfway down the corridor on the left is a dark recess. Climb the rope hanging there up to the room above. 14. Exit the room, go down a short flight of stairs and turn right into a corridor. Follow it all the way to the end and down into another room. Take a sharp right into another corridor and follow it around and up some stairs and come out on a ledge above a room. Use holy water arrows on the Undead below. 15. Go back down the stairs to the center of the previous room. Go into the alcove in the north end. Halfway into the alcove face right (east) and mantle up into the opening and follow the passage. Take the first left and go down the stairs into the room where you Holy water arrowed the Undead. Climb the rope to the rafters and exit out to finish the mission. Top
E quipment Expended Moss arrows: 2Water arrows: 4 1. Make one step toward the guy behind the counter and an arrow comes through the window and kills him. Turn back toward the door and you hear two assassins in the street talking about now they just killed you. Now your mission objectives change. 2. Follow the two without being detected. There are two difficult spots to the chase. One is early on where they cross a steel bridge. Shoot a moss arrow here and follow them across the bridge and to the left (once in awhile they turn right). Later they'll cross a wooden bridge near a wharf. Crossing this is noisy, too. Eventually they lead you to Ramirez's house. Hunker down in the shadows across the street from the mansion. 3. Check your map. You now have one page that shows the way back to your home turf and one page that's a floor plan of the mansion. Plus, you now have a whole new set of objectives: Breaching The Walls1. Crouch and creep inside the entrance archway. Hug the right wall and stay in the shadows. There are two guards in the left intersection. Take the right. It's a gravel path and noisy so go slow. Time your moves to when the guards are whistling and the wind's high. Hug the right wall again and go far enough so when you turn around you can get a clear water arrow shot at the torch set into the wall to the right of the guards. 2. Creep to the other side of the the passage (north) until you can use another water arrow on the torch in the south wall of the passage you're in. Keep hugging the north wall and creep to the end of the passage and turn left. Keep the wall on your left and work your way across the grassy courtyard to the shadows along the north wall. Turn around and notice the guard on a walkway over where you came in. 3. Creep east to the next corner and continue following the wall. If you make a little noise, the guard on the walkway will leave and come down. This will give you a chance to run down the wall, turn left and see the pool. Jump in the pool and swim toward the far end. There's a ladder on the right side you can climb. You'll have to fight the current but you can climb up. 4. At the top, open the door and enter the tower. Turn around and jump (west) to the roof. Move left and step down onto the balcony. Top Floor1. Pick the lock on the doors and enter the library. Find the stairs at the north end and go to the library's upper level. As you walk toward the staircase you hear a woman saying Ramirez is in the basement counting gold. Get two candlesticks from the desk. Go left (west) from the desk and pick the lock on a chest in a dark corner for more gold. 2. Go back downstairs. In the bookshelves to the right of the fireplace, four shelves up is a book you can use to open a secret panel on the other side of the fireplace. Follow the newly opened passage to the trapdoor and ladder at the end. Pause here and listen to some guards talk about the attempt on your life. When they're done talking and have moved off, climb down the ladder. 3. Go through the large room into the smaller one at the opposite end. Get the stacks of coins from the desk. Go back to the large room and find another blue chest and get some gold from it. Go back to the library. 4. Go into the hallway and into the first door on the left. Pick the lock on a chest to the right of the door for a speed potion. The left door at the opposite end of the room leads to a staircase down to the first floor. The right door leads into the hallway. Exit the way you came and enter the room across the hall. 5. Clean off the sideboard and exit through the other door and turn right. Run down the corridor and make two left turns. The last left is by a stairwell. Go into the first corridor on the right, next to the stairwell. Go all the way to the end by the door. There are patrolling guards on this floor and you may have to try this move more than once to get a feel for the timing. Since you have to pick the lock here and guards may walk by, use a water arrow on the torch at the passage's entrance. Pick the lock and go into Ramirez's bedroom. 6. Pick the lock on the chest to the right of the bed and get the basement key. To the left of the bed, on a column, is a button with a raised "R" in a circle. It's the alarm. DON'T push it! Collect some goodies from the rug in front of the fireplace and read the scroll - a threat to the Chief of Police. Get some gold from the mantle over the fireplace. 7. Enter the door to the right of the fireplace and collect the plethora of goodies around the tub. The room to the left of the fireplace is empty. Use a water arrow to douse the fire. Go into the fireplace, get gold from the right, flip the switch on the left to open a secret panel. Just inside the passage, in a frame on the right wall, is the silver fire-poker. Turn left at the intersection and get gold from the chest. Return to the bedroom. 8. Exit to the hallway and pick the lock on the next room to the right. Get loot from the fireplace mantle. The chest is empty. 9. Exit to the hallway and pick the lock on the next room to the right. Get a ring from the table and gold from the mantle. You should now have at least 2000 loot. To The Basement1. The first floor is even more heavily patrolled than the second. Exit this room and go right through the next room, a Hammerite shrine, and through the opposite door to the stairwell. Hide in the shadows across from the door and when the guard comes up the stairs pickpocket his key (storage room key). Take the stairs down to the first dark spot and stop. When the next guard comes down pickpocket his key (courtyard key). Wait for a third guard to pass then run down the stairs and go left into the corridor. Follow the corridor through four turns until you find the stairs going down to the basement. Dealing With Ramirez1. Follow the basement corridor until it "T-s". Wait in the shadows until a servant passes going to the right carrying a tray. He's taking refreshment to Ramirez. A few minutes later the servant will pass back to the left. Go down the right branch of the corridor and unlock the door with the basement key. 2. Go left and sneak into the first opening in the left. Ramirez is in here. Have your blackjack ready and hug the left wall. When he moves to your left to pull the bell cord to summon a servant, come up behind him and whack him. Dump the body in the dark corner by the entrance. Get the purse. 3. Take two stacks of coins from the shelf to the left of the blue chest on the floor. Left of that take a key. Move all the way left along the shelf to a small blue chest. Use the key on it. This key also works on the blue chest on the floor. Before you leave get the moss arrows and water arrows from the table. Getting Away1. Exit right from Ramirez's room and go back to the basement stairs the way you came in. Make sure there are no guard's footsteps to be heard then go up the stairs and turn right and follow the hallway back to the staircase where you picked the guard's pockets as they passed. Go to the top of the stairs and reenter the Hammerite shrine. 2. Exit the other end of the shrine and go left. At the end of the hall turn right and go to the end. Turn right and then enter the short corridor on the left and go into the library. There are two possible ways to get out of the mansion: 2A. Go out onto the balcony, mantle up on the roof and jump to the ladder hanging outside the tower. Climb up into the tower open the door on the right and creep along the walkway to the door in the tower at the far end. Open the door, go down the stairs and come out in the courtyard. Don't forget the guard way off to the left who overlooks the courtyard. Creep to the wall across and follow it back to where you originally entered the courtyard. There may be an extra guard standing against the wall directly across from the one on the catwalk. You can blackjack him easily and continue around the wall and turn right into the small corridor that leads to the main entrance. From there you can creep past the two remaining guards and make the street. 2B. Go out onto the balcony, mantle up on the roof and jump to the ladder hanging outside the tower. Climb down into the water and let the current carry you to the end of the pool. Swim through the opening. You now have had a mission objective added to those you already have: "Head for the safety of your neighborhood." 3B. When you can't hear any guards around climb up the ladder by the wooden bridge, and using your map, get back to the part marked "Home Turf" without being detected. Or if you're detected, you can outrun the guards and be home free. Top
Rope arrows: 2 1. Walk north around the mansion until you come to the balcony. Shoot a rope arrow up into the ceiling between the balcony and the tower on the right. Climb the rope and jump to the ledge, then to the balcony and enter the room. 2. Turn right and get some gold from between the two bunks. Go into the tower and climb down the ladder. Go to the end of this room and get a flash bomb from the last partition on the left. The first floor is very heavily patrolled. Some of the patrols even go in and out of rooms, so get used to being discovered and having to restore your game. Being wary of guards, open the door to the hallway and go left. Enter the first room on the right. First Floor1. Go to the far end of the room and pick the safe in the bottom of the column. Exit the room and go right and enter the first room on the right. Leave the door open. It'll save time on the exit. Keep right on moving and go around the right edge of the banquet table and turn left. Creep between the two chairs at about the mid point of the table. At the very first chance you get shoot out the torch on the west wall else you'll be discovered shortly. Guards will move in and out of this room constantly and will be passing on your left and right as well as across in front of you. Take the candlestick from the center of the table. Lot of work for a candlestick, isn't it? And we still have to get out of the room. 2. Wait until the foot traffic dies down and exit through the same door you entered. Go straight across the hall, into the opening, and up the stairs. At the top of the stairs the floor is missing. Jump into the right hand corridor, turn left and open the door to the first room on the left but don't go in yet. Second Floor1. It's booby trapped. If you step on the dark panel in front of the door a fireball shoots out of the mouth of a golden wall hanging. Angle left, run and jump over the corner of the dark patch into the darkened corner of the room. The fireball should miss you and vaporize some barrels to the left of the door. Immediately cross the room to the left of the fire, and standing as far away from the second door as you can, open the door and let the purple missile shoot through the door. Run into the room, get the goblet from the table and run back into the other room and shut the door. If you mess around a guard comes in and this room is as bright as day. Look under the golden wall thing and get a gem. 2. Exit this room where you came in, jumping over the pressure plate, turn left and enter the first room on the right. Pick the two chests in there and get a healing potion. Exit this room and turn right. 3. Go to the end of the hall, turn left and enter the first room on the right. The mouth of the decoration hanging on the north wall is a hole. It's the same with the decoration on the east wall, right of the fire place. If you stand in front of the blue chest in the corner and open it, you could be blasted from two different directions. So, face the corner of the blue chest that points into the center of the room, crouch down and open it from as far away as possible. Hopefully the blasts will miss you. 4. Continue down the hall and enter the next door on the right. No traps here; just two goblets and a parchment. 5. Continue down the hall and pick the lock of the next door on the left. Turn left on entering and go through the door and get the scroll from under the table. On the floor to the left of the bed is a key. To the right of the bed and on the wall under a picture with a suspicious looking mouth, are two gems. There's a pressure plate under the rug somewhere between the bed platform and the picture. Approach the gems from well off to the right. The other room contains nothing. 6. Exit the room and go through the first set of double doors on the right. Go down the stairs. Use a water arrow on the second torch from the top. Turn the corner and go to the bottom. Put out both torches you see here. Hide by the right side of the door frame and face the stairs. Soon a guard will come by. Snag his key. It opens the other set of double doors back upstairs. Stay where you are and the next time he comes around blackjack him. 7. Carry the body upstairs, go right to the end of the corridor and turn right again. As you start up the ramp some purple missile will begin shooting through the room above. Walk into the room, and looking down, find a set of floor tiles that move down when you step on them. The missiles also stop. Dump the body on the tiles to hold them down and pick the lock on the chest at the end of the room. Top Floor1. Go back to the second set of double doors and use the key. Climb the stairs to the top and follow the corridor around to the left. Go through the tunnel directly ahead of you in a room of stars. Walk out to the edge of the walkway and get the gem. It's almost transparent and hard to see. Jump across the gap to the other walkway, get the gold, and enter the tunnel. 2. Go to the end, turn left into a hallway and immediately take the right tunnel leading up and go to the top. You'll be above a hallway with a patrolling guard below, a rope hanging in front of another tunnel slightly left and another hallway to the right. 3. Jump over to the rope and enter the tunnel and follow it up to a hallway with three guards grumbling about the Boss's mood. Creep to the top and hide in the shadows at the left where the tunnel meets the hallway. To the left you can see the sword suspended above a shaft. These guards seem to hear almost everything and once aroused and searching for you take forever to calm back down. If they start searching for you it's almost worth restoring your game instead of waiting. The Sword1. Shoot out all three torches in the right hallway. Creep down the right hallway and into the first left. It's a niche overlooking the sword. Wait awhile, the guards will get into a pattern of passing your niche one at a time. Get close to the right wall, facing the hall, stand up and blackjack one of the guards when he comes by. Just leave him where he falls, the other's won't notice. Immediately get ready and get the next guard. The second is real tricky, but once done, for some reason the third guard ceases his patrolling. 2. Face the sword and look up. Shoot a rope arrow into the ceiling very near the edge of the skylight. Jump to the rope, get the sword, jump back to the niche. 3. Go right from your niche. The third patrolling guard seems to have disappeared. Go back down the tunnel to where the rope hangs from the ceiling. Use the rope to get across to the tunnel on the other side. Go to the bottom and go right until you see a short ramp on the left. Go up it and go through the passage with the spiraling tiles to end up where you entered the star room. 4. Turn right and follow the green tunnel. When you come to the tiled hallway keep going straight, then right and through the double doors (stairway) on the right. Go back down to the second floor. Incriminating Evidence1. Turn slightly right when you exit the double doors at the bottom and crouch in front of the last door on the south side of the hallway. Open the door and the missile should fly over your head. Take the exit on the right side of the room and go to the end of the corridor. 2. Wait until the guard passes going right then follow in his direction. Go right, then left at the double doors, straight across the room into a corridor, then take the first right. Stop around the corner, crouch and face the direction you came from. Wait until the guard passes, walk up behind him and smack him with the blackjack. Take the body back into the shadows where you were waiting. 3. From your ambush point go straight (south) and follow the corridor around as it curves to the right. Open the door at the end of the corridor. Water arrows are to the right of the bed. There are more in the stone tub in the next room. 4. Exit the way you came in, to to your ambush point and make a right. Go into the center portion of the divided room where the staircase leads down to the first floor. At the bottom of the stairs is a large room. On the far right side is the dining room where you got the candle stick near the beginning of the mission. To the left is a bar. 5. Creep down the stairs until you can just see the feet of the patrolling guard when he comes through. When he goes left into the bar, go down the stairs and to the right. Hide in the dark along the right wall with your back to it. When the guard comes back on his rounds, blackjack him and carry his body across the room into the bar. Dump him in the far left corner where it's dark. 6. Clean out the bar; and don't forget the sliding panel in the center and behind the bar. Go into the hall through the door closest to where you entered the bar. Go in the first room on the left and get gold from the table. 7. Exit left and go in the first door on the right. Get two golden goblets from the table. Exit the second door, go across the hall and stop just inside the green tunnel. Use a water arrow on the torch. Turn right and see a guard at the bottom of some steps guarding a chest. Creep down as far as the shadows will hide you, then when the guard turns his back to pace away, walk up behind him a blackjack him. Get a healing potion from the chest. 8. Go back to the entrance of this room and crouch in the shadows facing the corridor. When the patrolling guard crosses to your left run up behind him a whack him. Dump his body with the last one. Exit and go right, then turn left at the end of the hall. Go to the intersection, water arrow the torch, turn left and head toward the garden. Stop in the shadows to the entrance before the big tree in a pool. 9. After the guard leaves, go left into the garden, make the first right, then the next right and go down a slope. Go left over a bridge then right through a short passage into the next section. Go left into a green tunnel. 10. Follow the tunnel upward. Just where it ends by a huge tree, there's a key on the ground. Take the first right and go to the next tree. Get gold from a plant to the right side of the tree. Return back to where you found the key. Take the tunnel out and turn right, cross the courtyard and go back into the previous section. If you want you can enter the water by the bridge and swim all the sections of canal. You will find several water arrows, what else, floating here and there. 11. Cross the bridge, turn right and halt just below the top of the slope. When the guard comes out and turns to go back to your right, do the "run up behind and blackjack" thing. Dump the body in the garden, go back up the slope and turn right and follow the guard's route north. Follow the corridor until you come to a room with a canal flowing through it. Jump to the bridge on the other side. 12. Follow the wooden floored tunnel to the double doors at the end. One of the keys you have opens them. Go to the far end and take the four golden chalices and a fire arrow on the floor behind the altar. The door in the south wall is locked, we don't have a key and it can't be picked. 13. Go back to the bridge and jump over the canal. Follow the corridor back towards where you ambushed the guard. Keep going and crouch, with your blackjack ready, in the shadows just before the huge tree in the pool. To the right you should see the hallway where you entered the garden. Just past that, on the right, is an entrance to the greenhouse. When the guard appears he'll come towards you then turn and walk into the greenhouse. As he puts his back to you and heads towards the greenhouse, RUN up behind him (it looks like a long distance and running is noisy, but you can make it) and smack him. Take his purse, pick up the body, and go into the greenhouse. 14. Dump the body and exit the other door and enter a second greenhouse. Go straight in past the potting bench and turn left. Go down a short set of stairs and through the door. One of the keys you have opens it. 15. Go through the archway and turn right. Bear right at the intersection and when you get to the first bush, turn left into the center of the pillar. Get some goodies from a table and read the intro to Rakel's Tome of Magic. Under the table where you got the goodies is a parchment containing the "incriminating" evidence you need against Constantine; a thank you note from the mansion architect expressing curiosity about where Constantine got so much "raw" gold. 16. Now we're still a measly 14 units short on our loot quotient. We'll have to rectify that on our way out. Go back through the greenhouse with the potting bench and exit the door. Immediately turn half-right and in the wall ahead of you is a door. One of your keys opens it. There are two gold vases in there. Now let's get out. 17. Exit left from the door and turn left again. Go back to where the tiled corridor enters the garden and turn left into it, turn right, make the next left, go to the end of the hall and turn right by a chair. Stop just short of the main entrance on the left. Make some noise and crouch against the wall. If the outside guard comes to the doorway to investigate you can snag his purse and when he's gone back outside, you can run out the door behind him to end the mission. If he doesn't come far enough in for you to get his purse, you can follow behind him and lift it a second or two before the mission ends. Top
Rope arrows: 7 (Reusable, 2 found during
gameplay) 1. Read the papyrus on the ground under the light and learn that the device in the house to your left is a power grid control box. The left lever is the only one that will move. Pulling it down turns on the street lights for this section of town. Pushing it up turns them off. Make sure the lever is in the up or forward position. Head east over the pile of rubble past the light and turn right. 2. Climb over the rubble in front of you and make your way to the back corner. Crouch down and find the plate (50) under the building. Go back over the pile of rubble and go straight (north) past the rubble on your left, down a wall and make the next left. 3. Follow the path around the next right then walk up to the ground light and bear right around it. Make the next left and you'll see a large paved incline. Go up the ramp and all the way to the wall. At this point wait for, or attract the attention of some Undead here. Get them to chase you. Go right and continue until you see the DePerrin street sign on the ground (should be on your left). At the sign make a hard left. You'll see another power grid control box and just past that a patrolling Burrick. Run toward the Burrick and let it and the Undead battle it out. All you have to do is find a dark spot to crouch in until the fights over and the Undead leave. 4. When the battle's done go north to the end of the lane the Burrick was patrolling and turn right. Climb up on the machine, then mantle up on the ledge on the north wall. Walk to the west end and pull the lever. Go to the other end and climb the ladder into a room. Collect 2 fire arrows, 2 water arrows, and a breath potion. 4. Get ready for a long swim. Swim into the tunnel at the far end (east). When the first right turn comes up surface for some air. Take the right tunnel (south), then at the next intersection turn left and get a pouch (150) from a skeleton at the bottom of a grate. Do a 180 from the pouch and go down down a long tunnel (you may be needing to use the breath potion here) where, if you're quick, you can pick up a moss arrow. At the end go left and surface. You're in a room with some strange creature pacing the north end and a pillar in the center of the pool. Climb up on the pillar. Watchman's Grave1. Face north. The walkway juts out toward you in a sharp point. Jump over there and pick up a key. Turn right (south) and creep to the end of the walkway and look up. Shoot a rope arrow into the upper edge of the beam running along the south wall. Get it as close to the upper edge as you can else when you get to the top of the rope you won't be able to jump from the rope to the beam. Once on the beam retrieve your rope arrow. 2. Go north along the beams into the other part of the house and find a door. Pick the lock. There are at least four Undead outside pacing the street. Sneak in the first door on the right and get some gold (250) from a chest inside the door. Go into the tunnel at the back of the room and turn left. 3. Take the first left and go up the stairs into the tower. At the top shoot a rope arrow into the ceiling and climb up. At the top, retrieve the rope arrow and get a fire arrow by the chair in room center. Jump through the left (north) window to a ledge on the building across the street. Pick the lock on the door and enter. Follow the hall through another door. Below in the east side of the courtyard is the Watchman's grave. At ground level, on the north side, is a hallway with two spiders inside. 4. Work your way across and down the timbers to the grave. Look at the tin cup, or whatever the item is that's on the grave. Use the coins you brought with you to put on the grave. The only indication you get that anything happens is that the coins disappear from your inventory. Market Street1. Climb back up the timbers into the tower and go back to the ledge over the street. Walk out onto the metal sign hanging just below the ledge. From the end of it you can drop to the street without suffering any damage. Turn around and go into the lower level of this building, turn left and get gold (350) from the blue chest. 2. Turn around and go east (still inside the building) and take the first left, then the next right and drop through a hole to the basement. Exit out the east side. Go to the dead-end and climb the ladder. At the top face south and jump into the passage. 3. Ahead on the left is a small drop into another room patrolled by a spider. Kill the spider with a broadhead to the fat part of the body. Drop into the room and go right and get some gold in the corner (400). Go (east) into the room the spider was guarding and find a healing potion. Come out of the spider's room and turn left (south) and go up the small ramp into a hole. 4. Ok. Now we get to let the Undead do some more work for us. The footsteps you hear outside belong to patrolling Burricks. Down the other side of the hill and left is an area dominated by a bridge and a room with a pool. There are four or so Burricks and a nasty big spider patrolling here. We're basically going to run around and attract the attention of the Undead in the part of town we just left and lead them to the Burricks here. 5. Mantle to the top of the south side and crouch and watch the Burricks pass below. When it's clear run down the hill and turn right. Run down Market street to the end to get the Undead's attention, then turn around and lead them back to the mound. Go south past the mound, jog left and go over the bridge. Just past the bridge take the first left, skirt the puddle in the street and go straight into a rectangular opening. Turn right and walk up the incline. At the end of the street (Auldale) there's usually at least one Burrick. He's covering a doorway we need to get into. Anyway, the idea is to keep leading the Undead into the area between the mound and Auldale street until all the Burricks are dead. Later you'll be working in this area awhile and this way you won't be dodging Burricks. The Cathedral1. After the Burrick clean up go to Auldale Street and enter the door at the end of the street. Creep ahead (east) and you should near an intersection with a street sign on the right; Cathedral Street. There's a Hammerite ghost patrolling here but he's easy to get by. When his back's turned run into the left entrance and up the stairs to the Cathedral. The golden plaque over the door reads:
2. Go around the east side, pick up some fire arrows, and continue to the back of the Cathedral. Mantle up the back wall to a window and listen to the Eye's message:
Your mission objectives change. You now have to follow the Eye's instructions on how to get inside the Cathedral. The Keepers' Grotto1. Go back to the Hammerite ghost, turn right and go back through the opening that leads to Auldale street. Go straight west down the short section of Auldale street and into the square opening of a fallen tower. Go down the incline to the bottom and get a gem (500). Exit the tower through the rectangular hole in the south side. When you get to the puddle, turn left (east) and walk into a new area. There's a chest near a pillar on the left that contains gold (600). 2. Go back toward the bridge and take the paved walkway heading south, either just before of just after the bridge, depending on where you were when the battle ended. Go into the Keeper's Grotto - a room with a pedestal in the center of a pool. 3. Shoot a rope arrow into one of the overhead beams and climb up (retrieve your arrow), walk the beam and jump down to the pedestal. Get the Holy water from the chest and the healing potion next to the chest on the floor. Stand on the metal key-shaped thing and face the statue in the far wall. Light the torches on either side of the statue with fire arrows. A panel to the right of the statue opens. Jump from the pedestal to the walkway around the room and enter the passageway. 4. Follow the passage to a door flanked by two ruined statues. Pick up statue pieces and put them on the right pedestal to open the door. Jump up on the left pedestal to open the bars and run through the opening before they close. Pull the switch on the left (facing the way you came) inside door frame to keep the bars open. 5. Run down the stairs and to the right. Quickly pick the lock on the door and go inside before the moving wall behind you crushes you. There are two doors in this room, one to the east (left), Keeper Andrus's library, and one to the west (right), Keeper Lukas's library. The right can't be opened yet, but behind the left are two parchments and two keys; one gold, one stone. You learn the Hammerites have two Talismen, Earth and Air, and Keeper Andrus has hidden the other two, Fire and Water. The gold key opens the other door, Keeper Lukas's library. 6. Enter Keeper Lukas's library and read the book on the table. It says you must use the Portal Key, which you just got from the other room to get the Elementals of Fire and Water and the Hammerites have the other two. Look at the table. It's a map showing the location of the four Talismen. Fire and water seem to be in "New Market" and the other two seem to be "Down Towne". Your mission objectives change. You now have to find the Keeper's key, which you just got from the other room. All that's left now is to finish getting 2000 loot and find and steal the Serpentyle Torc. Burrick Caves1. Well, where there's Burricks there's caves. Go back to the Grotto and exit. Go left (west) over the bridge. Stop on the bridge and look up. Use a rope arrow to climb up into the opening. Get goodies (800) from the right end. Climb back down to the bridge, retrieve your arrow and continue. 2. Walk around the hill of rubble and instead of going up the street to where the Undead are, go left (west) into a cul-de-sac. Pick the lock on the door at the end and get a breath potion. 3. Go behind the wall in the southeast corner of the area. There's a hole with a wooden beam over it. Use a rope arrow to climb down the hole. Retrieve you arrow before you get to the bottom and fall the last few feet in safety. 4. Follow the tunnel to a room with a piece of machinery and go into the tunnel at the west end. Walk into the water and follow it to an intersection that runs east and west. East (left) is a dead-end, so go west (right). Follow it until you find the gray stone entrance to Burrick land. 5. Follow the tunnel. There are many shallow openings left and right. You can hide in them when you hear Burricks coming. Go to the large cavern at the end and search the corners. You find 3 gold cups, a pouch, and between the pillars in the cavern center; a key, a rope arrow and a noisemaker arrow. Total loot should now be 1040. 6. Go into the tunnel leading up in the south side of the cavern. Follow it to a moss-covered ramp that leads into a room. Cross the room, get a cup (1065), and go into the shadows in the tunnel entrance at the far side of the room before the insect-man (or whatever it is) sees you. When he does come by you can blackjack him easily. 7. Go to where the tunnel splits and take the left fork (north). Follow it to a room with rotting barrels. Immediately to the left of your entrance is another tunnel out. Go to the far end of the room, get two water arrows, then use the exit. 8. Follow the tunnel to an octagonal pool. Search the edges of the pool and find two moss arrows, and in a pile of bones, a golden hammer (1140). At the bottom of the pool there are two water arrows. Go back through the room with the barrels and follow the tunnel until it forks. Turn left (east). 9. Follow it to a room with a hole in the ceiling. Shoot a rope arrow into the edge of the hole, climb up and retrieve the arrow. Climb over the rubble to the right of the door and enter another room with a beam laying across it. Climb up the beam to what's left of the next story and find gold (1190) in the left hand corner under a pipe. Rubin Street Again1. Go back to the hole in the floor where you entered this building and cross the street (east) into the next building. Go straight to the east wall and turn left. Go to the end and exit through the hole that's right. Go up the stone ramp and turn left, make he next right (north), go over a small pile of rubble and turn left. Walk to the ground light and turn right and pass under a leaning wall. 2. Continue until you pass another ground light on your right, go through a hole in the wall and into the first door you see. Just inside the door, on the right, is a ladder. Climb the second floor and walk out on some beams on the south side and get a plate (1240). Go back to the ground floor. Exit the building and turn left. Go to the next intersection. The sign says Rubin street. Go east (left). 3. Pick the lock on the first door to the right. Walk up the beam that has one end in a puddle. At the top get a broadhead arrow and a vase (1340). Go back down, exit the building and turn right. Go to the next ground light and turn right (Cathedral street). Cathedral Street1. Go east to the wall, and turn left. Follow the street until you see a building on the left with a barber pole hanging out front. Go inside and find a vase (1440). Go back to where you hit Cathedral street and turn right. Go to the wall and turn left. Follow the wall through a very narrow place. At the end of this place is a space to the left with some crisscrossing beams. Mantle up on a beam and walk to the right end for some goodies (1490). Go north from here into a courtyard. 2. Go in the door in the north wall. Pick the lock on the door in the west wall and get a gem (1590) from a niche in the wall inside. 3. Go back to where you hit Cathedral street in step 3 of "Rubin Street Again" and turn left. Go past the door on the left that you picked and go straight (west) to the next intersection, Rubin street. Go right (north). Go to the end of the street and turn left (west). Keep the wall on your right until you pass under a leaning wall with a ground light and an intersection on the other side. Turn right and head west straight across to the wall. Off to your right is the grid control where you had the Undead kill the Burrick near the beginning of this mission. At the wall go right between a green slab on the left and a ground light on the right and around a corner to the left. 4. Go south around a corner, up a steep ramp, turn right at the top, then left into a roofless building with a door at the south end. Pick the lock. Stay to the edges of the room, the center is booby trapped. Go around the left side, hugging the wall, and collect a noise arrow and a flash bomb. Continue to the two chests and get a mine and a rope arrow. Still, hugging the wall, exit the room. 5. Head north straight through the roofless building and into a doorway that has a ground light to the left. Turn right up the small ramp and pick the lock on the door. Go to the far end of the room and get a breath potion from the chest and some fire arrows from a niche in the north wall. 6. Two rubble piles are west of the door. At the top, between them, get some gold (1715). Head back toward the stairs. Behind the two barrels in a shallow depression just left of the stairs, you can find a healing potion. Go down the stairs and straight ahead. You should see an overturned cart next to the wall. Also a stone ramp leading down is to the right. Enter a room to the left of the cart. Shoot a rope arrow into the ceiling beams and climb up. Follow the corridor to a noisemaker arrow and a gold vase in a niche (1815). Climb back down and retrieve the rope arrow. The Serpentyle Torc1. Turn sharp right from the building and go north and follow the path to where the dead Burrick and the power console are. Go to the console and face south. 2. Go south between the pillars, past street sign (DePerrin) on the ground, to the wall and turn left (east). Go to a pile of rubble, turn right, then left, and go across the top of a ramp and left again (north). Go a short ways to Rubin street and turn right (east). Go to the end of street and turn left. Follow the street to the wall, turn left, then right into a courtyard and go through the door in the north side. Exit the room through the east door. Once outside turn north to the bridge. 3. To the right of the bridge across the canal there are two buttons. Use a broadhead arrow to push the bottom one and lower the bridge. 4. Cross the bridge, turn right and go up the hill. Face downhill and jump to the top of the section of wall where the bridge switches are. Turn left and mantle up to the top. Turn right and cross the top of wall (west and toward bridge). Jump the gap and then jump into the opening and go to the door. Pick the lock and exit the room on the opposite side. Go down the steep steps to the street. 5. Go down the street to the mansion. Move the doormat and get the key underneath. Once inside creep into the room on the right. Use two flash bombs on the unearthly guard. Exit to the entrance and pick the lock on the door to left of main entrance. Get some loot from the table (1865) and a moss arrow from the chest. 6. Head back to where you flashed the guard and head upstairs. At the top use two more flash bombs on the dude there. Go left into the room and turn left. Pick the lock on the chest and get Holy water. Get the Serpentyle Torc from the chest by the bed. Top
Broadhead arrows: 4 You should buy at least two gas arrows before you start this mission. Entrance To The Lost City1. Walk down the street, turn the corner to the right and go all the way to the end of the street. Enter the waterway and let the current carry you to the west end by a ladder. Use the stone key you found in the last mission on the gray plate you see in the north wall to open a passage beside it. 2. Swim in and immediately surface. Let the current carry you to the end of the air pocket then swim down and follow the tunnel. When you come to an enlargement of the tunnel with an obstruction on the left, swim straight up into another air pocket. 3. Get your breath and face south, Dive straight down, under the obstruction, and turn right (west) and head down the tunnel. Towards the end you'll see two pillars. Just past and to the left is a hole in the floor with bubbles coming up from it. Swim into the hole and follow the tunnel. 4. Surface soon as you can. The current is very swift and you must mantle up on the right-hand ledge (very difficult) before you're swept over a waterfall. If you're swept over the waterfall, you can climb out and mantle up some ledges to the top. 5. Go south a short ways along the ledge to an open area where some white spiders are. These guys are tough hombres. They get on your head and you can't shake them off. Once they start chasing you they'll be on your trail forever. Get past them and jump across the waterfall to the east side where there are, of course, more spiders. 6. Follow the path down the ledges toward the bottom of the falls. Stop on the next to last ledge. The last ledge has a single spider on it. Shoot a broadhead into the stone of the ledge to make some noise. In a few seconds not only do more spiders come out, but their Mamma as well. Shoot a gas arrow into the middle of them and that's that. Drop down to the ledge. 7. Go in and take the left tunnel. Follow it past the little squirting lava trap and go until you come out on the roof of a building - the library. Follow the roof until you find the hole. Drop through. Since we're underground, guess what - the Burricks are also. Notice the library is very energy efficient. The lights come on when you enter a room and go out when you exit. 8. There are three doors. Go in the left door and find two goblets on a window sill (30). Exit and go through the middle door. Go to the second room and drop through one of the windows on the left. 9. At the bottom, turn north and walk around the right hand side of the center torch-lit column to a short ramp going down. There are lots of Burricks around and with the automatic lights, sometimes it's just best to run past them when you can. Read the book on the left ledge and go down the ramp. Turn right at the bottom then right again. Go down the ornate stairwell. If you bought two gas arrows during the equip phase, you might consider getting the Burricks grouped together in here and using the second arrow on them. 10. Follow the stairs to the bottom and turn left at the intersection. Go straight (west) to the end and turn left. Follow the corridor to a room with some goodies (270) and a scroll. Return to the top where you landed when you dropped through the window in step 9. 11. Go south through the opening in the wall and turn left. Turn right at the obelisk. This is the beginning of the residential district. Residential District1. When the Burrick patrol moves off, go up the ramp and mantle up on the first building on the left. Through the window you can grab some gold (295) and above and to the right, on top of the wall, you can look up and get a fire arrow. 2. When the coast is clear, jump off the building and continue south up the hill. Take the next left and go to the end of the street and enter the door of the house on your right. Go up the stairs and get a plate (345). 3. Exit the door and go straight (north). Take the next right and go downhill through an arch to more buildings. Turn left into the narrow space between the two gray buildings. Walk up the incline at the back, turn left, and just before you start to slide down, mantle up on the roof. Face the other building and run/jump/mantle up to the roof (Yes, Garrett can do it! Not as pretty as Lara, but acceptable). Run and jump to the yellow-green building across the street. Drop through the hole in the roof and get 3 fire arrows. Jump out the window to get back to the street. 4. Continue east to the next intersection which is full of lava. Turn left and walk to the building with the broken bricks around the balcony. Climb up there by going up the slope in the left corner between the building and the stone. Go down in the basement and get 4 fire arrows. Go back up to the roof. Stand on the brick railing around the balcony and mantle up to the roof. Go from roof to roof along the house until you get to the last house in the south corner. Jump from this roof into the tunnel. 5. Follow the tunnel up to a vantage point overlooking a city square. The two fireballs circling the obelisk are Fire Elementals. One hit each from a water arrow will make them history. 6. Now we need to let the Elementals take care of some Burricks so we can get some loot. When the Elementals exit the square to your left, climb up on the railing, turn left and walk around the corner to the right and face the square. When the Elementals come back and are passing the obelisk going south, shoot a broadhead arrow into the farthest west corner of the square. You can barely see the edges of some buildings there. When the Elementals go over there to investigate they'll find the Burricks. If the battle spills out into the square, you can shoot one of the Elementals and let the other fight the Burricks. But don't get greedy. While the Elementals (or the remaining Elemental if you shot one) is busy, walk along the railing of the overlook until you can drop to the square without falling in lava. 7. Exit the square through the south side. Go up a ramp and turn right by the lava pit. Go down a short ramp and follow the tunnel to a set of stairs. At the top of the stairs follow the path around until it enters the rear of a building. there is a small lava pit on the left. 8. Follow the path through the building until you go up a short ramp. The path goes to the left and on the right is a sort of balcony that overlooks some houses. Look over the balcony. The low building straight ahead is where we need to go to get some loot. Mantle up the wall on the left and turn right (east). Jump across to the roof of the adjacent building. Jump to the building on the right, then to the ground and enter the building and collect the loot (445). Go back to the balcony and head west down the path. 9. Follow the path until it splits but keep going straight (west). Go forward to a break in the wall. Two Elementals patrol here. They will appear from the left, turn and go down to a lava pool then come back and disappear back to the left. After they've gone, climb through the break and crouch against the left wall close to where the Elementals appeared. When they come back, quickly shoot them both with water arrows. 10. Turn left and go in the direction the Elementals came from. Go past the small obelisk with a sheaf of wheat on it and through a narrow space between the wall of a building on the right and the cavern wall on the left. The Civic Center1. Immediately turn left and go to an old campsite. There you can read an interesting entry in a journal about part of the expedition heading toward a tower. Exit the campsite through the gates to the south and go to a building with an obelisk in front of it. This is the civic center. 2. Creep into the entrance of the Civic center. There are two Elementals patrolling here. Splash them with two water arrows and collect the 23 blue gems on the walls around the entrance. There are 22 on the wall and one on the floor. You loot quotient should now be 790, 545 of that in gems. This satisfies the gem part of the quotient. 3. There are two exits on the west side of the entrance. Take the one on the right and go up a ramp into a kind of theater. Climb up on the stage and collect two masks (1030). Climb to the top of the seats and go left. Follow the passage until you get to a small room with a low wall in front of you (south), a doorway to the west and a low entrance to your immediate right. Go into the low opening and get two fire arrows. 4. Go back to the room and go through the door, turn left, go past a door on the right, then left again and go up a small ramp. At the top of the ramp turn right (south) and follow the passage down a short flight of stairs and find a scroll. Read about the Guild of Enlightenment vowing to protect their Tower at all costs. Backtrack and go through the door you passed at the beginning of this step. 5. You are now back in the entrance of the Center. Turn left (south) and go in the next door on the left and go up the stairs. Follow the corridor until you come to a narrows with a window on the left and right. Walk forward into the next room and turn left into another. In this second room find and read a scroll about the new Emperor closing the Coliseum for a year and a day to mourn the loss of the old Emperor. Go back to the previous room and exit through the door in the corner of the south wall. 6. Follow this long corridor past a doorway on the right (north - it leads to the theater in step 3). At the end of the corridor turn left and climb through the hole in the wall and follow the trail up and away from the civic center. The Talisman Of Water1. Follow the path around a walled opening (it's the ceiling of the civic center) to an obelisk on your left and a row of small crypts. Turn left and go down the row of crypts. The last crypt in the row is leaning and is lower than the rest. Mantle up to the roof of it. Head east and start jumping from roof to roof until you come to a lava flow. Follow the lava flow, still jumping from roof to roof, until you come to an old campsite. 2. By the skeleton you'll find a pouch (1100) and one of the Keeper Medallions. There is a scroll that tells you the tomb you are about to enter is trapped and an expedition journal telling about an attack on them by Fire Elementals. Continue south to the stairwell that enters the crypt. 3. Walk down the stairway until you come to an open shaft with a large torch on the opposite side. You can run and jump across this shaft. On the other side of the torch is a doorway. To the left of the doorway is an alcove with a hole in the floor. Climb down the ladder in this hole and follow the passage. Crouch and creep down this passage so any sprung traps will miss you. 4. You come to a small room with six pillars in it. The south side (forward) opens into a room with a sarcophagus and some other things. There are two doorways on the west and two doorways on the east walls. 5. The first rooms on both walls are empty. Go in the second room on the east wall and get a lever from a pedestal standing between two torches. The second door on the west wall is just an empty niche. 6. To the left of the sarcophagus in the east wall is a golden statue in a niche (1200). On the opposite wall is a small room with two more pieces of loot (1240). Swim through the water in the tunnel to the left of the sarcophagus and get the Talisman of Water. The door to the immediate left of the stone coffin leads to an empty room. 7. Retrace your steps (crouching to avoid traps) back up the hallway and back up the ladder. Jump back across the shaft and go up the stairs and back outside. 8. There are Craymen out here now, but just run by them and go back to the abandoned camp and jump the crypt roofs back across the lava and retrace your steps to the Civic Center. There will probably be Craymen at the Civic Center, too. Run by them and exit out into the courtyard and go past the obelisk. The Arena1. Take the first left past the obelisk (west) and follow a gray path uphill. Go left past a large lava pit, left (south) again past two small buildings sunken in lava where the gray path turns into a green path. There are two water arrows on the roof of the first building. Continue to a very narrow bridge. Just on the far side of this bridge, turn left and follow the ledge to get four water arrows. Go back to the bridge and continue until you come to some stepping stones over a lava flow. Use the stones to get inside the building. 2. Turn left and go up the stairs. Follow this path until you come out on the roof of a building with a lava pit on the left and a sort of island in it. Enter the doorway straight ahead, turn right and go into the hall. Enter the first doorway on the left. The Crayman should have his back to you. Blackjack him and get the loot from the window sill. 3. Go into the adjacent room (doorway is east). Collect three more items of loot (1400). Exit this room through the east side and go straight into another. Turn right and collect three more pieces from the corner (1460). Go through the low passage in the east end of the room, climb down the ladder in the hole to a pile of treasure, get four items from the floor and one from the chest (1720). 4. Go back up the ladder to the previous room. Exit the room and go right (north) and make the first right and go down some stairs. Follow the corridor to the large machine. Use the lever you took from the crypt in the slot. It extends a bridge to the island in the lava pit outside. You have to click once to insert the lever and once again to raise it and extend the bridge. 5. Go back to the top of the stairs, turn right and go up a short set of steps, then down another. At the bottom of these steps the corridor to the left leads to the bridge you just extended. It's probably guarded by a Crayman with his back to you. Halfway down the hall is a balcony with a beam across it. Upstairs is another Crayman, but there is also enough loot to satisfy our loot quotient. 6. Turn left and creep into the hall. One broadhead arrow to the head will take care of the Crayman guarding the bridge. Step into the center of the hall, turn and shoot a rope arrow up into the beam. Climb up the rope and mantle up on the beam. The Crayman is probably on the south side. Take care of him with a broadhead just like you did the one below. 7. Jump off on the south side of the balcony, go to the end of the hall and turn right. Go into the room at the end of this short hallway and get three items of loot (1885). Exit the room, turn left and go to the end of the hall into another room. Collect three items from the floor (2075). Our loot quotient has been met. 8. Go back to the north side of the balcony and turn right. Go into another room and get a third golden mask from between two torches (2195). Climb back down the rope, retrieve your arrow and cross over the bridge. The Talisman Of Fire1. At the end of the bridge walk across the top of the wall to get over the lava flow to the next building. Go into the building and head north down a hallway. Go right down the stairs at the end of the hallway. At the bottom of the stairs there's a window. Step down to the ledge below and go left. 2. Mantle up the high step and go right. Take the first stairway on the right and go down to a gray path. Turn left and find the second half of the lost expedition. Here you can collect five water arrows, three rope arrows and the second Keeper Medallion. Read the journal in the skeleton's hand for clues about where the Talisman of Fire is hidden. 3. Continue down the path until you come to the end where there's a statue in a lava pool. To the right are a yellowish building and a gray building. Go in the yellowish building and shoot a rope arrow into the ceiling beam. Climb up and jump to what's left of the second floor. From there you can run and jump through an opening to the roof of the gray building and from there to a ledge on the other side of the lava pit. 4. Follow the ledge. Mantle up onto a window ledge in the tower. Turn half-right and look down. Below and to the right is a triangular shaped platform. Jump down there, then jump across to the next platform. Climb the ledge behind that platform and walk across the front of the building (west) to an opening and drop down into the next tower to the ground. 5. There's a Fire Elemental patrolling outside. When it passes, run out the door and into the tower across the way. Take the stairs all the way to the top. In the east corner of the top floor, by a broken chest are some goodies (2370). 6. Climb into the window in the north wall and lower yourself to the ledge outside. Go left (west) on the ledge and around to the center of the next side of the tower. Look up. You should see the ends of three beams sticking out of the wall. One of them should be directly over a window. Shoot a rope arrow into it and climb up. 7. Jump to the window ledge and then jump right into the tower to land on the bottom of the ruined stairs. Go to the top and get the Talisman of Fire. All that's left now is getting out of the city. Leaving The City1. On the way out you will encounter some more Fire Elementals. If you remain stealthy and use water arrows sparingly, you have enough water arrows to last the mission. Go back to the bottom of the tower. When the patrolling Elementals are out of sight, run back across to the other tower, climb the rubble pile inside and mantle up to the walkway. Jump from the walkway down to the gray path. Head south to the tunnel, turn right and follow it back to the campsite where you got the last medallion. 2. Go past the campsite, back up the stairs to the left, turn left and go across the ledge and mantle up into the window of the building. Go right up the stairs, turn left and exit the building. Walk across the wall tops over the lava, go over the bridge and into the Arena. 3. Go down the Arena hallway, turn right, go up the short set of steps, down the second and go left (south). Turn right when you come to a torch on the left, go all the way to the end of the hall, turn right into a room. Exit this room and leave the building. 4. Go west across the balcony to a ramp. Go left up the ramp and follow the path to the stepping stones across the lava. Follow the trail through the tunnel to the courtyard in front of the Civic Center where the obelisk is. 5. Turn left and go through the gates, past the campsite, then left. Follow the path to another obelisk. Go past it on the right hand side and climb through the hole in the wall. Head north into the tunnel and follow it until you come to the buildings again. 6. Turn right and follow the path through the buildings, down some stairs and back into a short stretch of tunnel that comes out in a square with an obelisk in the middle. Exit the west side of the square and go into the residential area. 7. Follow the street all the way to the end then turn right (east). Go to the end of the street and turn left. Take the last left at the end of this street, go to the end and turn right. Go to the obelisk, turn left, then right into the building. 8. Head toward the center of the three torches, then go around either side of it's column. At the intersection turn left and go into a room. Exit this room through a doorway in the left (south) wall. Follow the staircase up. At the top turn right (east) and go past some windows and into a room full of rubble. Climb the rubble and mantle up through the hole in the roof. 9. Cross the roof and enter the tunnel. Follow it back to the waterfall. Top
Gas arrows: 1 I recomment you buy at least one gas arow for this mission Into The Temple1. Before you start read the scroll in your possession. It's your credentials to get into the Temple. It also states that areas marked with an inverted red hammer are off limits to you. 2. Walk down the street until you find the temple entrance, a large gray stone arch, on your left. Walk up to the guard and give him the scroll. He'll open the gate and you can go inside. 3. In the center of the main entrance is a statue of a giant hammer. A small golden hammer is placed just beneath it. Tempting, huh? Don't touch it. The guards will see you and your cover will be blown. 4. There are doors in the east, north, and west sides. If you read the notice posted by the west door, you discover your recent activities involving Cragscleft prison has resulted in a doubling of the Temple patrols. Great. The west and east doors are guard's living quarters. If you enter, a guard inside tells you novices are not permitted there. 5. Go through the north door. Reconnaissance1. Just through the door, a hallway crosses left and right with a door in each end. If you continue forward you go into what we'll call the main stairwell, for lack of better words. It's a large foyer with doorways in the east and west walls, doorways in the northeast and northwest corners, and a set of stairs going down in the center. Turn right and go through the door at the end of the hall. Once inside turn left and go to a table in the northeast corner. Take the scroll. It's a copy of the Wallbuilder's prayer. You'll need it later. 2. Exit the door in the southeast corner of the room and follow the golden tiled floor to another door. The balcony on the right overlooks the garden. Go through the door and you're in the Reliquary; a shrine where sacred relics are kept. 3. By the north wall are three pedestals. Go there and read the plaques on the wall above each pedestal. The hammer on the center pedestal is "The First Hammer". The one you'll eventually steal. Exit through the door to the left of the pedestals, go straight across the narrow hall through another door, across the south end of the Main Chapel, through another door and across another narrow hall into the library. 4. From one of the books on a table, you learn that only Priests are allowed keys, and only the High Priest has the master key. The door close to the library entrance is marked with the inverted hammer. It's also locked. When the patrolling guard leaves the library, pick the lock. It takes awhile and you have to switch back and forth between your picks several times. Go inside and shut the door. Get some loot from the shelf on the left wall (100). The lock on the chest can't be picked. 5. Exit the library, turn right (south). Go to the main stairwell and go down the stairs. At the bottom of the stairs go right. Ahead is an "off limits" door. Wait until all the guards have exited the area, or are looking elsewhere, and enter the door and close it behind you. Pick the lock on the chest and get a pouch (200). Get a key from the table by the bed. 6. When there's no noise in the hallway, leave the room and shut the door. Go back to the library. Whack the guard when he comes into the room and turns his back. Dump his body in the forbidden room and use the key to open the chest. The scroll inside tells you that to get the Talismans there are 5 locks that must be released with 5 minutes. Their locations are:
Ok, that means a lot of running around. Find all those within 5 minutes and collect loot, too. I don't think so. First, lets get some loot. Lower Floor1. There are too many guards around. Let's decrease the numbers a little - and get some loot. Go back downstairs to the door you entered to get the key. Turn right and go into the narrow hallway lined with doors (Priest's quarters). Go to the south end. There's an intersection there - a hall goes left and right and straight goes into a dining room. Post yourself a step or two inside the east side of the intersection facing west. When a lone guard comes by and turns north (to your right), follow him up the hallway and blackjack him. Open the first door on the right, pick up the body and go in the room. Dump the body and close the door. Get a key from the table and a healing potion from the chest. 2. When the hallway sounds clear, exit, close the door, and go back to your ambush point. Repeat your performance until you have four unconscious guards piled in that one room. Now for the High Priest. He's in the room across the hall from where you've been stashing the guards. 3. Through the window in the hallway you can see the High Priest pacing in another room. Walk down and open the main door to the room and stand there looking into the room. Soon the High Priest will walk by. You'll know he's coming because his footsteps will change to sound like someone walking on a carpet. As he passes, walk in the room behind him and blackjack him. Too easy, huh? Now close the door. Get loot (250) from the top of the bookcase across from the door. Get the hammer (needed later) from the shrine in the corner, gems from the chest by the painting (350). Go into the next room and from the table get a hammer (435), a bottle of wine (475) and the master key to the entire Temple. 4. Exit the High Priest's room and go left. Enter the first door on the right. Get wine (525) from the chest and jewelry (650) from the bookcase. Exit the room and go right. Go down the hall, turn left and go past the staircase. Enter the first door on the right and get a pouch (750) from a chest. Exit the room and turn right. 5. Enter the next room on the right. From the bookcase get another key and a golden goblet (775). Exit the room and go right. Go to the end of the hall and turn left. Go to the dining room and get three bottles of wine (925) from the table. Now you're back where you started the looting spree. Location Unknown1. Exit the dining room and head north all the way to the end of the hall and enter the sparring room. Walk right around the sparring ring, past a shelf on the wall, turn left and go down the narrow stairs in the far west corner. Follow them all the way to the bottom and crouch in the shadows near the intersection. When the guard walks by whack him and dump the body in the shadows. 2. Go west from the intersection and make the first left. You should now be hearing another guard. Go straight through the next intersection and get some gold (1025) from the top of a crypt on the left. Turn around and go north from the crypt, take the first left. At the end of the corridor, by a light, turn right and creep up the incline and blackjack the guard. Get gold (1125) from the crypt behind him. Go west into the corridor the guard was facing and get more gold (1225) from the crypt there. 3. Go back to where the guard was standing and go north, around a corner to the left and get loot (1325) from a crypt on the right. Go back to where the guard was and continue south to the bottom of the ramp and turn left. Go straight to the end and climb the stairs on the right to the storage rooms. Storage And Treasure Rooms1. You should be facing some barrels. To the right is an exit to a hallway. Wait until the patrolling guard passes going to your right. Walk out behind him and smack him. Pick up the body and go north, around the corner to the left. Drop the body, pick the lock on the door to the left, take the body inside and close the door. It's a treasure room. Open the first chest on the left and get a pouch (1425). The next chest yields another (1525). The last in line yields some gems (1625). The gold on the floor brings the total to 1996. We still need over 400. Go into the other section of the room and turn left. It's the old kitchen. There, on the right wall, between the oven and some shelves is one of the switches. Remember this location. We'll be back. 2. Go out of the treasure room and go right, around the corner (south) to the next corner, and go right again (west). About half-way down the hall on the left is a room with orange and black carpeting. It's the Inquisitor's. He's asleep inside. One of the switches is through there. You'll be back later. 3. Go in the room at the end of this corridor and turn right. In the other room turn left and go up the stairs. At the top go straight (east) down the hallway and soon you're back in the Priest's Quarters. Take the first left (north) and go all the way to the end and back into the sparring room. Turn right and cross the room and exit into the garden. Walk straight across to the east wall and turn right. Walk about half-way down the wall behind the trees and look up. You should see the switch. Leave it for now. Go back to the training room. Audacity1. Exit the training room through the first left. Go up the stairs to the main stairwell. There's a guard that patrols here. Introduce him to your blackjack and stash him in the forbidden room in the library with the other guard. 2. Leave the library and go right, across the main stairwell and back into the foyer where you first entered the temple. Walk around behind the guard standing in the corner looking at the Hammer statue. Blackjack him (yep, you can do it and the dude outside won't hear a thing) and stash his body behind the pillar. Creep outside and knock the other guard unconscious. Stash his body in the same place. Now take the little golden hammer (2071) from under the large hammer sculpture. 3. If you didn't equip yourself with a gas arrow at the loadout screen before the mission, you can skip this step. Go back to the library but go through the other door into the back of the main chapel. Position yourself at the back so you're looking straight down the aisle between the pews. Draw the gas arrow. Soon as you do, the two guards by the altar will see you. To get to the closest alarm button they have to run up the aisle and turn left in front of you. When they're bunched together coming down the aisle toward you, fire the gas arrow at their feet and both should fall unconscious. Take the golden hammer (2146) from the altar. Hide the bodies in the library. Getting The Talismans1. Go back downstairs to the sparring room and exit through the door in the west side and enter the graveyard. Go straight to the tomb ahead of you and take the urn (2246). Turn left and get an urn (2346) from the next tomb. Continue down the walk and take an urn from each of the tombs. Your loot total should now be 2646. Enough. Go back to the next to the last tomb. Go inside, look up. There's the switch. Flip it. We've got five minutes to flip the other four. 2. Go back through the graveyard and into the sparring room. Go straight across the sparring room and exit the other side into the garden. Go to the east wall, turn right and go about half-way. Look up and flip the switch. 3. Go back to the sparring room, exit and go up the stairs to the main stairwell. Turn hard left and enter the narrow hallway, turn right at the end into the reliquary room. Go behind the guard, blackjack him, turn and get the First Hammer from the center pedestal. Turn right and flip the third switch which is on the rear of the pedestal holding the skull. 4. Exit the reliquary room and go back to the main stairwell. Go down and turn right. Turn right again and go down the hall to the dining room. Turn right at the dining room and follow the passage all the way to the end and go down the stairs. Turn right at the room at the bottom and go into the hall. Go left down the hall and around one turn to the right. Go inside the treasure room on the right, to the back section and flip the switch between the oven and the shelves. 5. Exit the treasure room and go right. Make two right turns and go to the door of the Inquisitor's room, turn left and go inside. Creep by on the carpet and he won't wake up. The floor of the torture chamber is metal. Go slow in there so footsteps won't rouse him. Once inside turn right, go to the left side of the rack and flip the switch behind it on the wall. Sneak back out the way you came and go into the hallway. Turn left, make one right turn and enter the first door on the left. Go back up the stairs. At the top turn right (south) and follow the corridor until you come to a doorway on the right. 6. Go inside. Since you're carrying the hammer from the High Priest's room, the red bridge extends when you near the edge of the ledge. Cross the bridge, enter the cell on the left and pull the lever to open the cell containing the Talismans. 7. The Talismans have a lethal force field around them. To turn it off, stand in the cell with them and read the Wall builder's prayer - the scroll you got at the very beginning. When you do this, the force field goes off and the alarms go on. If there are any guards left conscious :-), you'll have to run for the exit. Leaving The TempleYou'll also notice the bridge has retracted. Jump down to the floor and exit through the door in the northwest corner of the room. The corridor leads back to the torture chamber and through the Inquisitor's room. Back in the hall outside the Inquisitor's room, turn left, make one right turn and enter the first door on the left. Go back up the stairs. Go straight down the corridor and make the first left. At the end make a right, another and go up the stairs to the main stairwell. Go straight, through the door into the main entry foyer and out into the street. Top
Flash bombs: 4 Note: I found this level extremely difficult due to the number and concentration of enemies and the scarcity of weapons. I highly suggest you outfit Garrett with at least 4 flash bombs and as many fire arrows as you can afford. I could find no flash bombs during gameplay. Also, the Equipment expended listing is not accurate due to the memory loss caused by multiple instances of cussing, hair-pulling, and chair-kicking the many game restores caused. Was this mission hard, or was it just me? :-) Into The Cathedral1. Use the proper Talisman with the proper statue to open the Cathedral doors and go inside. Turn right and go through the door there. Once inside the small room, turn left and exit through the door in the opposite side of the room. 2. Go down the hallway and pick the lock on the first door to the right. Get the goblet in the far right corner (15). In the far left corner read a note about the Eye seeming to have a mind of its own. 3. Exit this room, turn left and go back to where you entered the cathedral. Ignore the double doors and enter the door on the west side of the entryway, turn right and enter the door leading to a hallway. Pick the lock on the first door to the left. Get the two golden candlesticks (115) in the south end of the room. Return to the hallway and go left (north) and through the door. 4. This room has several baddies. North and east from your door is the altar, a giant hammer - what else. It's flanked left and right by two huge pillars. The eye floats about ten or fifteen feet above the altar. To the right rear of the altar is a door. That's our goal. However, just to the right of the hammer and against the back (north) wall is an Undead. Crouch and creep across the room to the left pillar, up the shallow steps toward the hammer. Keep slightly left of the hammer to avoid a pool of light. Once at the top, turn right and creep across the top step in front of the hammer. You can pass right under the nose of the Undead who doesn't even notice when the door is opened. 5. Once in the room you can right click on the fountain and the water stops. You can't restart it but it will automatically flow again after a few minutes. This heals you! In one corner of the room you can find some Holy water. 6. Exit the door and do the creepy thing across the front of the hammer to the door on the other side of the altar. Once inside the door, if you turn right (north) and go toward the door there, you'll find a red journal in the right corner beside a seat. It tells of a novice who reportedly saw Brother Murus' ghost in the graveyard a week after his burial. If you try to exit the door, the Eye speaks to you and chides you for leaving when it is "almost within your grasp". So, don't go out there yet. Instead, go straight from your entrance to the end of the room. Turn right and go through the door there. Cathedral Basement1. Go down the stairs, through the door at the bottom. Don't flip the switch on the left, It turns the lights on. There is an Undead and an Apparition patrolling this area. Go down the narrow hallway and into the water. Turn left and go up a short step into another hallway. Follow the hallway and take the first left (north). Follow the corridor to the end and pick the lock. Inside the storage room turn left and get a bottle of wine (165) from the shelf. Continue between the shelves and find the body of Brother Renault on the floor. On the shelf to the right of the body get two bottles of wine (265). Exit the room and go back to the intersection of the corridors. 2. At the intersection jog around to the left and head south into the water. Off to the left on the floor is a tile more greenish than the water. Don't step on it. Whatever it triggers kills you instantly. Walk straight into the flooded room. Just off to the left is an enclosure with waist-high walls. Enter there. From the shelf on the right side get a candlestick (315). 3. Exit the enclosure and go left (south) to the end of the room, turn right and follow the corridor around to another room. Just inside this room turn left and go down a long hall. At the end get two gems (415) from the shelf on the right and eight stacks of coins (476) from the shelf on the opposite wall. Go north back down the corridor and turn left. 4. At the end of the corridor make a hard left and look up on the wall to the left of a light fixture. There's a switch labeled "ON" and "OFF". We need to put this switch in the "ON" position. It turns on the power for the complex. There's an elevator we need to use later. As soon as you flip the switch machinery starts and alerts the patrolling bad guys, so flip it, turn northwest and run down the corridor (north). Go straight across another water-filled room to the door and exit to the stairway you used in step 1. Now go all the way to the top. Get The Eye1. Go in the door at the top of the stairs. Get a moss arrow from the chest on the right. You can't open the steel door (armory) on the left, so go through the wooden one on the right. Walk across the beam and into a room. Get some loot (576) from the chest. Continue through to another room and get some gold (601) from another chest. 2. Exit the door in the end of this room and walk across another beam into a room. Turn left, go through the door into the next room and get a water arrow from the chest off to the left by the bell. Go up the steps to the next door. 3. Walk across this next beam, stopping to get the gem (701) in the center. Get the loot (751) from the table. That's Brother Martello's body on the floor, by the way. Exit the room, walk back out on the beam and drop to the platform below. Pick the lock on the door at the north end. 4. Enter the room, turn right and read the note in the corner. The gist of it is that there's another exit from the cathedral - the Cloister gate. Go to the west side of the room to the ledge. There's the Eye hovering over the huge hammer at your level. Jump to the top of the hammer. It's metal, you make a bunch of noise, plus the Eye starts to flame and that alerts everybody down below. 5. Grab the Eye, crouch and get as close to the west side of the the hammer as you can. All the bad guys will come up and mill around the hammer. They can't get to you, so just wait until the real threat comes - one of the dudes (Apparition?) that throws those exploding stones (or whatever they are) at you. He should come through the door down below on the west side. Soon as he comes in drop three flash bombs into the crowd. That should take care of them all. Note: I tried this step many times before I could kill them all with three flash bombs. It's important here to get them all killed with a minimum expenditure of weapons. There are lots more Haunts and Apparitions in other areas and you need to save some resources for them. 6. Drop off the hammer and go west through the door, turn right and go through the next door. Just inside the garden you'll see the ghost of Brother Murus. He offers to help you if you help him. You don't really have a choice, of course. This cooperation is now added to your objectives. Walk by him, take the first right and drop down a collapsed staircase to the ground. 7. At the bottom of the stairs, he appears again and gives you your first task - to get his rosary. Brother Murus' Rosary1. Head left (north) from Brother Murus and go up the stairs. The plaque left of the door says it's St Yora's. Once inside turn right and go up the stairs, turn left and enter the room. 2. On the north side of the sarcophagus get two water arrows from the lid, then go to the south side of the room and go into the hole in the wall. There are three Undead patrolling this next section. You'll be dodging them while searching and collecting loot. There's not much to say except that you have to be where they're not and you have to be going where they've been. There aren't very many places where your visibility crystal will be completely dark. If you're seen you can run around corners and hide. Sometimes the Undead will follow and sometimes not. They do open doors and enter rooms, therefore, they can catch you in a brightly lit room with no place to go. Not good. 3. Go through the small room and out the door in the south end and go left. After you turn left you'll see a door straight ahead and a hole in the wall on the left. Go in the hole, then right through another hole and left into a hallway. Go in the last door on the right. The first chest only holds a wooden bowl. Ignore it and go into the adjacent room through the hole. From the chest there get a pouch (851). Depending on how long you're in there, you might want to climb up on the bed in the corner of this second room and wait until the Undead comes in and leaves. 4. Leave the room and turn left. Go all the way to the end of the corridor and into the last door on the left just before an obstruction. Pick the lock on this chest and get Brother Murus' rosary. Head back down the hallway (north) the way you came and take the first corridor left. 5. Go to the end of the hall, turn left and go down the stairs. At the bottom turn left and take the first left into a corridor that leads into a room. Sometimes there are two Undead in this room. Take the healing potion from the table, and in the book, read about some explosives stored in the armory. In the northeast corner of the room are two doorways. The leftmost one goes into a kitchen. The right one goes back to the entrance to St. Yora's. We'll use this later. 6. Go through the left doorway into the kitchen. Shoot a rope arrow into the ceiling above the hearth and get a fire arrow that's laying on one of the beams. Climb down and retrieve your rope arrow. Look on the floor by the central work counter and get a golden plate (901). Exit the kitchen and go through the room with the table, down the corridor and turn left at the hallway. 7. Enter the first door on the left and get a gold vase (1001) from a shelf on the left side of the room. Exit the room through the door you entered and go left (east) and into the room at the end of the hall. Exit the room and go back to the room where you read the book on the table. Go straight through the doorway to the right of the one that leads to the kitchen, through the next door and you're back outside St. Yora's. Return to the last place you saw Brother Murus. He now tells you that you must make a holy object. Brother Murus' Holy Object1. Go through the doorway near the broken stairs and enter the Cloister area. There are something like two Undead patrolling here, of course, and two Haunts and an Apparition come in and out of doors and gates. They are hell to sneak around and you could do many game restores here. Turn left in the courtyard, then left again into a door. This is St. Tenor's, the factory. 2. Exit the far side of the room to the corridor, turn left and follow it to a room at the end. How nice of them to leave everything warmed up for us. Read the instructions on the wall to the left of the mold rack.
3. Sounds simple enough. Take the mold on the bottom right, it looks like a hammer, and place it on the pegs. Pull the left lever and the mold should close. Pull the lever on the right and watch the needle on the gauge on the wall to the left. When it hits the red zone push the right lever to stop pouring. Pull the left lever to open the mold and take the holy symbol. 4. Go back to the hallway and head north, through an intersection and follow the corridor around to some stairs. Go up the stairs and turn right. About half-way down the walkway turn left (west) and jump across to the ledge on the opposite side of the room. Turn right and walk to the end of the ledge. There's a chute sticking out of the wall. Jump into it and go outside to the courtyard. 5. Shoot a rope arrow into one of the sides of the shed and climb up. Retrieve your arrow, get the candle and the pouch (1101). Jump back to the ground, climb up the chute and leave the factory the same way you came in. 6. Back in the Cloister courtyard, go through the opening in the east side. Follow the path through a gate you can open. At the end, by huge wooden double doors (we'll be leaving by these doors later), turn left (north) and enter a doorway on the left. 7. Just inside is a low table with a parchment on it. The parchment tells you there's two ways to make an ordinary metal symbol holy: a priest's blessing or another way known to Brother Renault. Well, we don't have a priest and we found Brother Renault's body in the basement earlier. Oh, well, forge on. 8. Shoot a rope arrow into the balcony on the left and climb up. Retrieve your arrow, walk around the corner and get the prayer book on the floor. Jump down and return to where you last talked to Brother Murus. Trip to St. Jenel's1. Brother Murus now wants to meet us at his grave but first we need to do a few other things. Go back into the Cloisters and enter the door directly in front of you, St. Jenel's. Immediately inside, turn left and go through the door in the north wall and get a stack of coins (1126) from a bookcase. Back outside there are two skeletons in the main room. The one closest to the chair has a gold hammer (1201). He doesn't need it anymore. 2. Walk forward and drop down a level to an elevator platform and turn west. There's nothing of value behind any of the four doors, but there is an Undead behind the second one. I used a few game restores here. For some reason, sometimes the Undead comes out of the door after you quickly and some times not at all. I tried to get it done without using a precious fire arrow. Enter the room and face the sarcophagus. Pick the lock of the door to the left and go up the stairs. On the first landing get a moss arrow and a fire arrow. 3. Follow the stairs up to Brother Renault's observatory. Read the book on the table and discover that the Lunar Pool will bestow the Builder's blessings on holy objects immersed in it. Drop your holy symbol in the pool and then retrieve it. It's now the "Blessed Holy Symbol". Mission accomplished. Go back down to the sarcophagus. 4. Go right and go back to the elevator. Push the button and ride the platform to the top floor. Go towards the staircase but instead of going down, hug the left wall and go onto a wide ledge. There's sometimes an Undead guarding the stairs here. Drop down and get the cemetery key from the blue chest and the loot from the table (1251). Run past the Undead and up the stairs to the elevator, turn right, go across the room and exit the door to the courtyard. The Graveyard1. Once you leave St. Jenel's turn slightly right (northwest) and go to the gate in the corner of the courtyard. It's just past the door to the factory. Open it and follow the path to the graveyard. Use the cemetery key on the gate and deal with the Undead inside however you can. I used holy water and water arrows and sneaked by the rest. 2. Inside the graveyard, angle left and go through the doorway in the northwest corner. Keep going straight until you come to an open grave. Read the tombstone. It's Brother Martello's grave. We found his body in "Get the Eye", Step 3. Go east from this grave and you should see Brother Murus waiting for you just through a doorway. 3. He tells you to wave the rosary over his tombstone, place the candle on the tombstone, read the prayer from the prayer book and touch the tombstone with the holy object. His spirit is freed. However, you are not. Remember those two bodies we found; Brother Renault and Brother Martello. Well, now Brother Murus asks us to bury them. Bury Brother Renault1. Brother Renault's body is in the cellar. So, exit the graveyard and go back to the courtyard, then back to the broken stairs and turn right. Follow the passage back into St. Yora's. Head west through the door, across the foyer and into the room where you found the healing potion on the table. Exit from the room through the south doorway, go to the end of the hall and turn left. Go to the end of the hallway and turn left again (north). Follow the corridor back into another foyer and turn east. Go through this door into the garden. You're now on a walkway around the garden. Follow the corridor around to the right to a door. 2. Go through the door, turn right when you can, then right again at the end of the room. Go through the door to the stairway and go down to the basement. Go south through the door at the bottom of the basement stairs. Go to the center of the flooded room and turn left (east). Go into the corridor and take the first left. Follow this corridor to the storage room. Get Brother Renault's body and retrace your route back to the graveyard. 3. After you leave the cathedral and are back on the walk around the garden, take the first right and go back down the broken stairs to the Cloisters. It's shorter than going back through St. Yora's. Back in the graveyard, take the first right and go until you see Brother Murus standing by Brother Renault's grave. Place the body in it. 4. Brother Renault's spirit rewards you by telling you of a room with a mural, and a concealed button in some tunnels. Brother Murus asks you to bury Brother Martello. Brother Renault's Reward1. Go back to the Cloister courtyard and go into St. Jenel's, the place where you found the golden hammer on the skeleton. Go all the way to the back of the room and ride the elevator down. Go past the sarcophagus and turn right. Climb down the ladder into the hole. Of course, the usual warning applies here about Undead and Haunts. Watch out. 2. Follow the tunnel around three left turns then take the first right. Here I had to shoot an Undead with a fire arrow. Follow the tunnel to an intersection, turn left then take the first right into a room. On the north wall of this room is a mural. On the west wall is a golden embossed panel. Go to the right-hand (northeast) corner of the mural and put Garrett's nose right in the corner and look up at the yellow fringe (or whatever the border at the top of the mural is). The hidden button won't light up so you can see it, so just start right-clicking with the mouse and moving your view around. Sooner or later you'll hit the button. You'll hear a loud click and the embossed pane on the west wall will slide back and reveal an opening. 3. Go in the opening and get some goodies from the chest and the shelf: a water arrow, a mine, two moss arrows and a vial of holy water. Now exit the room through the door by the chair (south wall) and go left. Take the first right and head south to an intersection. Go right (west) and follow the corridor until you come to a room on your right. There's one of those skeleton-faced, sword bearing dudes patrolling inside. I had to use a fire arrow on him, too, though it would appear that with the layout of the room and the shelves, you could, if you had patience, possibly sneak around him and collect the loot quietly. Collect two gems (1401) from the shelves inside. On a counter in the far corner is a blue chest. Get a healing potion from the left of it and from the chest itself get a vial of holy water. 4. Exit the room and go right to the elevator pad. Press the button to bring it down. Make sure you step back into the hall so the pad don't crush you. Take the pad up into a bath house. Get three water arrows from the pool. Exit through the door nearest the elevator. Once outside turn left and go through the gate into the Cloister courtyard. Bury Brother Martello1. Go back through St. Yora's and back to the walk around the garden just like when you collected Brother Renault's body. Go back inside the cathedral, turn right and go to the staircase. This time go all the way to the top and enter the room. Now, just keep going through rooms and walking across beams until you come to the room where Brother Martello's body lies on the floor under a round stained glass window with a big hammer in the middle of it. 2. Take the body back to the graveyard. Don't get excited about having to drop the body to open the doors at the ends of beams. The body will stay on the beam, unless, of course, you throw it off to one side. 3. After you place Brother Martello in his grave, Brother Murus thanks you and leaves you the key to the armory (hanging in mid air). We'll have to blast our way out. Blasting Out1. For one final time, go back through St. Yora's to the walk around the garden, into the cathedral, right and up the staircase to the top floor. In the room at the top, there was an iron door we couldn't open earlier. Use the armory key on it now. 2. From the shelf get a scroll that tells you the device is an explosive and how to use it, the explosive device, and a fire arrow. 3. Go back to the Cloister courtyard. Go through the northeast corner (left of St. Jenel's doorway), through the gate and follow the path to the large wooden double doors. 4. Place the charge on the ground directly in front of and against the doors. Back up to the gate and hit the charge with a fire arrow. Walk through the gate. Top
Gas mines: 4 (4 found) 1. Go to the altar and get two rope arrows, your blackjack and three noisemaker arrows. Go through the open door - the door that wasn't open the last time you were here. Turn left and go down the stairs. At the bottom take either left or right path and go down further to a balcony. 2. Well, we've got some new adversaries - some things that look like ratmen with long tails and swords, and some other creatures that look like bugs, or praying mantises. The bugmen are the more dangerous of the two. There are ramps going down the left and right side of the balcony. Creep over to the left side and look down the ramp. Study the patrolling patterns of the creatures. When they've all left the area at the foot of the ramp, run down and get the fire arrow from the flame on the ramp railing and run back up to the balcony before they see you. 3. Directly across from the center of the balcony is an alcove. It has a torch on the left side. Shoot a rope arrow into the ceiling so the rope hangs very close to the alcove. The bugmen and ratmen won't notice the rope. To your left across the way, and some distance, is a niche with a torch in it. To the right of the alcove where you're headed, at ground level, is a path that seems to go around the rear of the alcove. Quickly shoot a noise maker left at the niche with the torch, turn and shoot another as far up the path on the right as you can. When the creepies go to investigate, jump to the rope, then jump to the alcove. 4. Search your alcove. Get a chunk of gold (100), 6 broadheads, 2 gas mines, 2 more noise makers, a regular mine and two flash bombs. Now we need to take care of the creatures. Face the balcony. The bug man seems to like the far right corner under the balcony. Throw a gas mine in there. Watch the patrol pattern of the two ratmen. I managed to kill them with the other gas mine and the regular mine. Be patient. It could take quite awhile for them to blunder into the mines. 5. When they're dead jump to the rope arrow, retrieve it and fall to the floor. Turn right and go past the north ramp of the balcony. Turn right again. The first dark patch you see on the left is a niche in the wall - dark enough for hiding. To the right of that is an entrance into a cavern where the light is flashing. There are three exits from this cavern. Just inside is a round tunnel entrance on the left. In the center of the cavern, on the floor, is a piece of fruit that will increase your health. Creep in, get the fruit then go into the round tunnel on the left. 6. Once inside this tunnel, the path splits; right through a gray tunnel and forward through a red tunnel. Take the red tunnel to a weird vertical pool of water. Get two water arrows from it. Return back down the red tunnel and go left through the gray tunnel. 7. Get a chunk of gold (200) from the second skeleton. Continue east and get a water arrow from the ground near a torch on the left. Continue to an intersection. Paths to the left and right (east-west) are guarded by spiders. Creep left (east) close enough to snag the moss arrow the spider's guarding. Turn around and creep west to the other spider and snitch the water arrow that's just left of the mushroom light in the right-hand corner of the room. Return back down the path past the two skeletons and turn left into the room with the flashing light, where you got the fruit earlier. 8. Go back to the balcony and walk to the other side of the room and enter the cavern there. Against the north wall get a water arrow. Go through the entrance close to where you got the water arrow. Go down a steep ramp. At the bottom use a water arrow on the torch stuck high up in the left wall. 9. Move forward and search for a moss arrow on the floor. Just before you reach the intersection, look up and left. There's a ratman patrolling at the top of a ramp with a black gravel surface. To the right is a large open cavern. You can kill the ratman with one broadhead. Creep up the ramp and get a fire arrow from the base of the column. To the right of the column is another piece of fruit. East of that (right) is a tunnel. You can barely see the top of another vertical pool. Go down this tunnel. 10. Get a moss arrow by the skeleton and four more water arrows from the pool. Return to the dead ratman and go down the ramp toward the large cavern. Against the right-hand wall is sort of treehouse. Way at the far end is an exit. Ratmen, bugmen and a fire elemental come in and out of that entrance. There are two torches in this room. Use water arrows to put them out. They're pretty far so aim high. 11. Once the torches are out and all's clear, mantle up on a slope just right of the treehouse. Shoot a rope arrow into the wooden ledge and climb up. Retrieve your arrow and go into the treehouse and get some goodies: a noisemaker arrow, a rope arrow, a flash bomb, ten broadheads (your total should now be around 15), and two gas mines. 12. Creep back out on the platform and look right through the short connecting tunnel into the next room. The ratmen, bugman and two fire elementals are milling around in there. We need to trim the odds. Wait until all the creepies are in the next room, or at least in the far side of the connecting tunnel. Throw your two gas mines in there. If they're bunched up you should get them all. Sooner or later one of the Fire Elementals will come close enough to the tunnel and you can extinguish it with a water arrow. If it doesn't, you can get a water arrow ready and stand up on the platform. Sooner or later one will see you and come for you. You can splash it before it gets to you. Kill all you can now or you'll meet them later under less favorable odds. 13. When your little act of mayhem is done, jump back down to the floor. Against the far wall, opposite the treehouse, is a gem (250), right of that, almost to the tunnel, is a piece of fruit, get it, then turn left and go toward the black gravel path where you killed the ratmen before you climbed into the treehouse. 14. At the top of the black gravel path, where you found the fire arrow, turn right and follow the tunnel past the skeleton and the vertical pool. Just past the pool the tunnel widens and a spider is posted there. One shot with a broadhead and it's history. Continue up the tunnel to come out on a ledge above a room with an altar on the floor. The remaining Fire Elemental is here. Creep to the edge of the ledge and shoot it with a fire arrow. Jump to the floor and get a fire arrow from one of the fires burning around the altar. 15. The small platform on the north wall contains two water arrows. Shoot a rope arrow into the ceiling and climb to the platform. Jump back and retrieve the rope arrow. Now look up at the ceiling. You'll see a grayish smoking object. It's a gas arrow near the ceiling. Shoot a rope arrow into the ceiling near it, climb up and get it. Climb down and retrieve the rope arrow. 16. Exit through the south side of the room and take the tunnel on the left. At the first right, turn and get the water arrow on the ground. Go in a little further and get a piece of gold (350) but be careful, a ratman patrols the end of this short tunnel. Back out and continue the way you were going - toward the treehouse. 17. Stop in the dark spot just before the tunnel enters the treehouse cavern. When the patrolling ratman comes by drop him with a broadhead. Pick up the body and enter the cavern and immediately turn left and go around the left side of the treehouse into a dark corner and dump the body. Immediately in front of the treehouse is another tunnel. A single ratman comes and goes from there. Be watchful. Creep back to your ambush point and watch for the second ratman. He'll come into the room, then turn and go back toward the tunnel. When he turns his back give him the shaft. Dump his body with the other one. On the floor at the tunnel entrance is a piece of fruit. There should also be one close to your ambush point. You can find a moss arrow by the mushroom light just beneath the treehouse. When you're done searching, use a rope arrow to get into the treehouse. 18. Once up on the platform, retrieve your rope arrow. Enter the treehouse and get two flash bombs, one gas mine, two noisemaker arrows and a regular mine (under the table). Read the journal by the chair. It's some scribbling by Constantine about a "Dark Project". Sounds good, huh? Not good enough to satisfy a mission objective, though. Well, since we now have some decent equipment, let's go get Constantine's plans. Constantine's Plans1. Jump to the ground, turn right (north) and go back down the tunnel you entered this area through. In the large room just before the room where the altar is, where you killed the second Fire Elemental, turn slightly left (northwest) and take the tunnel past the first treehouse. Exit the treehouse cavern on the north side and go up the black gravel ramp where you killed the ratman. At the top turn left. Follow the path into the room with the flashing lights. 2. Exit this room through the tunnel in the northeast corner and go to an intersection. you're now where you were close to the beginning. If you continue forward you'll go to the first vertical pool you found. Instead, turn right and go down the tunnel past the skeletons. Have a broadhead ready. One of the spiders you stole from earlier will probably be coming down the tunnel. 3. At the intersection turn left, then immediately left again. This is where you stole a water arrow earlier. The spider that was here is the one you just killed in the tunnel. Follow the tunnel to a small room with a torch. A spider is plugging the exit. Kill it with a broadhead and follow the tunnel up to another treehouse cavern. 4. This cavern is patrolled by two bugmen, plus, directly between two mushroom lights in front of the treehouse is a small insect that looks like an aphid. If it gets near you it explodes. There is a second one someplace nearby. Bide your time until the two patrolling bugmen are close together and passing in front of the aphid, then try to get all three of them with the gas arrow. You have to at least get the two bugmen. If you don't get the aphid you can try to evade it or shoot it with a broadhead. I think it's a waste of an arrow myself. 5. Once the bugmen are dead, you can run into the left side of the cavern, around some stones and put a rope arrow into the treehouse platform and climb up before the remaining aphid (or aphids) get to you. At the top, retrieve the arrow, enter the treehouse and collect some goodies: a flash bomb, a rope arrow, a gas mine, a gas arrow and three gems (500). The book by the chair contains Constantine's plans for the Eye. Read it to satisfy the mission requirement. Now all you have to do is get out alive. 6. Exit the treehouse door, and turn left. Go to the end of the platform and look down. There's a stone slope coming up to the treehouse. You can jump down on it and get to the ground without losing any health. Quickly exit down the tunnel and retrace your steps all the way back to the second treehouse - where you started this section. Don't stop for quite a ways once you get started. The damn aphids will follow you forever, it seems. Basement1. Go west from the second treehouse and into the tunnel. Follow the black gravel path upward to an intersection. Left (south) is the entrance to the basement. Turn right and go to the intersection and get a moss arrow. Head left and up into a room with a black gravel floor and get a fire arrow from under the torch. Head north from this room up the path and get a water arrow by a mushroom light. 2. Retrace your steps and this time go up the path into the entrance to the basement. Just before you enter the room there is a small rise in the floor of the tunnel. It comes out between two square columns. On the far side of the room is a short tunnel that exits into a hallway. There are three ratmen patrolling there. They come down the hall, make a left towards you and go a short way into the exit tunnel, turn and go back. Hide in the shadows just below where your tunnel enters the room, behind and between the columns. When a ratman comes into the exit tunnel, shoot him with a broadhead arrow. Quickly run up and get his body and run back past your ambush point and down into the treehouse cavern. Stash the body in a corner. Do this until you have gotten all three ratmen with three arrows. After you kill the second ratman, the remaining third may see you carrying his companion's body back toward your ambush point. If he does, continue into the treehouse cavern and hide in the dark niche just left of the other entrance to the cavern. After several minutes of searching, the remaining ratman will go back to his regular patrol. You can get him then. 3. When you're done, enter the room, go through the short tunnel and into the hallway. Turn right and go to the end of the hall. Go right, walk forward to the wall, then go right and immediately left. Go down the hall to the metal floor. Take the first left after you get on the metal floor and go up a metal ramp. 4. At the top of the ramp there's a room with barrels. Go in and get a health fruit from behind one of the smaller barrels against the wall on the left. Go to the right side of the large barrel. By just walking against it you can push it on top of the smaller barrels and open up a narrow hallway with a metal floor. We'll use this to bypass the lighted hallway on the other side of the door. 5. If you want another moss arrow, leave the barrel room and turn left. Right where the two hallways intersect a moss arrow lays on the carpet. Get it and go back to the barrel room. 6. Go down the narrow metal-floored hallway. As you approach the end, be cautious. There's a ratman off in the hallway to the right. He can hear you footsteps on the metal floor. At the top, to the right is a pile of crates. Hide behind them until a ratman comes and goes back. Walk right out into the hallway and place a mine there. Go back to your hiding place. When the mine explodes, go get the body and stash it in the dark end of your corridor. Do this again with a second mine and the second ratman. 7. The third ratman is more difficult since we are out of mines. To the right of your hiding place in the main corridor is a torch. Use a water arrow on it. Also use a water arrow on the torch at the other end of the hall, at the top of the metal ramp. Stand in the hallway, now totally dark, and shoot the third ratman with a broadhead when he comes down the ramp. Hide the body with the rest. 8. Quietly creep up the ramp - there's a giant spider up there. At the top of the ramp go right, then make the second left up a metal ramp. After the ramp take the next two rights and go until you come to a door. Open it and go up the stairs. First Floor1. Creep up the stairs. Just at the top there are two ratmen behind a bush. Run up the last few steps and turn right. Once in the hallway turn left. Go to the intersection of the next hall, it will be on your left. Don't turn, go past and make the next left into an open doorway. This is the bar. Make a quick right and run behind the counter and hide all the way at the end of the bar. You're probably being followed by at least one ratman, and an aphid. The aphid will probably find you. At this point you have a choice - use a precious broadhead on the aphid or take a hit for half your health. I used the broadhead. The ratmen should give up and leave. 2. When the coast is clear, start collecting loot. Start at the south end of the bar facing the shelves. Get three wine bottles (600), move right to the other end of the bar and get a goblet (615). Face the bar and get a health fruit and, oh, yeah, go back to the other end of the bar where you started and get the golden spittoon (715). Go back to the other end (north) of the bar and just left of the mushroom light on the floor get a goblet (730). 3. Come out from behind the bar, turn right (south), and walk to the wall. Turn right, stay in the shadows, and approach the bugman in the next room close enough for a good shot. Make sure your visibility crystal is completely dark. Wait until a ratmen (sometimes two come in, get what you can) comes through the door behind you and walks by. When it (them)gets to the bugman shoot a broadhead into the corner behind the bugman. When they all go to investigate, hit them with your last gas arrow. Go to where the bugman was originally standing and collect the pouch from the floor. Your loot total should be 4789. That's right, 4789. The bugman was loaded. Escaping1. Continue into the dining room and collect a gem (4889) from under the table. Now it's time to get out. We'll use brute force. 2. Creep out the dining room door and turn left. You'll be face to face with another aphid. Use a broadhead on him. If you miss, he'll jump on you and explode in your face. In either case use up enough of the health fruit you've got stored to get max health. Look down to the other end of the corridor. You can barely see it around the bush. Watch until some ratmen come from the left, turn around and go back. Run, still crouched, to the end of the corridor and turn left. Stop and throw your last gas mine down the corridor to where the ratmen and bugman are. When the gas goes off, stand and run down the corridor and try to dodge as well as you can those who are left and attacking you. Wade through the crowd and take the first right to exit the mansion. 3. Run until the mission ends. If it hasn't ended by the time you reach the gate, just turn right and keep going along the wall until it does. Top
Regular mines: 1 (1 found) Garrett should have at least four gas arrows at the start of this mission. This means you should buy the three offered at the loadout screen. Is Anybody Home1. Go west down the street to the Hammer Temple entrance on the left. Pick up 15 broadhead arrows from the dead guard out front. As soon as you enter the temple your objectives change. Scratch finding the High Priest. You now must investigate the situation and locate the Hammerites. 2. Go in the barracks on the left side of the entrance and get 6 broadhead arrows. Go into the barracks on the other side and get 6 more broadheads and a flash bomb. Open the door to the main temple, watching for enemies. Creep forward into the main foyer. Your objectives change again. You must now kill all the bugmen. Shoot the spider you see first. Use a broadhead arrow. Then shoot the bugman with a gas arrow. This will only knock it unconscious. To kill it you must slash it with your sword until you no longer hear the "sword hitting flesh" sounds. You must do this to each bugman (4) you kill during this mission else you can't finish. Go back to the cross corridor between the temple entry and the main foyer. Turn left and go down the hall to the doorway. 3. Just inside the door grab two more broadheads. Turn left, go a short ways and get two more broadheads. Exit through the door in the southeast corner. Turn left (north) in the hallway and get two more broadheads by a ripped-off door. 4. Follow the hallway into what's left of the reliquary. Between the bell and the giant hammer on the floor get two broadhead arrows. Exit through the doorway in the northwest corner, pick the lock on the door across the hall and enter the chapel. Straight across from the door is a rope arrow. 5. Go across the short end of the chapel, through the next set of doors and into the library. Go into the room straight across from the entry. Get two broadheads and a flash bomb from the floor. Go into the library proper and through the door at the far end. Get two broadheads from the floor of the balcony. 6. Follow the hallway through the door at the end. Get a healing potion and a mine from the floor just inside the doorway. Turn around and go back to the chapel. 7. Walk down the center aisle toward the remains of the altar. Get 10 broadheads from the dead guard. At the altar, climb the ladder down. The Builder's Chisel1. Head west from the ladder into a tunnel and go into a room. By creeping and staying in the dark patches like a good thief and hiding behind barrels and columns, you can avoid most of the ratmen. You've got plenty of arrows, though, and if you want to let fly, go ahead. There are about three ratmen patrolling the exit from this room. Wait until they've made their rounds and run into the exit. Keep to the left in the tunnel until you come to a room with a dead Hammerite and a cloud of flies. Just past him is a small room, slightly left. Ignore that and instead head past the dead Hammerite and into a room just to the right of the small room. 2. Exit right of the central column and notice the fire at the far end of the passage. It's a burning tapestry and there's also a fire arrow there. Walk toward the fire and pick up two more broadheads on the way. Watch for three ratmen here. Just to the right of the fire is a set of stairs going down. You'll be going down there later. When the ratmen are out of sight, run to the tapestry, get the fire arrow and continue past the stair railing, turn right at the wall and go into a tunnel. 3. Creep down the tunnel and stay left. We're going to the end and there are two nasty spiders guarding our prize. They are a lot easier to kill if they aren't alerted to your presence. Keeping left, pass the tunnel on the right and continue past a mushroom light. You should be able to see the room at the end. Stop in the dark spot between the last light and the room entrance and start looking for spiders in the room. The greenish-gray spider you can kill with a broadhead. Do it first. However, the red spider is another matter. It's usually to the right of the piece of overturned furniture and almost out of sight in the corner. I never could kill it with broadheads. I did however, shoot it with the fire arrow I found outside. It immediately shot past me into the tunnel beyond without touching me. It does come back, quickly. So chase it out with a fire arrow, run inside and between the dead Hammer and the piece of furniture and get a chisel. Immediately run back down the tunnel, into the next room and down the stairs which will be to your left as you exit the tunnel. If you can't get the chisel with one fire arrow, continue the mission without it for now. Later you can find two more fire arrows and come back. Finding The Hammers1. At the bottom of the stairs you come to a circular pit. To the right is a locked door you need a key for. This pit has three levels. The second level down has wooden walkways in the shape of an "X" with a tunnel at each end. In the bottom level are two ratmen, a bugman, and two of those darn exploding aphids. The creatures can look up and see you. Be cautious. 2. Creep to the edge of the pit and look down. Sooner or later one of the ratmen will cross the beams. Get him with a broadhead. These shots are long, but you should do it until you get it right. It'll save you a lot of grief later. 3. After you get the ratman, look down into the bottom level between the beams for the bugman. Sometimes he'll look up and see you. If he does he shoots a cloud of bugs at you. He usually missies and you can move back from the edge. Also, after that, he sometimes starts coming up to get you and you can shoot him while he's on the crossbeams. Anyway, shoot him with a gas arrow. It's really cool when you connect from this distance. You'll have to get the last ratman and the two exploding aphids later. 4. Walk left around the pit. Just before you get to a dead Hammerite and more flies, enter a tunnel on the left and take the ramp down to the next level of the pit. 5. At the bottom there are two small rooms and an exit. The room with the fire inside has two fire arrows in the center pit. If you missed getting the chisel, you can take these two fire arrows and go back and try again. The other room has two moss arrows on a pedestal. Go to the edge of the walkway that exits this area and lean out and look for the second ratman that patrols the wooden beam walkway. You can maybe get him with a broadhead. If you can't, walk out on the beam and go north at the intersection. Place your mine directly in front of the entrance. Go back to the alcove with the two rooms. If the ratman doesn't come out, shoot a broadhead down at him to get his attention. That'll make him come up and step on the mine, of course. 6. That leaves the two exploding aphids. You'll probably have to go down and get them. They jump around a lot, but when they see you, they always freeze for a few seconds before they attack. You can then get them with a single broadhead. Walk back out on the beam and go down the stairs at the end of the north intersection. Somewhere between there and the bottom you'll dispose of the aphids. Don't forget to whack the bugman to make sure he's dead! 7. Go back up to the two rooms and take the exit down to the next level and two more rooms. The room to the right is a variation of the vertical pool. The round section in the center is dry. Go into the water, swim to the center section, get eight water arrows and return. The room to the left of the water room is like the star room in Constantine's mansion. The floor is invisible so you can just walk over and get the gas arrow. 8. The exit from the room leads to a long, narrow spiral staircase. At the bottom you find a Hammer guard behind a Hammer-shaped hole in the wall. He talks to you, gives you a key and a scroll and rushes off to do battle with intruders. Your mission objectives have changed again. They are now:
1. Retrace your route all the way back to the top of the pit and use the Hammerite key in the locked door. Walk straight across the room into another, then turn left. This area is heavily infested so your skills of invisibility will be severely tested. Fortunately there are plenty of shadows. 2. The first room on the right has a bugman in it, and sometimes a nasty red spider. There's also a ratman who patrols down the hall, goes into the room, comes out and goes back down the hall. When he comes toward you to go in the room, get him with a broadhead. If you drop him in front of the door, the bugman sometimes comes out to see what's going on. If he does, get him with a gas arrow and whack him with your sword to finish the job. If he doesn't come out, you need to make a noise, jump up and down or something, to get him to come out into the hall. The object is to separate him from the spider inside. 3. Once you're done with the bugman, keep going down the hall and avoiding the ratman patrols. They aren't too hard to get by but feel free to use your water arrows on the torches. You won't need them anywhere else. At the very end is a small alcove with a ramp on the left. Take it down to a room with a fire burning on the floor. There are two exits from this room. Take the one on the left. Now for some heavy-duty sneaking. 4. This room has a couple ratmen standing by a fire. Their backs are to you so hug the left wall and creep past to the exit at the far end of the room. 5. The next room also has some ratmen around a fire, however you need to enter and exit to the immediate right and go into a room with a cloud of insects. Just off to the right, in an adjoining room, there's a bugman. He's standing still by a fire. An easy shot with a gas arrow. Do it then go in a finish him off. To your left, close to the wall, is a mushroom light. Just right of it is a doorway. Go through it. You should be in a room with a skeleton. 6. Exit the skeleton room into yet another room with ratmen around a fire. Cross the room and go through a doorway on the right. The High Priest is in this room on the left side. Hug the left wall and creep until you find the High Priest's body between two columns amid some boulders and plants. When none of the ratmen are looking, get the body and leave the way you came back into the previous room, through the skeleton room and into the room with the cloud of flies. 7. Leave the cloud of flies room, go through the next hugging the left wall and enter another. Deliver The High Priest1. Hug the right wall here until you come to where you entered this room previously. However, instead of exiting, turn right and creep to a door. You can do it. The ratmen won't hear or see you open the door. Drop the High Priest and use the Hammerite key on the door. Pick up the Priest and creep through the door. 2. Go down the tunnel to another door. Use the key on this door also. Carry the High Priest through the door and across the cavern to the hammer-shaped slot. Drop the High Priest here and the mission should end automatically - if you whacked all the bugmen properly and have the chisel.
Broadhead Arrows: 9 (0 found) To finish this level Garrett will have to save one each, gas, fire, moss, water, arrows to disable the portal. Follow the Yellow Brick Road1. There was no loot quotient last mission, so there is no loadout screen for this one. You start the mission with: 20 broadheads, 1 water arrow, 1 fire arrow, 1 moss arrow, 1 gas arrow, 2 rope arrows, 2 noisemaker arrows, a fake eye and a papyrus. You have your trusty blackjack, too, of course. The papyrus gives you the clues to destroying the portal: "Destroy each of its (the portal) anchors with its opposite, and the Maw must then follow in their wake." So to destroy the portal you must have one each of water, fire, moss, and gas arrows. The portal behind you is not the portal you must destroy. Way down below in the Maw the creatures are floating up from the portal in bubbles to a ledge. The bubble dissipates and a new monster begins his journey up to where you are, through the portal behind you and into the world. This happens about every 30 seconds. The path down into the Maw is lined with creatures coming up like I-45 during rush hour. You can't kill a fraction of them. The monster machine is cranked up and running full blast. So we just run or sneak by. 2. Go into the red tunnel and run past any creatures that are in there and as soon as you hit the yelllowish-white marbled path turn right into a purplish tunnel. Immediately in the entrance is a gas arrow. Get it then scramble to a dark corner or otherwise make yourself scarce. This yellow path goes down to where the bubbles are releasing their passengers. The purplish tunnels zig zag across the yellow trail, are generally less traveled by the creatures and contain gas arrows here and there. Basically, you just follow the purple tunnels across the yellow trail down to the bottom. Evade and hide when you can, use gas arrows when you can't. Remember, you must save at least one gas arrow to destroy the portal. There are, also, places where you must use the yellow road to get to the next purple tunnel. It ain't all easy. So, get to the bottom. You can collect at least six gas arrows on the way. 3. You'll know you're getting close when the yellow road turns into normal greenish-gray stone and shortly thereafter, enters a square-cut opening. The opening squeezes down to a narrow ledge with a drop-off into lava on the left. If you want to hear something gruesome, knockout a ratman and throw him over the ledge into the lave. They scream a long time. :-) Follow the ledge to some stairs that go down through a doorway. You can find plenty of shadow to the right of the doorway. 4. The south side of the room has two exits. The creature LZ is through the left. We need to go there, of course. However, you owe it to yourself to go into the right opening and follow it to a drop-off. There you can view the creepies arriving in their bubbles. 5. When you've seen enough, go back and go through the other exit. Just inside it turns left then angles right. There's a cliff wall on the right and lava on the left. Just to the left and below the ledge you're on, is another ledge. Climb down and follow it. Right at the start there's one section that seems like a dead end, but off to the left around a corner it continues. 6. Follow it into a narrow tunnel, then a ledge (with another view of the creature bubbles), then another tunnel where you can see some blue crystals on the floor. Don't touch them, of course. You're at the crystal slalom. The Crystal Slalom1. Touching the blue crystals takes health points. From here down to the bottom it's more or less an obstacle course. After you pass the first two crystals, left and right, the floor turns into ice. If anybody remembers playing Underworld II there was a level in which you had to traverse some ice caves. The guys at Looking Glass were devious. Your control was almost like walking on real ice and, naturally, the floor wasn't level. Well, they've perfected it here and placed you on a down slope, too. The objective is to get to the bottom without losing any health. The only tip I can give you is that you can control your rate of descent by walking backwards. In some places you can actually stop. 2. Before you go down the first slope, look down and over to the left. There are three clumps of crystals on the ice. At the base of the far left clump is a water arrow. There is also one at the base of the left center clump. You'll meet some Fire Elementals soon and you'll need those arrows. You should try to get them. Enter the ice at about the center of the slope and angling toward the clump on the far left. I found this easiest to do if I was crouching, not standing. Start moving toward the water arrow and immediately start back-pedaling. You'll find you can hold yourself stopped against the wall on the left. By doing this you can kind of sneak up on the water arrow and get it without touching the crystal. 3. Turn and start toward the water arrow near the clump that's now to your right. You can sort of snatch it in passing. Immediately turn left past the clumps and run into the wall. You can stop there. There is a tongue of ice stretched along the left wall. At the bottom of it is a crystal. There's another water arrow there. Before you start over there you can see a couple exploding aphids hopping around. You could try to get one of them with a broadhead. You might get lucky. 4. You can get this next water arrow by staying off the tongue and going straight for the shortest way off the ice. Once down on good old rock, you can walk up to the crystal and get the water arrow. 5. Start down the slope to the next ice ramp. Before you get there you'll have to deal with the two twitchy, exploding aphids. The next slope is really steep and studded with crystals. The landing at the bottom looks like a punji pit. The best way through here is to pick a path (I picked to the right of center) straight through the crystals. Start forward and begin back-pedaling to slow your descent. If you do it right you'll land in a narrow safe aisle at the bottom and not continue forward into the crystals. 6. Now you get to deal with the three Fire Elementals. When you first spot them they're out of range and ignorant of your presence. You can sneak forward along the left wall and get all three before they know what's going on. They just hover in one spot and beg to be splashed. Be careful, though, there's a drop-off into some lava. 7. On the other side of the bridge go left along the edge of the lava pit. At about the center point you can lean over and get three fire arrows off a small ledge. Continue right (south) towards a set of two crystals against the wall. Just past them is a cut in the wall that leads to a down ramp. Go down the ramp and at the bottom turn left. 8. Follow the trail around to a steep stone ramp with more ice at the bottom. This one is really treacherous. It's steep and you can get up a lot of momentum. Back-pedal to control your speed and the left and right arrow keys to skid (sort of) around crystals. 9. At the bottom you'll find a blue cylinder with a spike-fringed top. It's full of water. On the ceiling directly above is a gravity-free pool. Past the cylinder is a water fall that's flowing uphill. What you have to do is jump in the waterfall and follow a tortured route to the pool above the cylinder and drop down into the cylinder. The Backwards Waterfall1. Jump into the waterfall and you'll be pulled up into a channel. Orient yourself immediately to the direction of travel. All through this section there's a strong current that hampers your control. Where the channel makes the first left you can break the surface and stop against the wall. 2. When you're ready push out into the current. You'll be pulled along and up into another chute. Just before you get pulled up the current slows and you can face right. When you break the surface immediately begin trying to pull-up into an opening. You can rest here and get your air back. 3. Go back in the water and get pulled up into another chute. You should start swimming with the current here to hurry. Keep your eye out for a vertical pool in the left as you turn a bend to the left. You must get in there on a narrow ledge or you'll run out of air before you get where you're going. Swim in carefully or you'll go over the far side of the ledge and fall down into some more water and have to start this crap over again. 4. Go back into the channel and turn left and start swimming with the current. You'll end up in a room. Look down and you'll see the blue cylinder. Swim down, fall out of the water into the cylinder and into some more water. Surface as quickly as you can and walk up the slope. The Mondo Tree1. Follow the tunnel into a room with a humongous tree. Creep around the right side against the cavern wall, past a mushroom light and back into the darkness. There's a ratman patrolling the base of the tree. Get him with a broadhead, or blackjack. Keep going until you find the entrance in the base of the tree. 2. There are three spiders just inside the entrance. Sneak into the darkness of the doorway and get them with broadheads. To the left of the ramp is a health fruit under a mushroom light. 3. Go to the right of the ramp toward what looks like a column of sparkling lights. Just before you turn left at the top of the slope, there's another fruit by a light. Turn right from there and go to the lights. At the base of the lights is a third fruit. 4. Move up close to the sparkling column and hit the up arrow and space bar at the same time and you'll climb the column like a ladder. At the top turn left and jump to the ledge. Follow the ledge to the end. Along the way you'll find two moss arrows. At the end you can mantle up into the v-shaped opening and get to the top. 5. Follow the path up a huge tree branch and between two large ice crystals. There's a web throwing spider in the middle of the path here. Deal with it. Follow the path in a large room with a raised center. It's full of spiders, too. Disable The Portal1. Run around the left side and climb a series of small plateaus, avoid the spiders and exit the room through a doorway at the rear. You'll come to a long hallway lined with purple lights. Run down the hallway and take out the ratman at the end. He seems pretty deaf and dumb. I was able to run right down on him and blackjack him before he knew what was going on. 2. At the end of the hallway you'll come to a room with a large lava pit in the center. Go around to the left. There are plenty of shadows and only two ratmen to avoid. Exit the opposite side and go up a steep tunnel into another room with a lava pit on the right. Go left along the edge and jump the gap to another ledge. 3. Follow the path around, jumping gaps until you come to an intersection. Go right. You'll go around a bend and there off to the right is the portal where the bubbles are originating. There's a bugman and a ratman guarding it. To disable it:
4. When you're done, continue following the path to a dead end. There are three vines hanging down. Climb up one, jump to the ledge then jump across to another vine and climb down to the other side. You are now at the end of a tunnel just outside where Constantine is. A Trick For The Trickster1. The Trickster is in the center of a huge seven pointed star with pedestals at each point. On an eighth pedestal in the center of the star is the Eye. After you switch your fake eye with the real one, you'll have to hide and wait until The Trickster finishes his ritual. The darkest spot is on the far side of the room. 2. When I arrived he was just performing a ritual over one of the pedestals closest to me. When he finished, he crossed to the opposite left pedestal. As soon as he turns his back to you start across the star toward the Eye. If you have any moss arrows left use them here. Switch the eyes (just grab the real one and the switch takes place). Ignore the notification of a change in objectives. It just says you're to wait until he finishes the ritual. Try to stay in the darker patches of the star and go across to the dark side of the room and wait. 3. When the ritual is finished and The Trickster tries to use the fake Eye, he's in for a surprise. Top
THIEF: THE DARK PROJECT LORD BAFFORD'S MANOR LORD BAFFORD'S MANOR BREAK FROM CRAGSCLEFT PRISON BREAK FROM CRAGSCLEFT PRISON DOWN IN THE BONEHOARD DOWN IN THE BONEHOARD ASSASSIN ASSASSIN THE SWORD THE SWORD THE HAUNTED CATHEDRAL THE HAUNTED CATHEDRAL THE LOST CITY THE LOST CITY UNDERCOVER UNDERCOVER RETURN TO HAUNTED CATHEDRAL RETURN TO HAUNTED CATHEDRAL ESCAPE ESCAPE STRANGE BEDFELLOWS STRANGE BEDFELLOWS INTO THE MAW OF CHAOS INTO THE MAW OF CHAOS |
Travel to: Strategy Index / Thief-TheCircle.com.com (home) / TTLG.com / Go Back
![]()
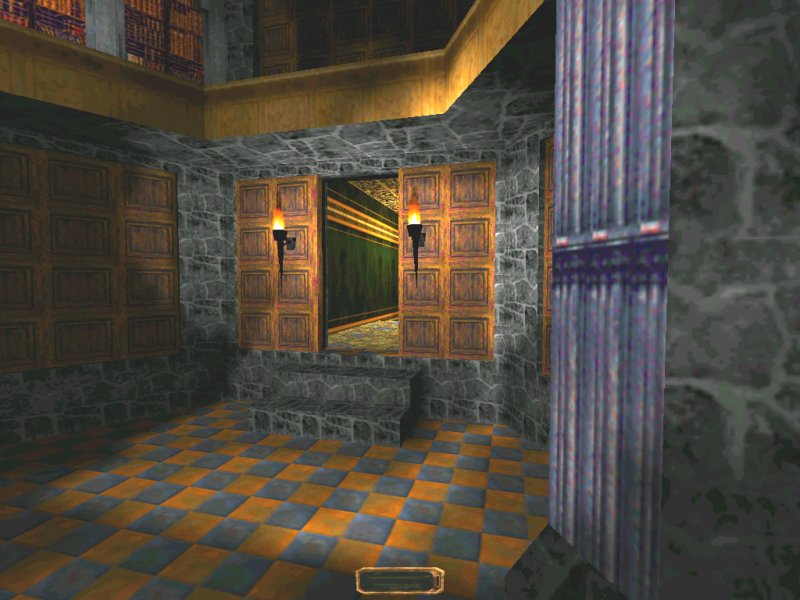


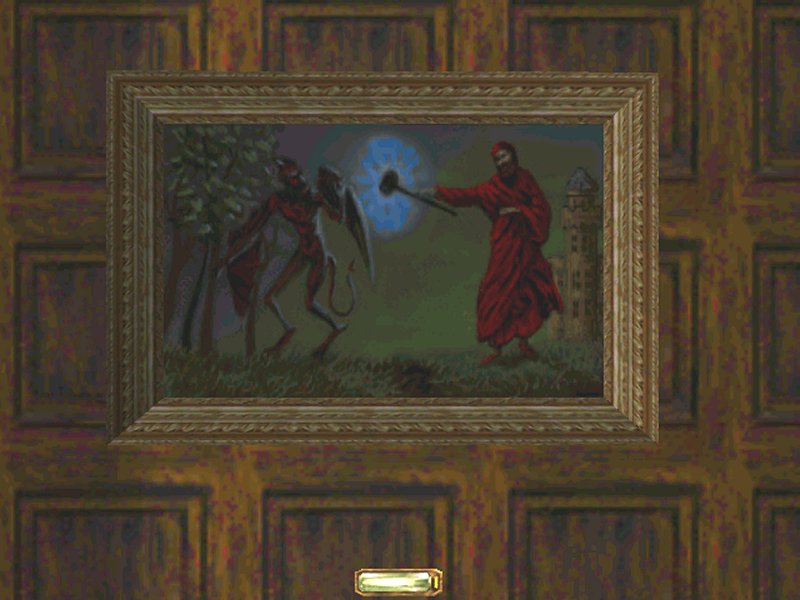
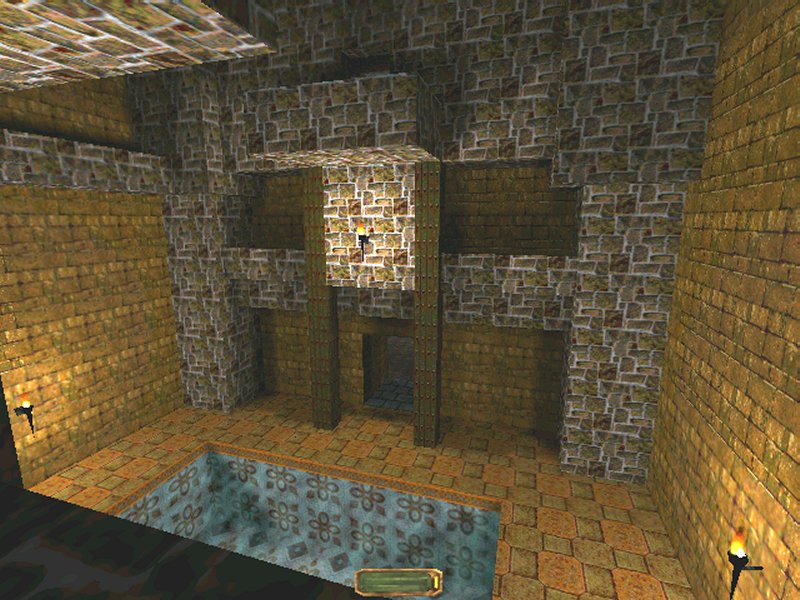
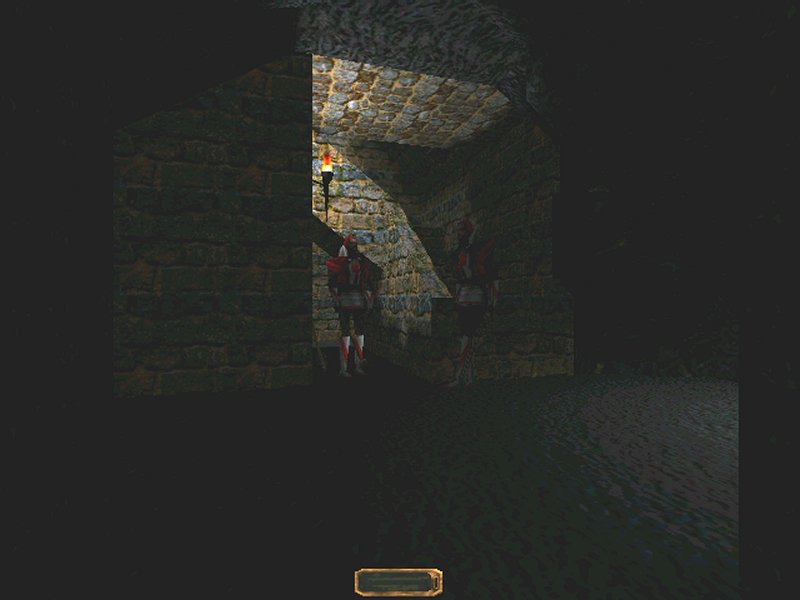
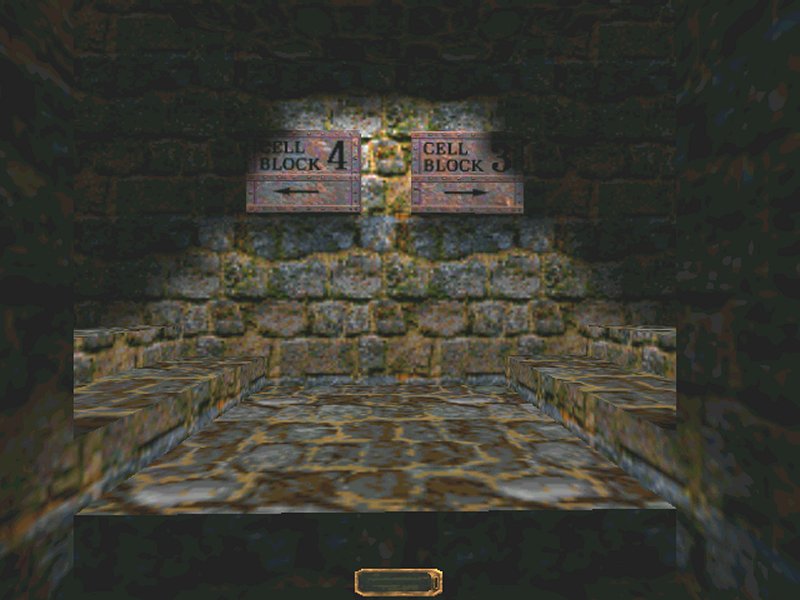
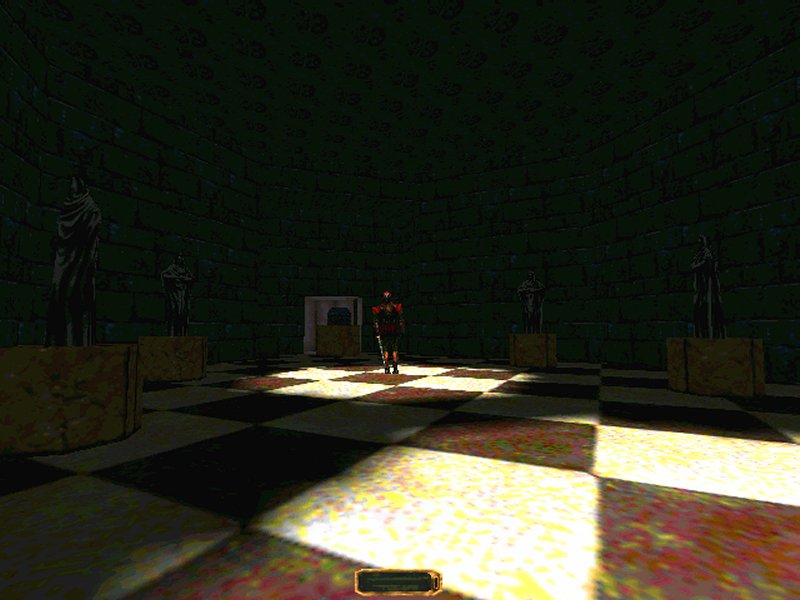
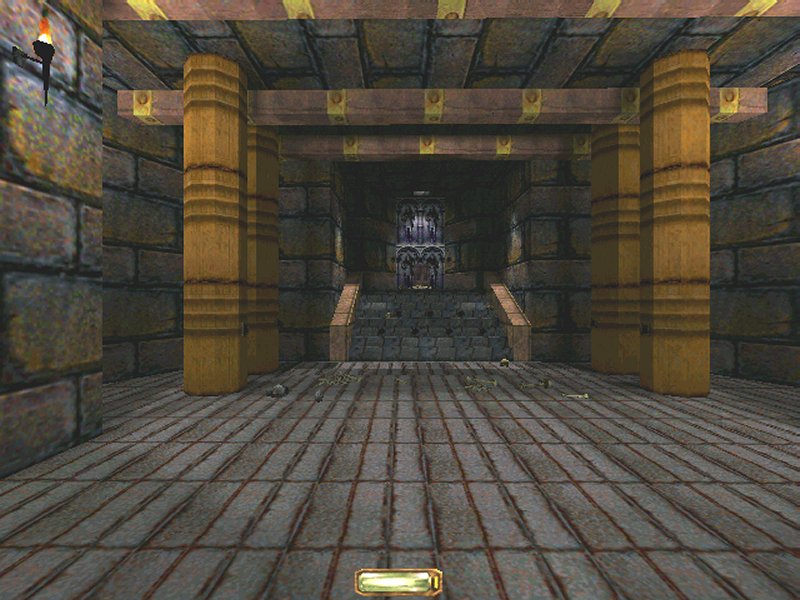
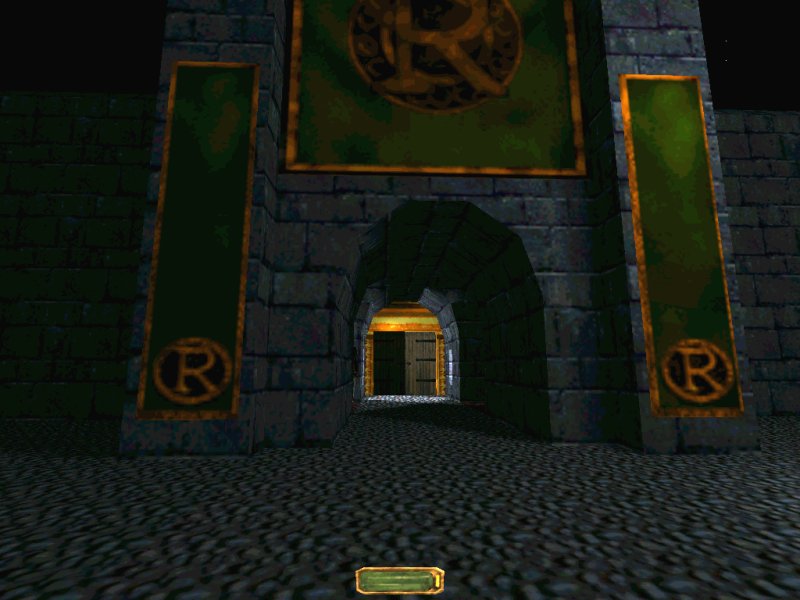
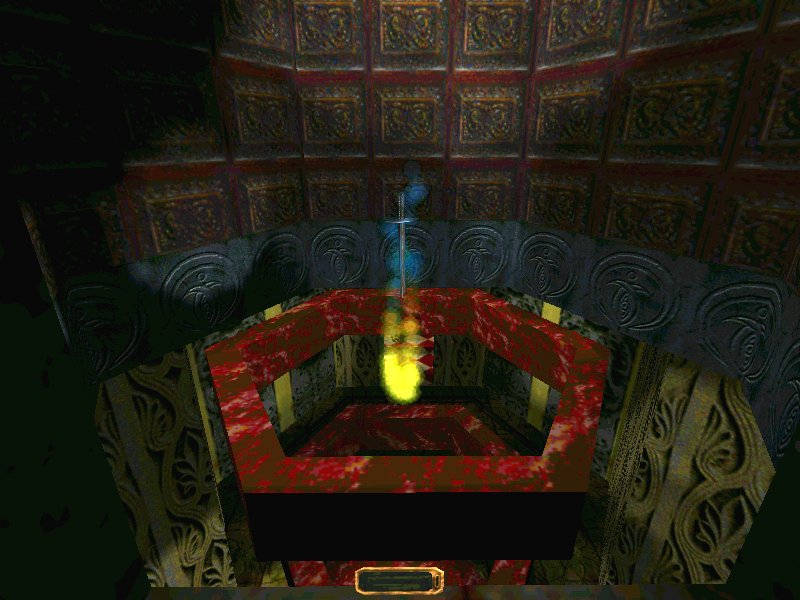
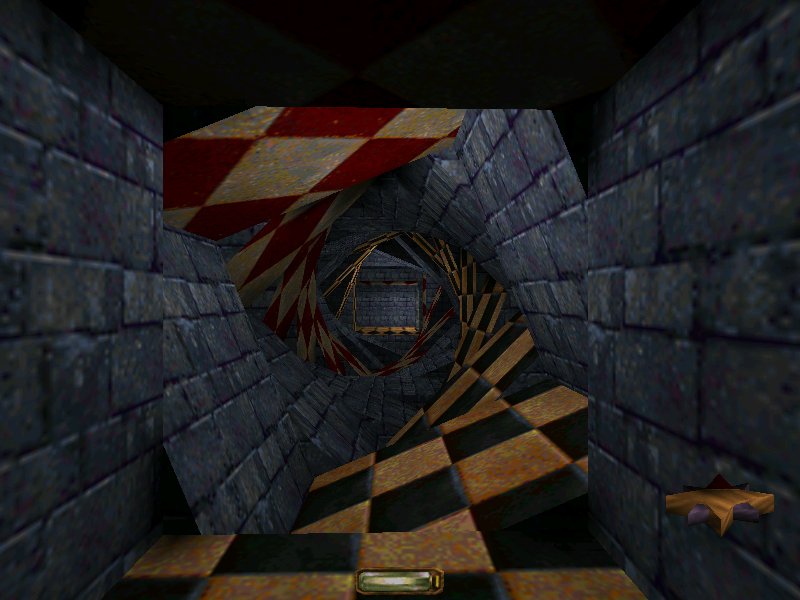
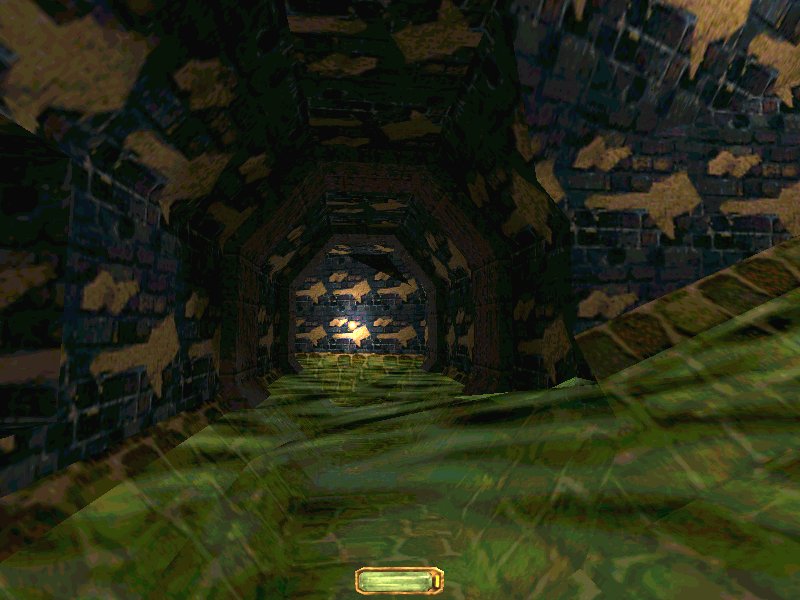
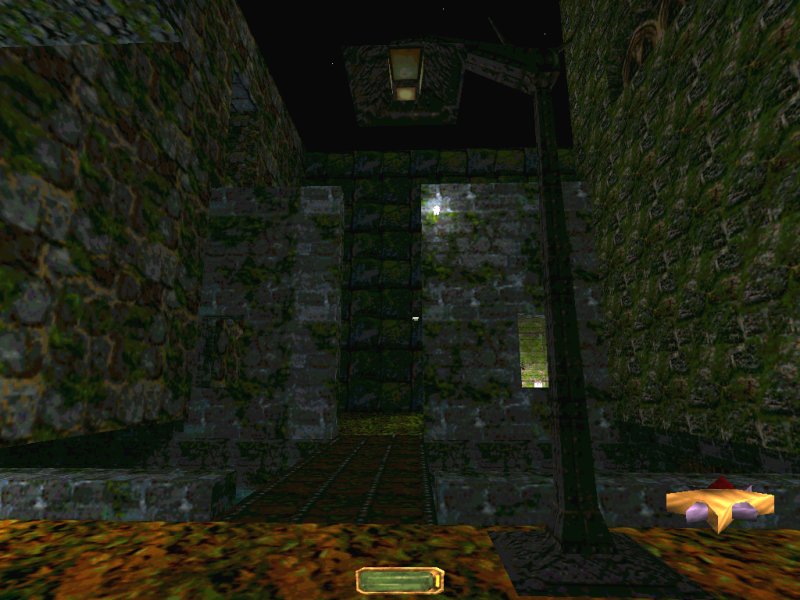
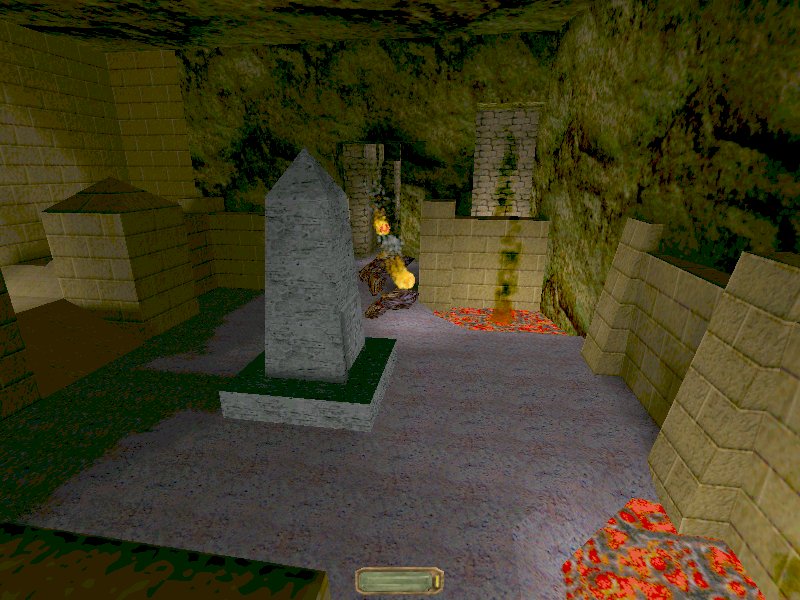
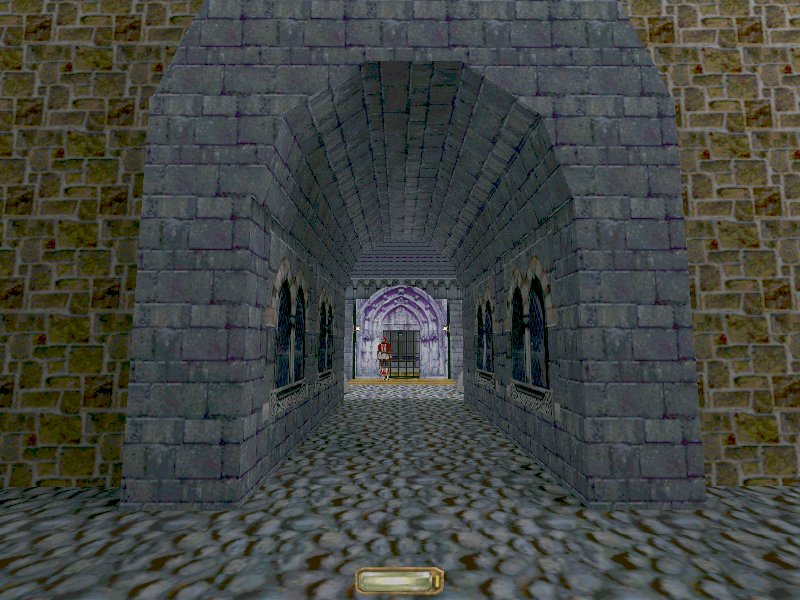
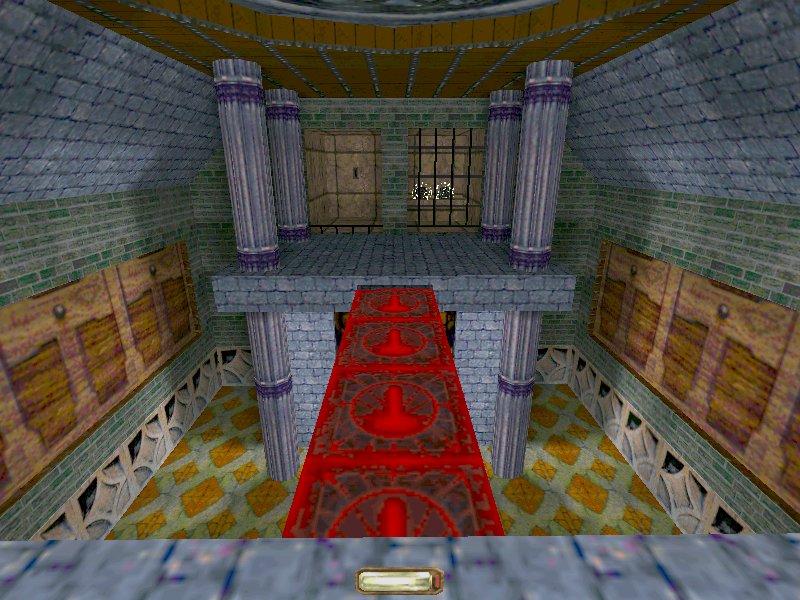
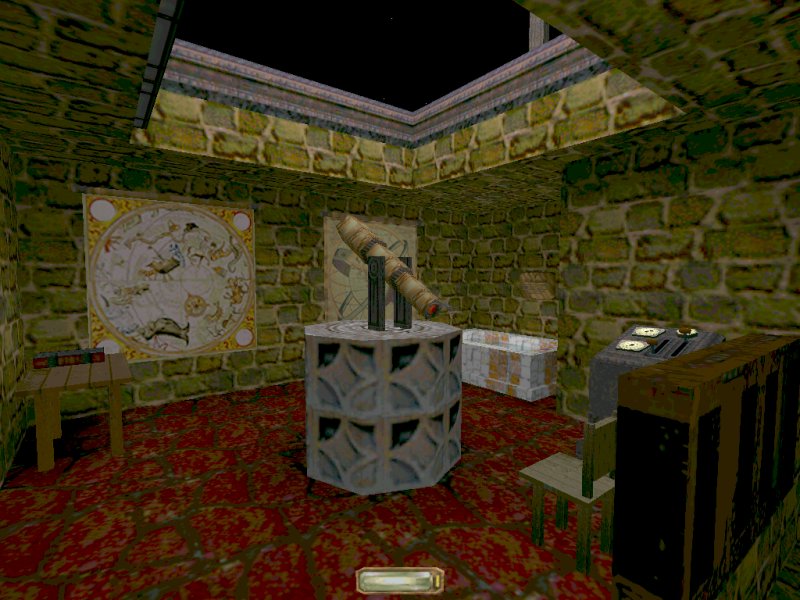
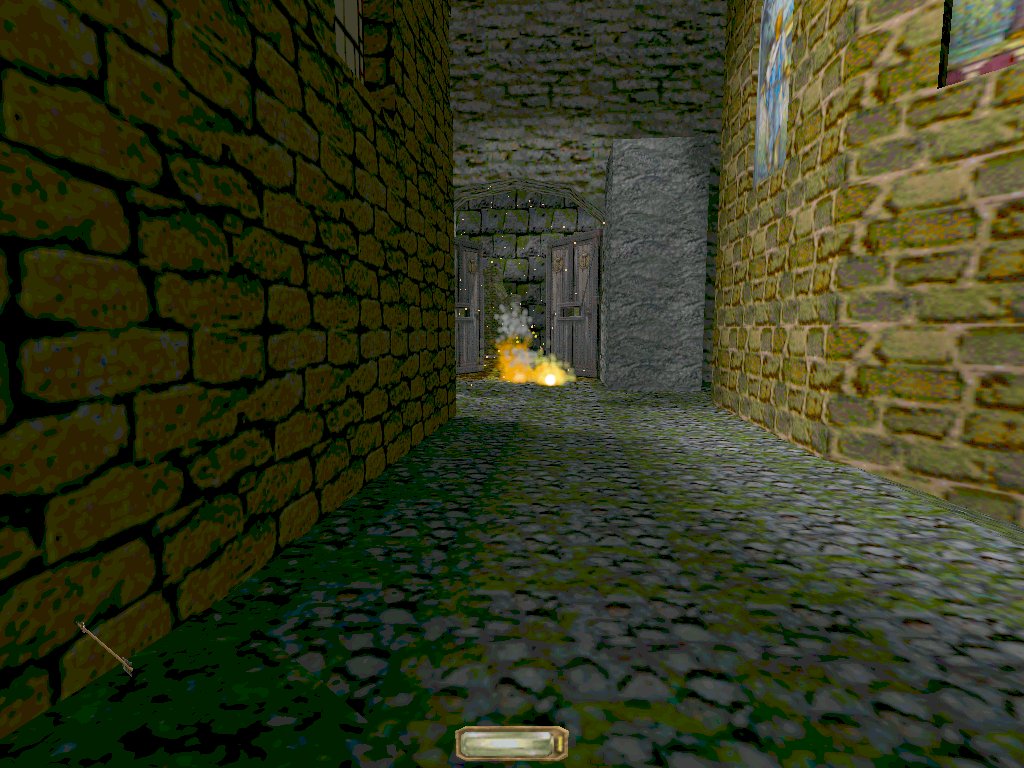
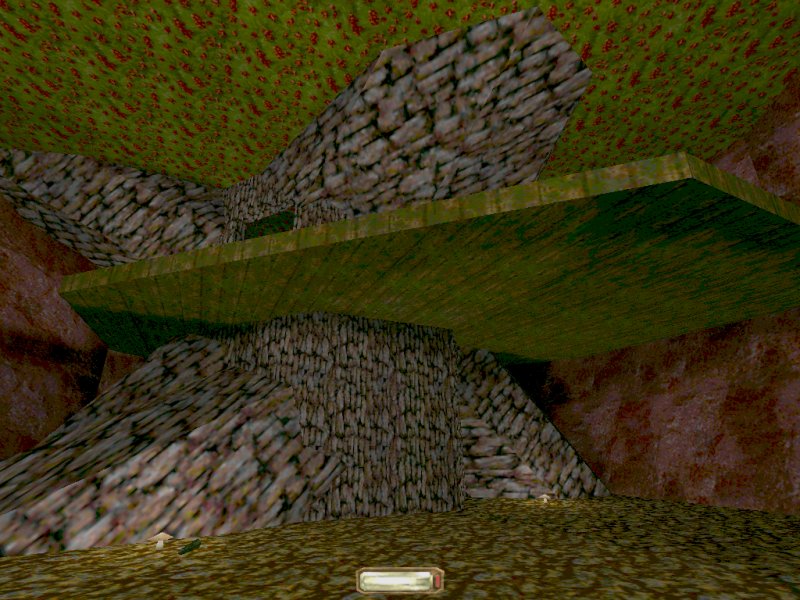
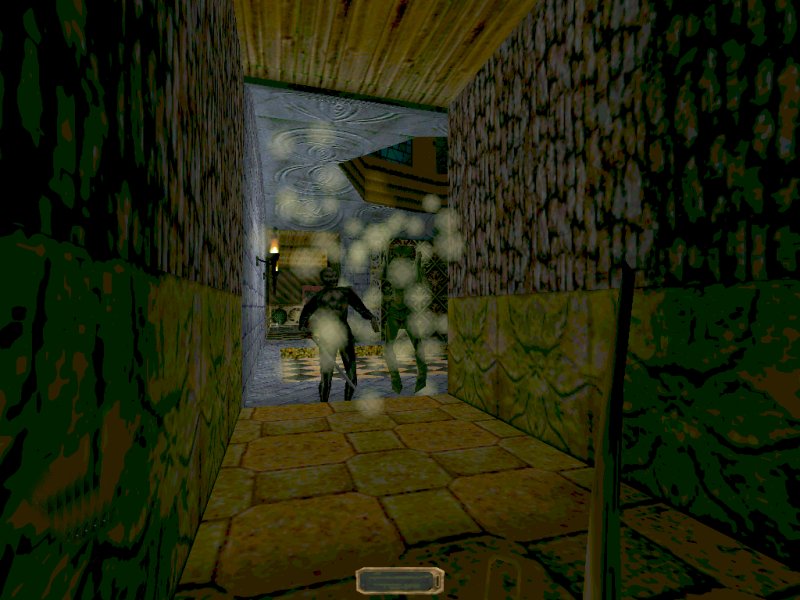
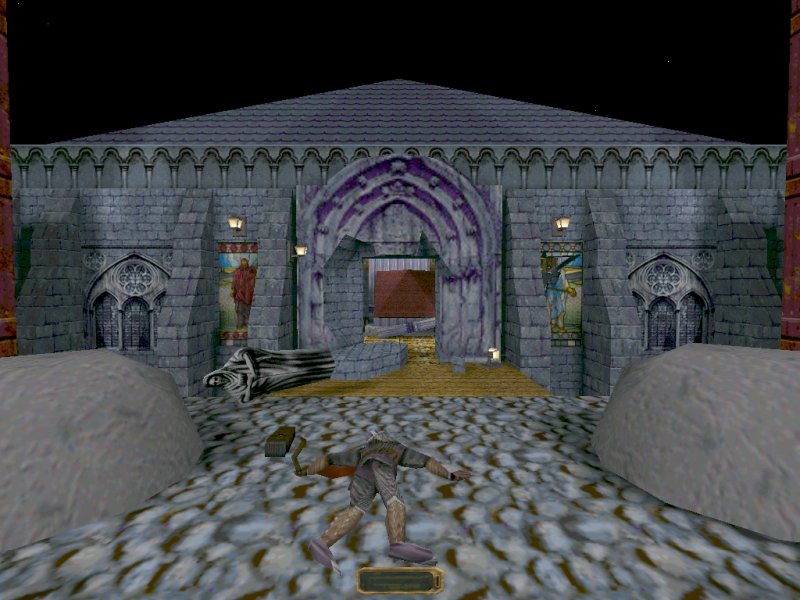
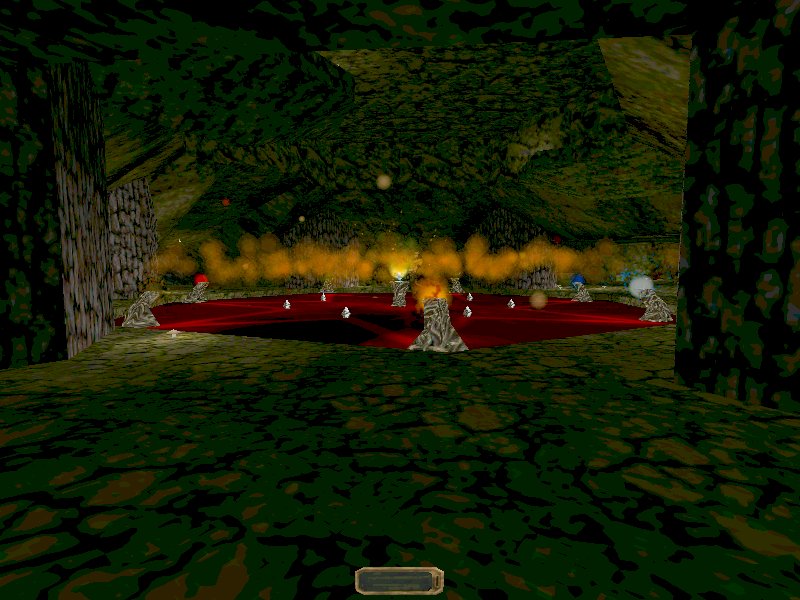