
"Some people in this city are to rich for their own good ... lucky they
have me to give them a hand."
Other Level Resources:
-
Loot Map - Go here for a complete listing of
all the loot locations.
-
Secrets & FAQ Page - Go here for pictures
of all the secrets in this level, as well as some frequently asked
questions.
TABLE OF CONTENTS (click a topic to jump to that section)
- The Basement & The Vault Pole
- The Records Hall
- Looting Part 1 - (Northern second floor)
- Lobby Security
- Looting Part 2 - (Southeastern second floor)
- Looting Part 3 - (Western first floor)
- Looting Part 4 - (Western second floor)
- The Vault
- Getting Out
Objectives:
- Break into the Bank
- Find the number of the Mechanist's safety-deposit box in the Hall of
Records
- Steal the Recording
- Don't kill anyone
- Get out of the Bank
Loot Information:
-
Requirements: None
- Available: 2284
- Accounted For: 2284
Important Notes:
- This mission is
designed so that every time
you restart it, the guard
population and camera
locations are rearranged. In
other words, areas that
may have been simple to
navigate previously may
now be complicated by
extra guards or cameras (and vice-versa). This
walkthrough simply gives
instructions for completing
the objectives regardless of
camera and guard
placement, except in those
instances where the they
are constant, or at least
present 9 times out of 10.
For more specifics on trouble spots, you may
want to refer to the secrets page and FAQ page.
The Basement & The Vault Pole
The first order of business after breaking in
is to get that blasted pole
away from the vault door.
Go east from the start point
(beware of the three man
patrol) until you reach a
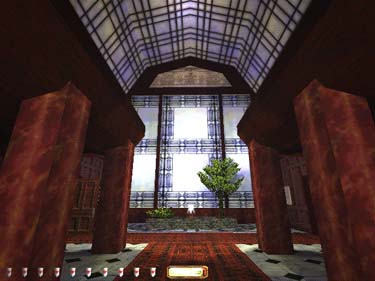
wall. To your left is a
basement window (figure 1) -
pick it and enter the bank.
To your left is room with
a ladder leading up to an
office - you may want to
take a look in case you
need to use it as an escape
route later. Otherwise, go
west following the hall to to
the large storage room
(grab the candlestick in the
first room on your left). Go
up the ramp to the right and
grab the flare and gold
plate from the crates - you'll
use this room to access the
first floor later.
Continue west through
the store room and follow it
around to the hall. Take the
first door on the right and
go through the tunnel
passage in the back. If this
is your first time dealing with
robots, be aware that the
small ones can't initially see you,
but they can hear you. Don't run
into them or run across the
metal plates while they're in
earshot, or they will alert
their big brothers.
Follow the tunnel until
you emerge in a room with
two doorways. There are
water arrows in the pool in
the large room at the south
end of the hall, but you
need to go north past the
room with the big mech beasts - they are in defensive mode, so don't wake them
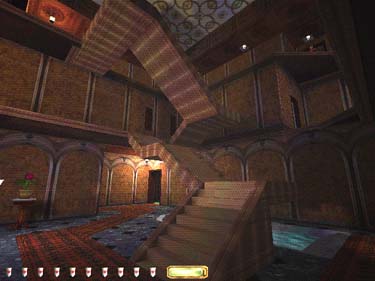
up. Go left at the end of the
hall into the brick walled
area (figure 2).
|
|
|
Figure 1
|
Figure 2
|
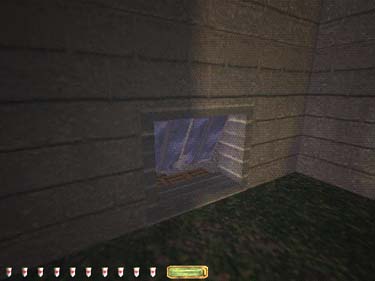
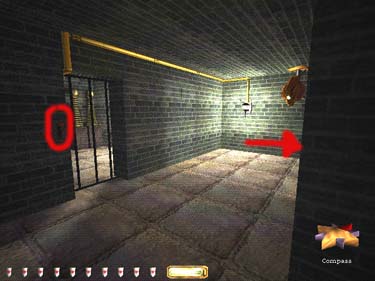
There's another mech
beast in the room to the
south, and a turret on the
wall behind you (look for
the pressure plates on the
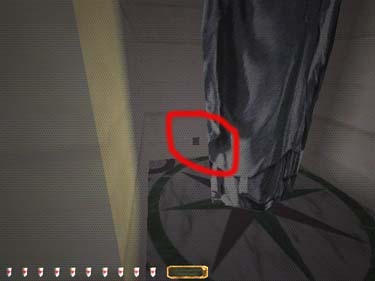
floor). Hide near the corner
ahead, use a scouting orb
to see which way the
camera around the corner
is facing (figure 3 - camera in
direction of arrow). Run
across and throw the gate
switch and then the light
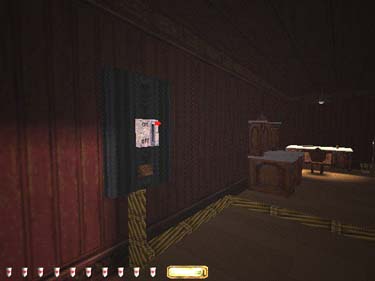
switch. Cross back toward
the camera and into the
control room. Open the
panel and get all the
buttons to stay in (figure 4).
The light should turn green
and the pole should lower.
Go back the way you came,
to the ramped room off the
north of the storeroom.
|

|
|
Figure 3
|
Figure 4
|
The Records Hall
At the top of the ramp,
go through the east
wooden door and down the
hall to the staircase. At the
top of the steps, go east to
the Records room door.
Douse the torch and step
inside. There is a shadow here (figure 5), and one in the
doorway to the left (figure 6).
|
|
|
Figure 5
|
Figure 6
|
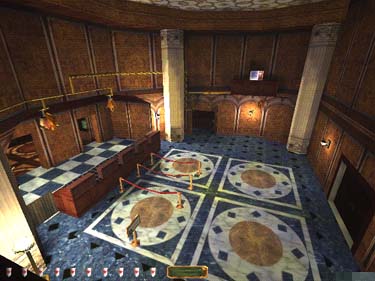
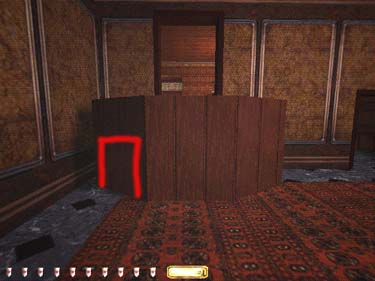
In the records room, the
scroll you need is on the
left platform. The
Mechanists' box number is
11. Grab the goblet on the
corner shelf back in the
hall, and go back past to
the staircase on the right.
Downstairs, head south
and grab the loot in the
meeting room bar, the two
small offices, and the large
office (where the basement
ladder leads to). Also don't
forget the coin stacks and 4
lucky coins on the bar in
the room exactly east of the
lobby. You can hide under
the camera and jump out to
grab the loot while it's
turned, or hide behind the counter - make sure to look
close for the lucky coins.
Go back to the staircase
and up to the second floor
when you're done.
Looting Part 1 - (Northern second
floor)
At the west end of the
hall, grab the copper coin
stack on the bottom shelf
on the left and continue into
the Great Hall. Stay
crouched and walk the
balcony to the doorway on
the left and into the hall
with statues (not to be
confused with the Hall Of
Statues on the west end). If
there are camera's here,
douse a few lamps and
grab the goblet from the
table. Continue through
this hall to the west,
through the guard room
balconies and into the room
just east of the vault to get
the goblet on the table.
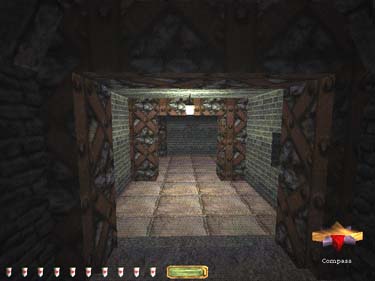
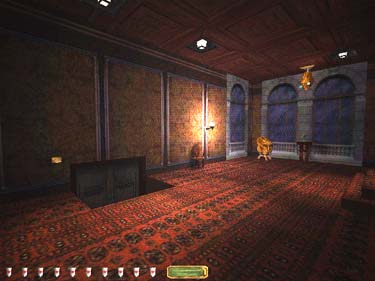
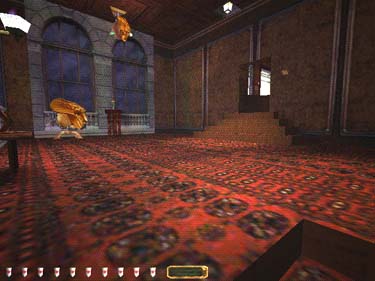
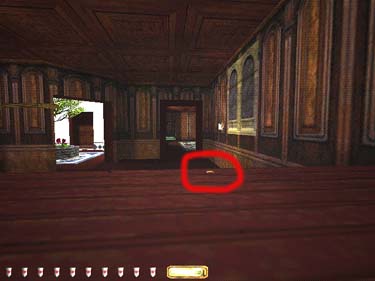
Drop into the vent system (figure 7) and travel back to
the east end of the first
floor. Go south in the hall
and grab the purse from the
safe in the next office on
the north side of the next
hall. Go east to the main
staircase (figure 8) and up to
the third floor.
|
|
|
Figure 7
|
Figure 8
|
Lobby Security
At the top of the stairs,
go through the north door.
There is usually a patrol
here. Grab the loot and
head through the next north
door into a long 'L' shaped
office. If there is a camera
in the corner, sneak to the
edge of the first desk, then
under the camera, then to
the next shadow along the
north wall. You'll come to a
tile hallway, with cameras
on either side. Use a
scouting orb to get the
timing right, and slip across
the hall (do NOT just make
a break for it - if they spot
you at all, the gates close
before you can get past).
Go around to the hall of
statues and frob the secret
switch behind the second statue on the left (figure 9 - we'll get to this in a
moment). Stay to the exact
center of the hall - between
the pressure plates, lest
you trigger the turret hiding
behind the panel up ahead.
Grab the vase and go right,
working your way around to
the bar area. Grab the gold
cup, and the plate on the
wall, then go through the
double doors and shut off
the lobby cameras power on
the north wall (figure 10).
|
|
|
Figure 9
|
Figure 10
|
Go back around to the
hall with the cameras and
make a quick turn right in
the hall to another office.
Pick the safe, and grab the
ring from the skeleton's
finger behind the panel you
opened earlier (remember that switch from figure 9?). Go
back to the main staircase
and down to the second
floor.
Looting Part 2 - (Southeastern
second floor)
Go clockwise on the
catwalk to the southeast
corner and through the
north door there. Grab the
goblet in the next room,
then go out the other door
and loot the two open
offices (beware the mech
beast. You should be able
to do this without tangling
with the robot if you douse
a few torches. Go south
through the next office with
the safe and coins on the
desk, then left in the hall to
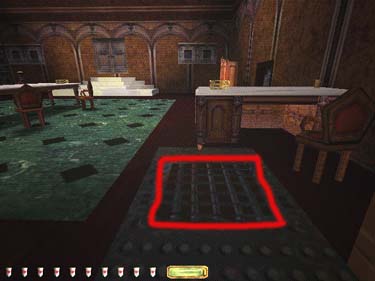
the music room. Around the
corner to the north is a gold
cup, and in the main room,
flip the switch on the
pedestal (figure 11) to open a
secret space underneath (figure 12).

|
|
|
Figure 11
|
Figure 12
|
Go back down the hall to
the west and take the door
on the left before the
balcony. Grab the goblet on
the table (jump the wall if
you're trying to beat the
camera), then head back
north to the main stairwell
and go downstairs.
Looting Part 3 - (Western first
floor)
Go to northwest door of
the stairwell and into the
hall. Kill the lights and take
the last door on the left.
Deal with the mech beast (if
there is one), grab the loot
(be sure to look closely for
the lucky coins in all these
rooms (figure 13). Go south to
the safe room, then grab
the coins under counter
and head west through the
lobby. Loot the next room,
then go through the northwest
doorway to the room with
the turret. This room is
tricky, so take it in steps
and move quickly. First be
aware of the patrolling
archer who comes through
the door to to your left and
down the stairs every few
minutes. Also beware the
camera around the wall to
the left. Make a dash for
the rightmost column, let
the camera settle down,
then go across to the
column near the desk. The
column should block the
camera (figure 14), but not the
archer's view from the
doorway should he appear.
|
|
|
Figure 13
|
Figure 14
|
Quickly grab the 3 coins
from the desk and back up
to the safety of the shadow
near the safe. Next, run
around and turn off the light
switch on the north wall,
then duck under the stairs.
Finally, run under the
camera and use the switch
behind it to the left to shut it
off. Now you need to get up
that staircase to the north.
Looting Part 4 - (Western second
floor)
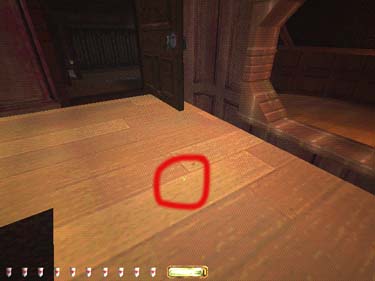
Jump across to the
stairs (or use the doors to
your left), grab the almost
invisible lucky coin from the
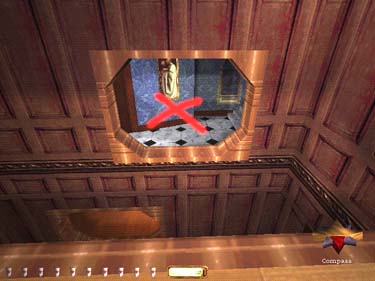
walkway (figure 15), and go all
the way to the top of the
stairs. From the top
walkway, jump across to
the window (figure 16), unlock
the office on the right, grab
the key and the loot, then
go back to the hall.
|
|
|
Figure 15
|
Figure 16
|
From here, you should
be able to open the gate to
the east and loot the
storage area adjacent to
the lobby, as well and the
gallery with the fountain.
Through the west door at
the top of the stairwell, you
can access the dome area.
Shoot a rope arrow in the
corner and climb down,
using moss arrows to grab
the loot here. Rope back
up, go to the north side of
the dome, then grab the
speed potion on the
platform and go downstairs
to the vault.
The
Vault
Slip around to the door
under the stairs and shut
off the camera. Grab the
goblet on the table and
open the vault door, immediately stepping to the
left to hide in the corner
shadow. Shut the door to
avoid company, then wait
for the lower camera to turn
away (you may want to use
the speed potion) - run
clockwise underneath it to
the elevator and call it
down. If you're crouched,
the camera shouldn't see
you riding up. On the
second deck, wait for the
right time, then run and
stand underneath the
camera. When it turns the
other direction, make a
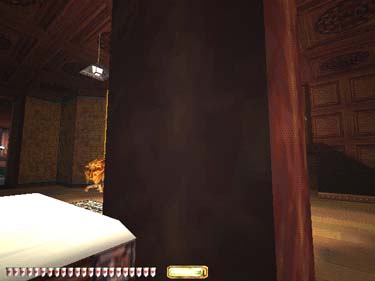
break for the ladder (figure 17).
The camera view should be
obscured by the column as
you climb up and go
counterclockwise to door
11. Grab the recording and
go back the same way, or
use the slow-fall potion you
grabbed in the dome.
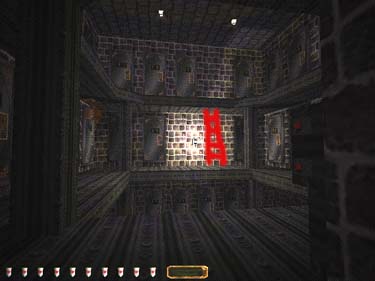
Figure 17
Getting Out
Head back south to the
staircase and go up and
across to the big
window/office area. The
metal door on the west
opens to a balcony where
you can make a quiet
getaway. Take a day off - this was a tough job!
Back to Index / Back to Eavesdropping / Forward to Blackmail
Travel to: Keepers' Chapel / Strategy Index /
Thief- TheCircle.com (home)
/ Go Back
|