
"It's time for a face to face chat with my old friend Sheriff
Truart..."
Other Level Resources
-
Loot Map - Go here for a complete listing of
all the loot locations.
-
Secrets & FAQ Page - Go here for pictures
of all the secrets in this level, as well as some frequently asked
questions.
TABLE OF CONTENTS (click a topic to jump to that section)
- Outside
- The Basement
- First Floor
- The Dungeon
- First Floor - Part Two
- Second Floor
- Third Floor & Attic
- Getting Out
Starting Objectives:
- Break into Truart's bedroom suite
- Confront Truart with the Mechanist recording
- Leave the estate when your business is finished
- Don't kill anyone
Ending Objectives:
- Search the murder scene for some evidence as to who may have killed Truart
Loot Information:
-
Requirements: 1100
- Available: 2100
- Accounted For: 2100
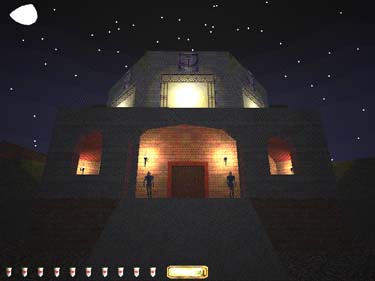
Outside
Back up and grab the
crate. Throw it against the
wall to the north. Wait for
the camera to turn, jump to
the crate and mantle the wall - then quickly jump to
the other side. Use the
back door and loot the
house (beware the sleeper
upstairs). Go back over the
wall and through the
window near the start point.
Upstairs, be sure to shut
the window before going
across to the desk.
Outside, continue south
over the next wall. Use the
back door on the next
house, then kill the yard
lights using the switch out
front. Open the large gate
to the south and loot the
next house (beware the
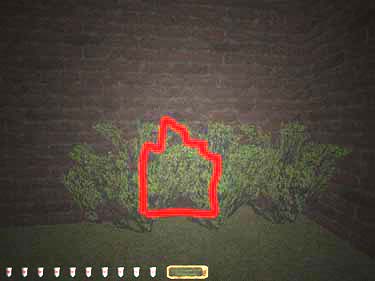
vagrant upstairs). From the
front yard, find the crack in
the wall behind the shrubs (figure 1), and follow the wall
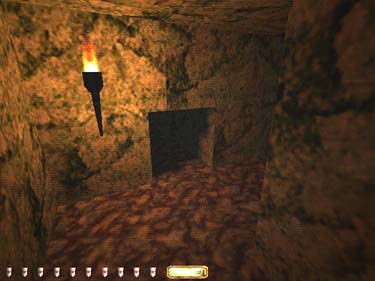
down to the large rock.
Crawl underneath (figure 2)
and immediately mantle to
the right. Around the grave you'll find some
moss arrows and flares.
|

|
|
Figure 1
|
Figure 2
|
Go back the way you came
and head north to the main
gate. Hide in the shadows
near the first door, pick it
and climb up to the gate
switch. Climb back down
and shoot a few broad head arrows to the north,
drawing the guards away.
Slip through the gate, go
east toward the front door
and douse the two torches
on the porch. Wait for the
patrol to pass, then head
left around the porch and
find the crack in the wall behind the
shrubs (figure 3).
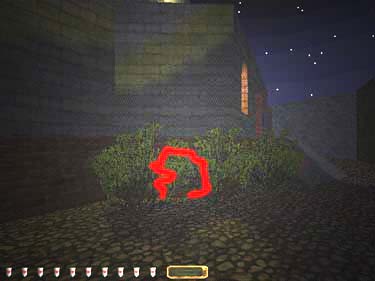
Figure 3
The Basement
Go counterclockwise to
the second opening and get
the gas mine in the crate.
There's a patrol in the long
hallway, and the small
doorway to the right leads
up to the grand hall (which
has a marble floor). Sneak
down the hallway- use the
cubby on the left to hide.
Sneak behind the guard at
the stairs and go up to the
kitchen.
First Floor
You will need a few
moss arrows to get started
here. Wait for the
conversation to end, then
cover the floor. The maid
stays at the sink, but the
male servant walks back
and forth from the ballroom
(he has an estate key you
will need). There are also
two patrols moving
clockwise around this level -
one has a gear you will
need to reach the second
floor. Grab the goods in the
sink and go clockwise to
the mess hall. Across the
hall is the plant nursery with a
moss arrow. In the ballroom
there are some plates on
the marble and a sleeper
on the floor - don't wake
him. Head back out and
north up the hall - jump the
tile sections or the whole
detachment will come
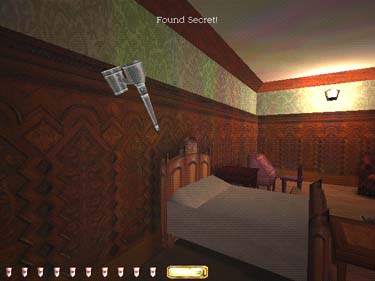
looking for you. Go to the
bedroom at the end of the
west hall and frob the torch
mount to open the floor
compartment (figure 4). In the
other bedroom, go through the
back door and slash the
banner on the right to get
into the chapel. At the altar,
shoot an arrow into the
overhead keyhole, and
climb down the ladder (figure 5).
|
|
|
Figure 4 |
Figure 5 |
The Dungeon
There's an old friend
patrolling down here (a haunt) so be very careful. Make it to the inner
hall and find the door to the
shrine on the north side,
grab the skull, then go to
the southeast corner of the
outer hall. Use your sword
to break the board (figure 6)
and take the crawl space to
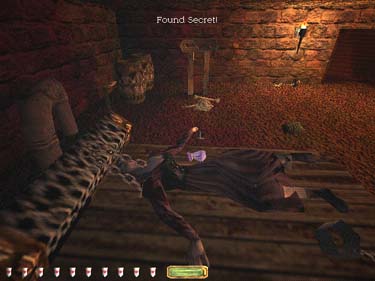
the torture room. Use the
button on the right to raise
the gate, grab the purse
from the corpse (figure 7), and
go back the way you came
to the chapel.
|
|
|
Figure 6 |
Figure 7 |
First Floor - Part Two
Go east to the guard's
quarters (beware of the
sleeper near the back).
Continue on to the back
foyer- there are some coins
in the fountain. A guard
stands near the fireplace,
but there's enough shadow
that you can grab the loot
from the table and open the
door in the fireplace if you
haven't been to the
dungeon yet. Go back to
the stairs in the west and
up to the second floor using
the metal gear.
Second Floor
Carefully open the
double doors across the
hall and observe the patrol
patterns. There is also a
stationary archer on the
floor. You can trail behind
the patrols to get the loot
on the walkway, but they
will become suspicious, so
sneak back to the hallway
and find a dark corner-
shoot a rope arrow and
climb to the ceiling. This
should give them time to
cool off.
Head to the north hall
and take the first left to the
room at the end of the hall.
Frob the book on the left (figure 8) for a healing potion.
Crouch past the guard
room in the hall (you can
also grab his estate key if
you don't already have one). The
next room on the right has a
vase, and there's a
noisemaker in the closet in
the room at the end of the
hall. Grab the coins from
the card tables in the game
room, then use a water
arrow to clean up the mead
spill (don't forget to grab the
jeweled cup). When you
clean the rug, the mounted cray-man head behind you
will move to the left
revealing a necklace (figure 9).

|

|
|
Figure 8 |
Figure 9 |
Use an invisibility potion
or good timing to grab the
gold bottle at the end of the
bar, then crouch under the
bar and lean around the
corner to grab Benny's
purse. Go south to the next
bedroom (invisibility potion
in the closet). In the hall,
you'll need to sneak past
the pool room on the left
and go all the way to the
end of the hall on the north
to shut off the security
cameras.
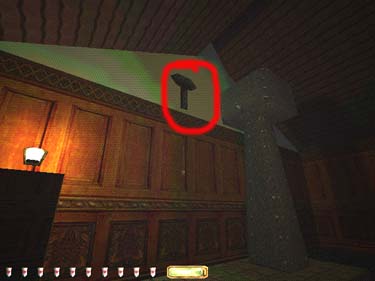
Go to the armory on the
southwest corner of the hall
and grab some weapons - especially the gas mine
behind the sword case
(shoot the target over the
door). Don't forget the gold
hammer in the corner.
Deal with the guards in
the pool room, grab the
loot, then jump in and get
the silver gear. Head to the
stairs next to the security room.
Third Floor & Attic
Go left to avoid the
guards and grab the loot
over the fireplace and
under the table in the west
room. Go down the small
hall to the bedroom suite
and up the ladder to the
attic. There's a flash-bomb
in the crate. Go across the
roof and get the slow-fall
potion in the crate, then
climb down to Truart's
bedroom. Grab Mosley's
key ring to the right of the
bed, and the bronze gear
(fig.10). Grab Truart's body if you want to complete a bonus objective.
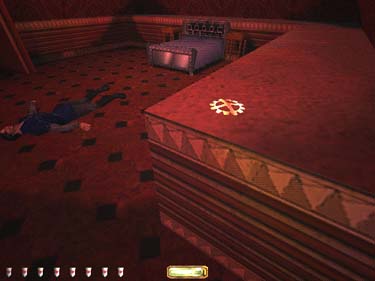
Figure 10
Getting Out
You can hassle with
getting out the conventional
way, but you've got a slow-fall potion, so why not
go out to the balcony with
the body? Simply jump to the
second floor, then slow-fall
to the ground (watch for the
patrol in the backyard).
Jump in the moat out back
and go south until you can
climb out on the other side
of the wall. Go back to the
gravesite and drop Truart's
body in the fresh hole (bonus objective), then
continue west and through
the crack in the wall.
Back to Index / Back to First City Bank and Trust / Forward to Trace the Courier
Travel to: Keepers' Chapel / Strategy Index /
Thief- TheCircle.com (home) / Go Back
|