
"It's not every day my services come so cheap..."
Other Level Resources:
-
Loot Map - Go here for a complete listing of
all the loot locations.
-
Secrets & FAQ Page - Go here for pictures
of all the secrets in this level, as well as some frequently asked
questions.
TABLE OF CONTENTS (click a topic to jump to that section)
- The Climb
- Markham's Isle (Lotus & The Navigation Globe)
- Observation Room & Cargo Storage Area
- Main Pirate Base,
Markham's Treasure and Scripture
- Sub Aquatic Base, Main Cargo and Rust Gas
- The Cetus Amicus
Starting Objectives:
- Kidnap Cavador
- Find Lotus
- Read another passage from the New Scripture of the Master Builder
- Find the old Lighthouse Keeper's Navigation Globe
- Find Markham's Treasure
Loot Information:
-
Requirements: None
- Available: 1627
- Accounted For: 1627
Important Note:
- Be sure to conserve resources as much as possible in this mission since there's no
load out for the following one. You'll find a lot of equipment throughout the level, but you'll need to save
as many water arrow and flash-bombs for the next mission as possible.
The Climb
For a silver nugget (50 gold) - you'll need to flip the switch on the top of giant drilling
machine (it's noisy). The little shack on the left has some fire and water arrows. Beware the
patrol and follow the tunnel to the elevator- but don't use it. Turn right and mantle up the rocks
until you come to a hanging vine/rope. Beware the camera and climb up to grab the gas arrow.
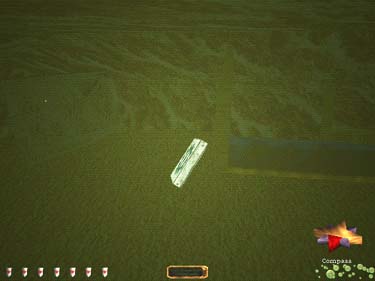
Jump to the other vine, wait for the camera to turn, then spin around and jump to the
outcropping (figure 1), mantle to the ledge (figure 2), crouch and go into the passage (do all of this
very quickly! Once the camera spots you, the guard takes a very long time to calm down).
|
|
|
Figure 1
|
Figure 2
|
Follow the passage to
the camera switch on the
overhead beam. Back down
on the landing with the
guard, jump to the shadows
behind him (he shouldn't
get too excited if you
haven't set the camera off
thus far). Flip the switch on
the right to open the
workshop gate overhead.
Go back near the ledge
you took to get to the
camera switch and climb
the vine up. Beware the
guard here, jump to the
corner and enter the
workshop. There are two
silver nuggets (100 gold total)
behind the robot station. Go
to the well in the back and
climb the rope up to the
lighthouse area.
Markham's
Isle (Lotus & The Navigation
Globe)
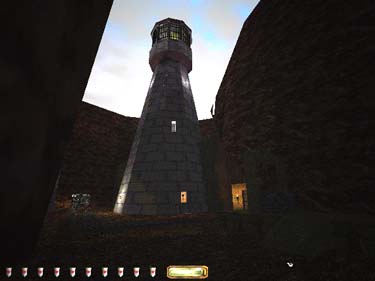
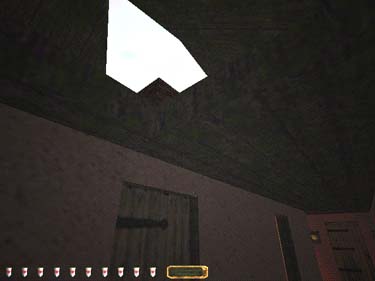
Lotus is in the cold
storage facility to your left,
but you need the key from
the Mechanist at the top of
the lighthouse. Wait for the
iron beast to pass, then
head west through the
darkened door of the
lighthouse (figure 3). Beware
the patrol inside and go to
the very top. You can
pickpocket the cold storage
key from the top of the
ladder. Go back down to
the house entrance on the
left. Take a left into the
house and get the purse
(20 gold) from the last room
on the right, as well as the
two lucky coins (20 gold)
from the shelf and the moss
arrows above them.
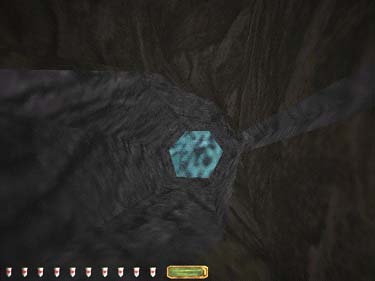
Upstairs, go to the end of
the hall, triggering the
conversation. While the
mechanists talk, use a vine
arrow to climb up through
the hole in the roof (figure 4).

|
|
|
Figure 3
|
Figure 4
|
Grab the purse (100 gold)
from the mechanist up here,
then go right to the next
room. Find the switch on
the floor around the boxes
(Secret - this opens the
door in the dark room
below). Back in the
downstairs hall, open the
door to the room where the
conversation took place
and douse the torch.
Pickpocket the mechanist's
purse (30 gold) and go into
the dark room at the end of
the hall. Go through the now
open secret door, grab the
navigation globe, healing
potion, and silver coin
stacks (36 gold total). Go
back through the lighthouse
and out to the yard. Hug
the wall around to the
south, avoiding the iron
beast. Unlock the cold
storage building, talk to
Lotus and get the peg from
beside him. For a few flash-bombs and a breath
potion, mantle to the top of
the cold storage building
and go to the platform.
Shoot a few moss arrows
onto the top of the wall and
to the metal below. Wait for
the sentry to turn her back,
grab the goods and head
for the lighthouse.
Observation Room
& Cargo
Storage
Go to the nautical
museum and use the peg
on the wheel. The platform descends to a relatively safe
area. Beware the camera to
the left. You'll need to flip
the switch to open the
window and gate leading
down to the base. Sneak
under the camera and
beware the patrol coming
up the path (there are
several places to hide
along the way). When you
reach the Cargo Storage
area, there is an iron beast
patrolling, a smaller beast
up at the door control
station, and a mechanist
directly in front of it. You
can use the controls to
open the tubes to the
buildings, but it's much less conspicuous to use the
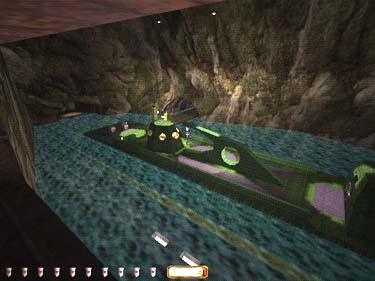
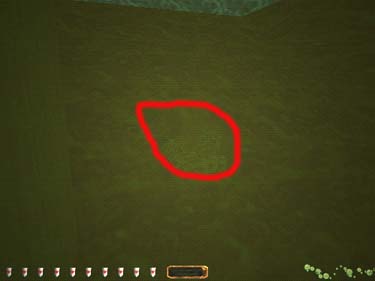
water to travel. Stay to your
left and go behind the
boxes. Grab the water
arrows and scouting orb
from the open crate and run
west to the small ledge
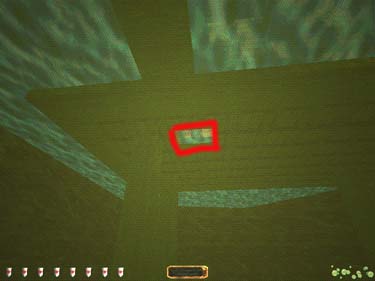
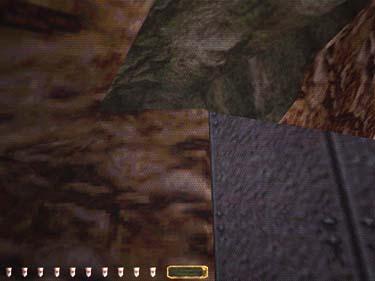
leading to the water tunnel (figure 5). Swim straight ahead
and down a bit to a
passage with boulders in
the entry (figure 6).
|
|
|
Figure 5
|
Figure 6
|
Main Pirate Base,
Markham's Treasure and
Scripture
You'll emerge in a cave
with what looks to be a
pirate fort. Climb the stairs,
open the hold and swim
around to the huge treasure
chest for a gem (400
gems). When you come
back out, high-tail it for the
water hole - Markham's
ghost is not happy. Swim
toward the hole in the
bottom of the Main pirate
base (figure 7). Grab the loot
on the table (30 gold title).
There are two sentries up
top along with a patrol, as
well as a patrol on the
walkway outside. Occasionally a patrol from
the substation will also
stroll through. In other
words- don't try to take
these guys on. Go out the
door, kill some torches and
look up. Shoot a vine arrow
into the metal grill and climb
up (quickly). Jump across
to the west platform (not the
metal ramp!). You can do
this if you time it correctly,
but a quick save beforehand
would be wise nonetheless.
Swim to down the hall to
the room on the right and
read the scripture floating
near the desk (figure 8).
|
|
|
Figure 7
|
Figure 8
|
Climb back down and
get in the water. The
platform & building on the
west are tricky. There are a
few mines on the shelf
inside and a silver nugget
(20 gold) on the beam
above. See the Secrets
page (Missing Loot?) for
tips on getting the silver
nugget. Swim to the door in
the east, go down the stairs
and make a quick left turn
away from the camera. Go
down the ladder and left
into the camera control
room. Back up the stairs,
sneak underneath the
camera and drop into the
hole to the left of the
staircase. The first room
has a purse on the floor.
Follow the passage around
to the locker room and grab
the Cargo Hold 5 key in the
water. Loot the locker room
of it's supplies including
136 in gold (3 silver coin
stacks and a purse), then
jump back in the water and
return to the staircase.
Climb out of the hole and
go left into the dive room
(try to mantle to the stairs to
avoid stepping on the metal
floor). Use the pressure
door in the floor to get back
in the water. Swim back
north under the building to
the Cargo Storage Area.
Sub-Aquatic Base, Main
Cargo and Rust
Gas
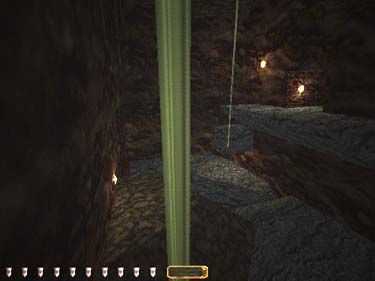
Wait for a break then go
up the metal ramp to the
west (there's a spot on the
near side where you can
mantle up without stepping
on the metal - figure 9) - save
your moss arrows for the
next mission. There's a few
in the corner on this side of
the ramp as well). Go to the
Cetus Amicus area and
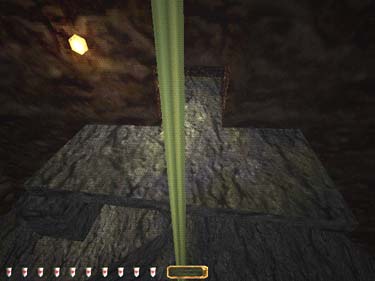
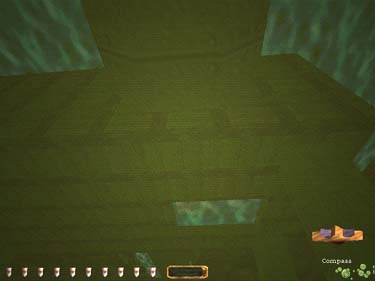
jump in the water. Head
west under the dock, then
south to the Sub Aquatic
Base. Go through the hole in
the floor (figure 10 - it's near
the pipe in the back). The
keys are at the top of the
stairs in the room with the
mechanist. He's turned
away from you, and there's
a patrol that comes through
this area, so be careful.
Back in the water, swim
north to the Main Cargo
area. Approach from the
back and mantle up behind
the sentry. Grab his key to
get in, then grab the rust
gas from the first crate on
the left (the other one has a
mace in it). There's loot in
the crates on the other side
of the room (a statue for 75
goods and some gold coins
for 125 gold). Back in the
water and swim south, then
east to the Cetus Amicus.
|
|
|
Figure 9
|
Figure 10
|
The Cetus
Amicus
There are several ways
to enter the submarine: through the pressure door
on the bottom, the ladder
on the east side, etc. The
most practical however,
seems to be the most
obvious. Mantle onto the
deck from the south end
and creep to the door,
making sure to avoid the
mechanist in the diving
gear (who can't be gassed
or blackjacked by the way). Be
careful to stay back from
the windows inside, listen
for the guard below to make
his round, then drop
through to the hall. Read
the captain's log in the right
room, grab the purse (100
gold), in the room on the
left, and grab the 2 wine
bottles (100 goods) and 2
gold cups (50 gold) from
the dining room behind you.
Go north through the ship,
using the closets along the
way to avoid the guard.
There's a water arrow in
the janitor's closet and
some flares in the small
storage area on the left.
Grab the vase (100 gold) in
the lounge, then go up the
down the ladder to the hold
area. Grab all the supplies
out of hold 1, 2, and 4 (3 is
empty). Hide yourself in
hold 5 for the trip to the KD
site.
Back to Index / Back to Life of the Party / Forward to Kidnap
Travel to: Keepers' Chapel / Strategy Index /
Thief- TheCircle.com (home)
/ Go Back
|