TABLE OF CONTENTS (click a topic to jump to that section)
- Secrets Listing
- FAQ
- Commonly Missed Loot
Secrets Listing
Total Number of Secrets: 1
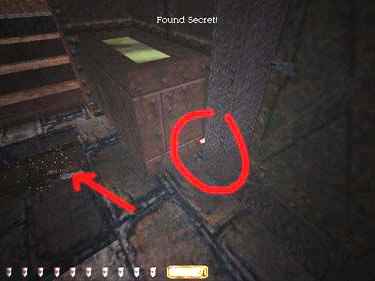
1) Underground Chamber
In the room
off of the Eastern courtyard,
look at the bottom of the
eastern most door frame for a switch (figure 1) which opens a pit
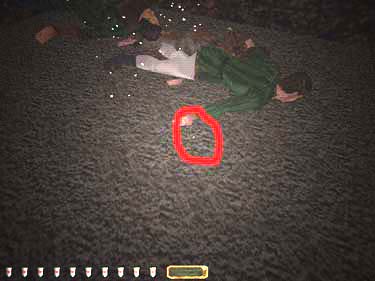
with two bodies and a ring
worth 100 gold (figure 2).
|
|
|
Figure 1
|
Figure 2
|
FAQ
Q: What are all these keys
for?
A: The most common
mistake made in this
mission is to go for a cup of tea during the
conversation at the meeting
hall between Truart and
Karras. Looking Glass got sneaky
and placed the safety deposit box key appear in a different location each time
- leaving the other keys as
decoys. The key you're
looking for could be one of the 14 different keys scattered throughout the level.
In order to know which
one it is, you have to listen
to the location Karras gives
during each conversation
near the end. Sneaky huh? If
you're stumped, you can
either refer to the
walkthrough for all the
possible locations, or just
reload the game.
Q: I can't hear the
conversation. What's going on?
A: Use your 'lean' key
against the door to gain
more clarity. Stay at the
door the whole time or the
mission will fail.
Q: Is there any way to
rescue the people from
those weird looking tubes?
A: No, unfortunately there is no way to help them.
Q: I can't do ANYTHING in
the chapel without getting
caught. What do I do?
A: This is one of the most
touchy areas in the whole
game. Refer to the
walkthrough for hints.
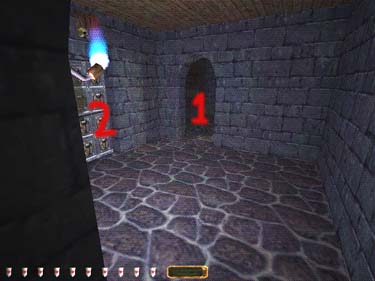
Q: How and where do I make an
impression of the key?
A: The workshop is located
at the bottom of the winding
staircase on the east side
of the meeting hall (figure 3).
The room you're looking
for is clockwise through the
workshop - the last room on
the left. Highlight the yellow
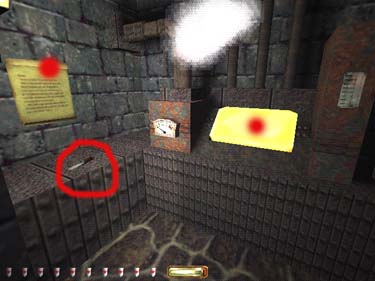
wax pad and 'use' the key on the wax - an impression of the key will be made.
Then use the putty knife (figure 4 - on the left) to remove
the impression. Don't forget
to put the key back where
you found it.
|
|
|
Figure 3
|
Figure 4
|
Commonly Missed Loot
Ring In Secret Chamber
Take a look at secret area #1 above for more information on this
item.
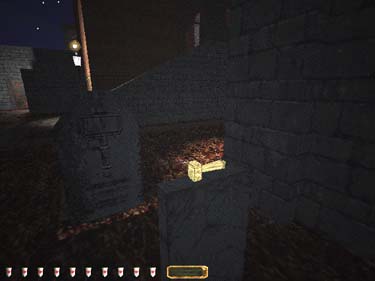
Golden Hammers in Graveyard
Go to
southeastern corner of the yard
and look on top of two
different tombstones (figures 5 and
6).
|

|
|
Figure 5
|
Figure 6
|
Offering Plate
In the western closet in the Chapel, you'll find an offering
plate. This is often overlooked because it looks like junk (figure 7).

Figure 7
Jeweled Cup On Turret
On the southwest
corner of the roof near the
storage shed, you'll find a jeweled cup (figure 8).
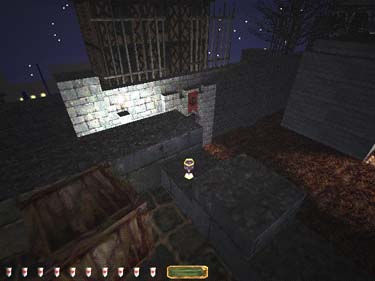
Figure 8
Small Statue Under Stairs
Close to the workshop and
catacomb entrance, you'll find this little trinket (figure 9).
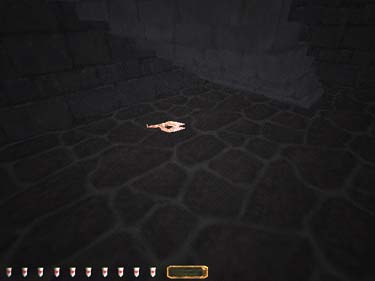
Figure 9
The Catacombs
You should actually refer to the Loot Map for this section
since there is so much loot
down here. The
hammer atop the sarcophagus is worth
picturing here (figure 10) since
it's so well camouflaged. In
the un-patched version,
there's a hammer inside
one of these, so click
around on them until you
find it.
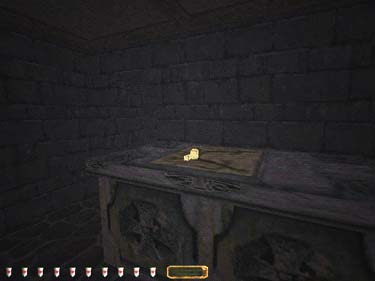
Figure 10
Purse on Chair
Look carefully in the area near the chapel. A purse is lying on one of
the chairs (figure 11).
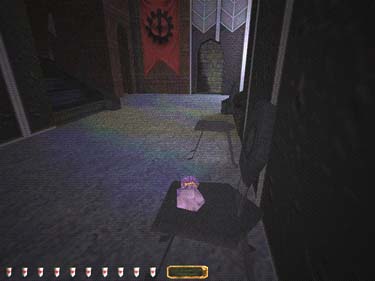
Figure 11
Travel to: Keepers' Chapel / Strategy Index /
Thief-
