Other Level Resources
TABLE OF CONTENTS (click a topic to jump to that section)
- Secrets Listing
- FAQ
- Commonly Missed Loot
Secrets Listing
Total Number of Secrets: 13
1) The Rope Arrow
Go South from the start point and pass the first control shack. You need to reach the top of
the tall crates, either by climbing onto the shack or by jumping from the catwalk
above. Inside is a crate with a rope arrow (figure 1). This arrow will make
several tasks in this level much easier, so make sure you get it.
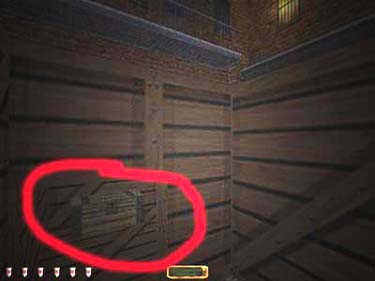
Figure 1
2) The Broken Elevator
In Lord Porter's shop, jump into the elevator landing and shoot an arrow at the button above
(figure 2). The elevator will descend to the first floor, allowing access to the
second. Note that you need to shoot the lower of the two buttons. If you hear
your arrow hit a button, but the elevator doesn't come down, you hit the upper
of the two buttons. Aim a little lower a try again.
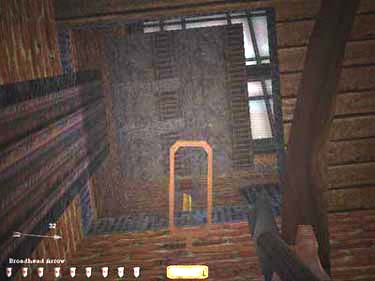
Figure 2
3) Lucky Selentura's Dice
In Lucky's shop, mantle to the top shelf and grab the key from the box.
This key will unlock
the safe in the same room. Within the safe are a pair of golden dice (figures 3
and 4).

|

|
|
Figure 3
|
Figure 4
|
4) Gilver's Banner
In Gilver's office, slash the banner on the wall with your sword. A hole
in the wall will be revealed, containing a diamond (worth 100 gems).
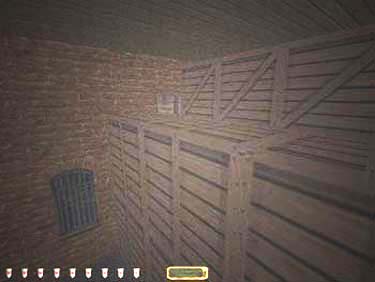
5) Kilgor's Gold Hammer
On the first floor of Kilgor's Weapon Smithing shop, climb up through the crates
(figure 5) to find a golden
hammer in the locked crate.
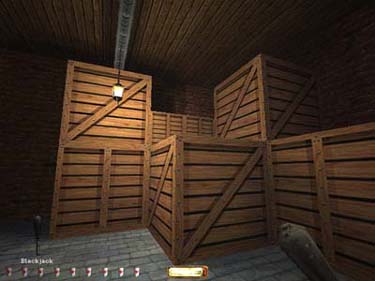
Figure 5
6) Mynell's Safe
In Mynell's shop, take the southern elevator up to the freezer and push the
small button just inside the door. Some ceiling
vents will open and a blue key will fall on the ground (figure 6) - you may have to
crouch to see it. Mantle up through the vents, go back down to the first floor and
then head to the northern elevator. Take this elevator to the second floor and
use the key you got to unlock the safe.

Figure 6
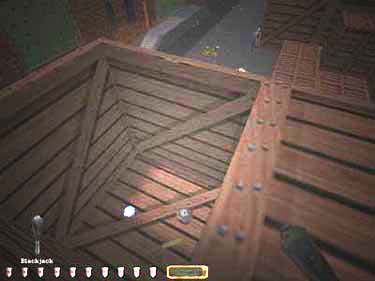
7) Rope Arrow # 2
In the main warehouse, there's a crate in the southeast corner atop some of the larger crates
(figure 7). You can access it by going through the upstairs offices and onto the roof, then down
through the
far southern skylight (figure 8). Don't forget the bag of spice in the locked crate where you drop
down.
|
|
|
Figure 7
|
Figure 8
|
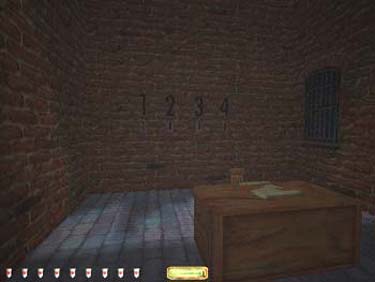
8) Building B Secret Room
Just inside the northern yard entrance to Building B, turn left and take the first left beyond the
elevator. In a room with three boxes (figure 9) is a hole in the ceiling with a wooden ledge. Shoot a
rope arrow into the ledge, not into the upper ceiling - the arrow won't reach
the ground if you shoot it into the ceiling. Then climb up the rope for a scouting orb and an
invisibility potion.
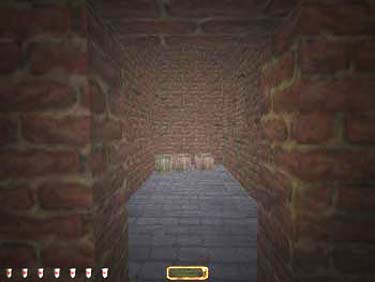
Figure 9
9) Rampone's Bookcase
On the third floor of Building B, enter into Rampone's office. Take a
look at the second bookcase from the left and find the hidden book (figure 10).
Inside this secret area is a golden candlestick.
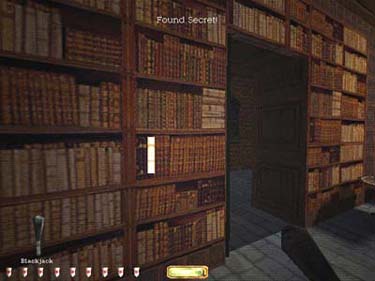
Figure 10
10) Pirate Ship - Top Deck Cargo Hold
On the deck of the boat, open the storage crate for a bag of spice (along
with a few spiders and some fruit).
11)
Pirate Ship - Telescope
Turn the steering wheel and toggle the telescope (figure 11) to open up the spice crate in Davidson's
quarters.
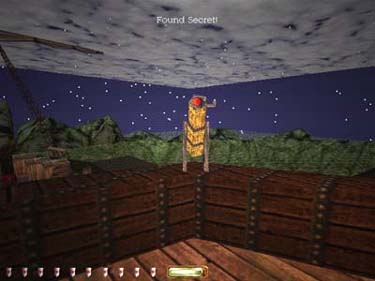
Figure 11
12 & 13) Davidson's Banners
Behind each banner in Davidson's quarter's is a crate containing some loot. Both
count as secrets.
FAQ
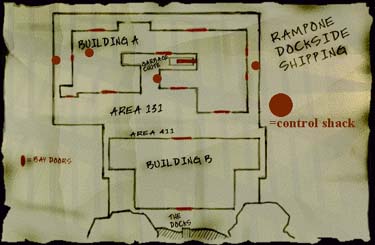
Q: How do I open the bay doors?
A: For Building A, use the control shacks (figure 12) located throughout the yard. The key
is in the main office (see walkthrough). For Building B, use the controls on the wall
in the northwest office on the second floor (figure 13). You'll need to pickpocket a
key from the patrolling swordsman to get in.
|
|
|
Figure 12
|
Figure 13
|
Q: Where is the shipping label?
A: In R. Bramrich's shop. He's the accountant on the Northwest corner of Building A.
The room combination is 7732. The label should be on his desk.
Q: How do I get to the second floor of Lord Porter's Art Sales?
A: Stand in the elevator landing, aim up to the elevator switch on the second
floor, and shoot an arrow at the lower elevator button.
Q: Where is the key to Lucky Selentura's safe?
A: On top of the shelf in his shop. Mantle up onto one of the partitions in the
room and jump to the top of the
shelf. You can also use a rope arrow if you have already gotten one. The key is in the
box on the very top of the stack of shelves.
Q: How do I get into the recording booth and where is the recording?
A: Use the gear on the console (figure 14) to enter into the recording booth.
The recording itself is the cylinder on the table to the right.
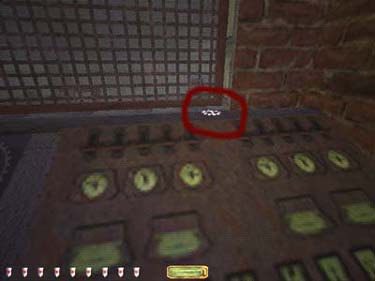
Figure 14
Q: Where is the key to Mynell's safe?
A: On the normal difficulty setting, it's in the downstairs cell with the spider. On
Hard & Expert it's in the
upstairs freezer case. Push the button inside the door to open the overhead
vents and the
blue key will drop to the floor on your right.
Q: Why can't I get into Osterlind's office in Building B?
A: You need Davidson's key. There are generally two 'pirates' or thieves walking from the
ship to the warehouse and back. One of them has this key. You will need it later to
access Davidson's quarter's on the ship.
Q: How many bags of spice are there and where are they?
A: There are 7 bags of spice in all - see the walkthrough for the exact locations.
Q: How do I get behind those stacks of crates in Building B?
A: Use the skylights, accessible via the second floor offices. Make sure you
have a few slow-fall potions or a rope arrow with you - the fall from that
height can do a good bit of damage.
Q: How do I open the crate in Davidson's quarter's on the ship?
A: Turn the steering wheel and toggle the telescope.
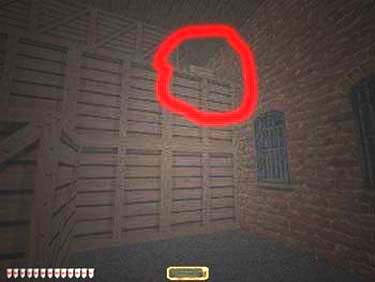
Commonly
Missed Loot
Check Behind & In All
Crates
This may sound silly, but there are quite a lot of crates that hide
either loot or tools for your use. If you see a suspicious looking stack of
crates, check it out. Specifically, the ones picture in figures 15 and 16 below
are prime suspects.

|
|
|
Figure 15
|
Figure 16
|
Idol Behind Porter's Picture
Use a broad head arrow to shoot the large picture at the end of the
hallway in Lord Porter's shop. Make sure you shoot the arrow into the crystal
ball. Once you do so, the picture will reveal a hidden niche with an idol in it
(figure 17).
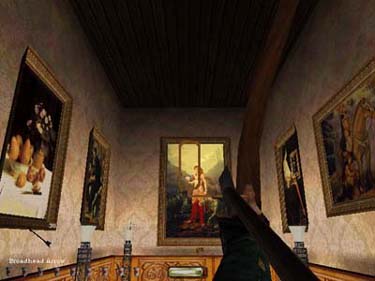
Figure 17
Gilver's Plates
Make sure you check EVERY plate on the second floor of Gilver's
Exporting - two of them
look like junk, but they count as loot.
Blackheart's Recording
Make sure you grab the silver flute and the cylindrical recording from the
tables in the recording studio.
Main Office Money Box
Get the purse in the box atop the message boxes in the main
office.
Travel to: Keepers' Chapel / Strategy Index /
Thief-
