"We can't afford any delays later when the masks arrive..."
Other Level Resources:
-
Loot Map - Go here for a complete listing of
all the loot locations.
-
Secrets & FAQ Page - Go here for pictures
of all the secrets in this level, as well as some frequently asked
questions.
TABLE OF CONTENTS (click a topic to jump to that section)
- First Floor - South
- The Clock
Mechanism
- First Floor - North
- Second Floor - North
- Second Floor - South
- The Library & The Correspondence
- The Secret Door & Getting Out
Objectives:
- Find and Operate the door to the secret staircase
- Find and read the correspondence from Karras to Gervaisius (optional)
- Map out at least one-half of the mansion
- Find at least seven secrets
- Get back out to the streets
- Don't get into any confrontations with the locals
Loot Information:
-
Loot Requirements: None
- Loot Available: 2685
- Loot Accounted For: 2685
Important Notes:
- "Confrontations with the Locals" includes any type of
offensive movement,
including flash bombs,
blackjacking, etc. If an AI
sees you, the mission fails.
Sometimes if you make too
much noise near an AI, the
mission will fail. Be aware
that near the southwest
guard room on the second
floor, a bug often causes an
NPC (the librarian) to be
present in audio, but the
physical character may be
invisible - thus, sneaking in front of this guard room
while the NPC is still
technically present, will fail the mission.
- The loot in the mission is extremely scattered throughout the mansion, so
this walkthrough will not detail loot amounts - only locations. For more
specific loot information (including a loot count), visit the Loot Map
and Secrets Page.
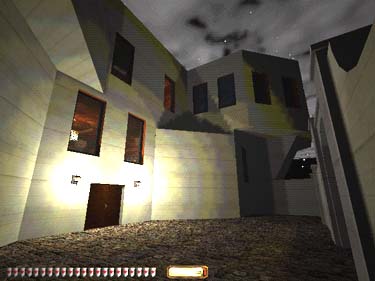
First Floor - South
Grab the coins in the
empty pool, then mantle up
to the small out hang near
the crates. Find the switch
on the wall to the right and
open the secret door. Once
inside, go around left to the
prayer room for a flash mine
in the corner, then grab the
coins on the altar and last
window sill. Beware of the
guard and camera in the
hall and go west through the
double doors and down the
stairs. Pick the lock and
grab the guards purse, then
head east, back through the
chapel and into the next
room. Get coins from both
tables before ducking into
the hall again, this time
going west across to the
storage room for a
candlestick and a flare in
the crates. Go upstairs and
grab the candlestick and broad head from the crates
up here, then go back
downstairs and east through the double doors to the
office on the right. Grab the
coins on the planet and flip
the switch on the wall
behind the desk to open a
secret door in the southern most closet. Go through to the workshop and into
the security office. Grab the
coins on the desk and on
the ledge, then turn off the
security cameras for this
wing. Make sure to grab the
patrolling guards purse,
then go to the southeast
corner of this floor and grab
the coin in the window sill
near the clock.
The Clock Mechanism
Head back west past
the foyer door and take the
next door on the right.
(Avoid the foyer for as long
as possible - when you
enter, it triggers a
conversation between the
door guard and the mage.
Afterward, the mage begins
to patrol in the ballroom,
making it difficult to work in
there). In this long
anteroom, quietly go up the
stairs to the ballroom. Grab
the cuckoo mechanism from
the toolbox on the
workbench (figure 1), then
pick the west door and grab
the guards purse. Exit via
the northeast doors, and
beware of the guard
patrolling this area (grab his
purse).
Figure 1
First Floor - North
Emerge in the north hall
and make a right to the
double doors on the west.
Flip the switch on the back
column to open a door
under the stairs (figure 2).
Figure 2
Go north to the guard room
and grab the coin from the
desk. Slash the banner in
the hall and flip the switch
behind it to open the north
secret passageway. In the
passage, take the first left
into the bathroom. Get the
coin from the sink, and
another from the ledge on
the far side of the tub (you
can use your moss arrows
here- you won't need them
anywhere else). Back in the
passage continue west to
the next hall on the left. Flip
the switch on the dead end
wall and go east into the
servants quarters. In the
bunk room, get the copper
and silver coins from the
left and right crates. Go
back through the passage into
the kitchen, get the three
wine bottles from corner of
the table, as well as the
spice bags from the shelf.
Go west to the security
room and kill the cameras
for this wing. At the bottom
of the stairs through the double
doors, pick the lock and get
the guards purse. Go back
east to the storage room on
the right/south (figure 3). Get
the plate and cup in the
crates under the stairs, the
cups on top of the boxes,
and the cup behind the
sofa, then go upstairs.
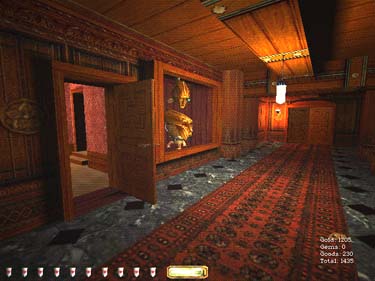
Figure 3
Second Floor - North
In the storage room, get
the two candlesticks
stacked behind the boxes.
Take the double doors and
go through the ballroom and
around to the north hall.
Two guards patrol this
hallway (both with purses).
Go across to the security
room, kill the cameras for
this wing, and grab the coin
on the inside ledge. Get the
coin on the floor behind the
couch, then head west
down the hall to the room
on the right. Grab the coins
from the bed stand and
desk, then go west to the
windows and grab coin
from the right window sill.
Go back to the security
room and flip the switch in
the southeast corner to
access the secret passage.
Go through to the trophy room,
grab the coins on the
corner table, and the
noisemaker in the chest.
Use the switch on the
ceiling of the closet to get
into the dining room. Grab
the coins floating in the
northwest corner (apparently a table got
removed, but the designer
missed the coins). Duck
into the other closet, use
the overhead switch to
re-enter the passage and
go west to emerge at the
corner of the hall. Slip
around the corner and turn
off the camera, grab the
coin on the window sill of
the guard room, then go
back west to the office on
the left and grab the coins
on the desk. Use the foyer
balcony to go west toward
the ballroom. (on normal
difficulty, the clock
mechanism is located at the
south end of the foyer
balcony). In the ballroom,
go south to the south hall
(you can also use a vine
arrow to get down to the
floor here for the clock
mechanism if you don't
have it already).
Second Floor - South
Cross the hall to the
security room and kill the
cameras (make sure you
disconnect the bottom left
switch for the turret/cam in
the corner of the hall, as
well as turning the power
off). In the hall, go east to
the office on the left, get the
coin on the floor between
the table and chair, get the
coin from the desk, then
cross the hall to the
dressing room. Grab the
coins on the corner table,
the healing potion from the
chest in the west closet,
then go through the middle
closet, flip the switch and
go west in the secret
passage. Take the next
secret door on the right into
the conservatory, cross the
hall and get the coin from
the left of the turret bay,
then go west into the bar.
Get the coins on the
planter, the bar, and the
window sill. Grab the purse
from the guard just outside
the double doors. Use the
switch in the southeast
corner by the couch to
access the secret passage
and go all the way to the
Library on the east.
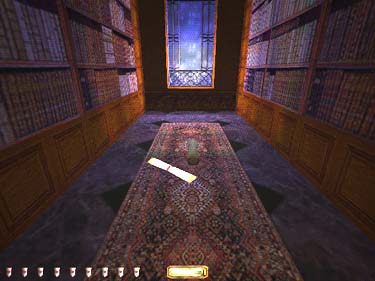
The Library & The
Correspondence
A ghost patrols here,
and you will see several
apparitions hinting for you
to read the books. There
are five books on you'll
need to read (figure 4). One is
on the middle of the 'T'
shelf to your immediate
right . Walk down the north
side to find two books on
your left, one on the west
side of the 'P' shelf (this
opens a secret
compartment), and one on
the west side of the 'N'
shelf. Cross to the table
near the fireplace for
another book and some
coins, then head west to
the window sill between the
'V' shelves on your left for
a coin. Go upstairs to the
southeast corner. The last
book to read is on the
window sill between 'Y'
shelves. Once you read
this, the ghost should
disappear along w/ the
voices, and you will find the
correspondence between Karras and Gervaisius on the floor between the 'M'
shelves (figure 5), as well as a
scroll revealing the fate of
the senior librarian and his
wife.

|
|
|
Figure 4
|
Figure 5
|
The Secret Door &
Getting Out
Since there's nothing
important on the third floor,
you're ready to split. Leave
the library via the northeast
door and place the cuckoo
mechanism in the clock.
When you turn the clock
hands to 12:00, the secret
door to the third floor opens (figure 6). Sneak down the
hall past the guard, turn the
corner and go right into the
foyer. Sneak around to the
north side of the balcony,
shoot a moss arrow below,
then use a vine arrow to
climb down behind the
guard. Grab his purse, pick
the lock, and exit to the
street outside. Use a
noisemaker to distract him if
necessary (just make sure
you've grabbed his purse
first). (Note: You MUST exit
to the east side of the
house- exiting to the west
only puts you in Gervaisius'
backyard).
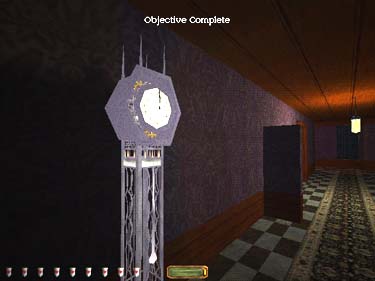
Figure 6
Back to Index / Back to Kidnap / Forward to Masks
Travel to: Keepers' Chapel / Strategy Index /
Thief-TheCircle.com (home)
/ Go Back