

"What hast thou ... built ... Garrett?" -
Karras
Other Level Resources:
-
Walkthrough (Part 1) - Go here for the first
part of this walkthrough.
-
Secrets & FAQ Page - Go here
for pictures of all the secrets in this level, as well as some frequently
asked questions.
TABLE OF CONTENTS (click a topic to jump to that section)
- Placing the Beacon and Tower 1
- Tower 2
(Experimental Invention
Workshop)
- Tower 3
(Downstairs)
- Tower 4
- Tower 5 (Computer Room)
- Tower 6 (Turret Room)
- Tower 7
- Tower 8
Objectives:
- Learn how to use the Guiding Beacon to draw the Servants to the Mechanist
Cathedral
- Use the Guiding Beacon blueprints to manufacture a new beacon to connect
to signal slot B
- Adjust at least 7 of the 8 signal towers to use signal B (the Guiding
Beacon) instead of signal A (Karras' instructions)
- Don't let Karras find out what you're up to or he won't trigger the
servants
- When the rest of your goals are accomplished, get outside before Karras
seals up the Cathedral and detonates the Servants
Loot Information:
- Requirements: None
- Available: None
Important Notes:
- The second part of this walkthrough deals with various strategies to
enabling each signal tower. Part 1 of this walkthrough deals with creating
the Guiding Beacon and putting it in its place.
- There is no chance of disabling or destroying all the mech beasts in this
mission, so choose your inventory wisely when you enter the level. However,
explosive mines can be made throughout the course of the level, which will
aid you in your ultimate quest.
- There seems to be no possible way to fail the "Don't let Karras know
what you're doing" objective. This is very strange, but you needn't
worry about failing this objective.
|
|
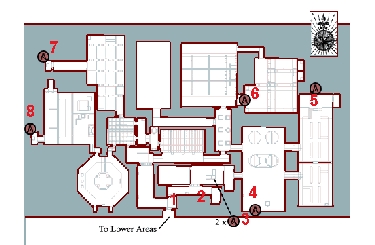
Signal Tower Numbers For This Walkthrough
|
Placing The
Beacon and Tower 1
You can reach the
North Apse from several
directions, but beware the
patrolling spiders. Take
the elevator on the right
up to the top floor. The
gate should be open if
you used the switch in the
secret room under the
plans room. If not, go to
the secrets page and
follow the instructions
for secret 1. It's much
easier than trying to get
to the beacon room via
jumping and climbing. (Hint: if you are being harassed by a spider, try
to lower the elevator
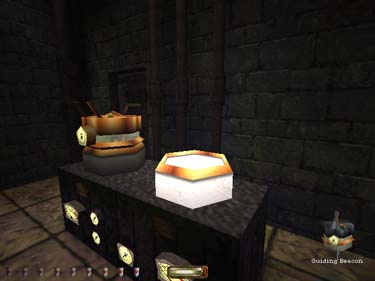
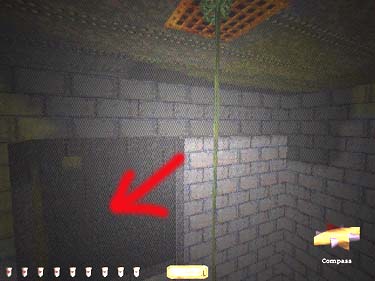
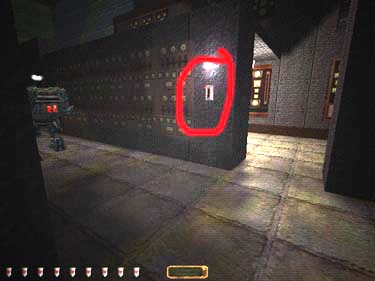
onto it.) Once you're in
the beacon room, use the
'use' key to place the
beacon in the empty slot (figure 1), then go through the
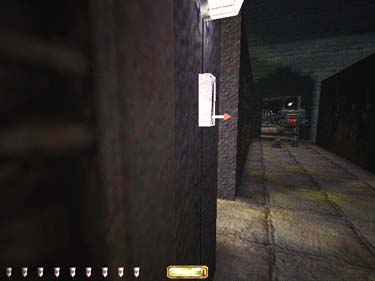
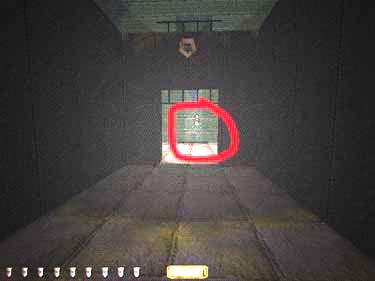
door and up to tower 1.
Switch the tower (figure 2)
to the 'B' side and head
back down to the first
floor.
|

|
|
Figure 1
|
Figure 2
|
Tower 2
(Experimental
Invention
Workshop)
Go east in the hall
(beware the patrolling
mech beast) and pick the
locks on the double
doors on the left. Take
the ramp downstairs to
the basement area and
you'll emerge in a large
room with a few
patrolling mech beasts
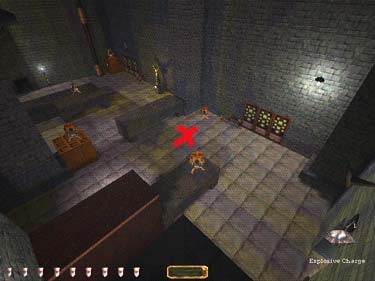
and mechanists. Jump off
the ramp to your right
and go to the elevator on
the east side of the room.
Take the lift down to the
Experimental Invention
Workshop. Go up the
ramp on the left and go
to the dead end where
you can get a flare from
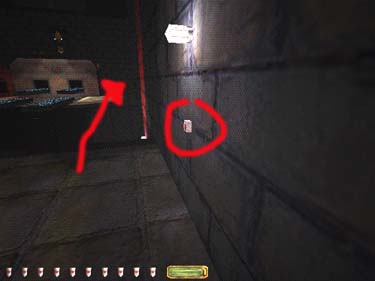
the box and kill the lights (figure 3).
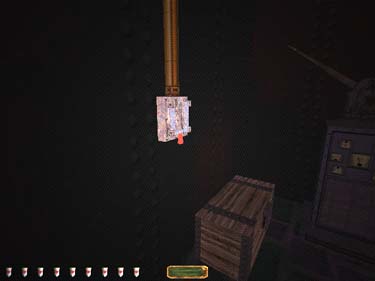
Figure 3
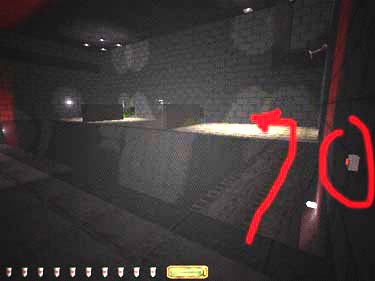
Back in the main hall,
sneak under the camera
(there's a spring wire and
a flux spheroid in the
room guarded by the
mech beast). Go out to
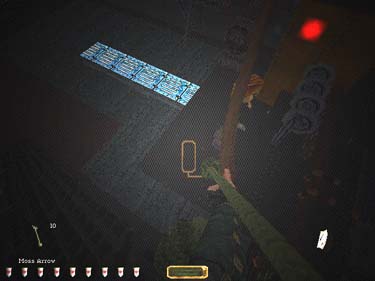
the large room and avoid
the metal plates on the
floor. Walk up to the
edge of the platform.
You'll see a mechanist to
your left. Cover the metal
grating in front of you
and below with a couple
of moss arrows (figures 4 and 5), then jump down
near the turret (don't
jump into the machine or
you'll take damage).
|
|
|
Figure 4
|
Figure 5
|
Climb the ladder next
to the turret (figure 6) and
the ladder on top of the
building to get to Tower
3. When you come back
down, jump to the
opposite side of the wall
(to the north). The
switch controls the vault
doors with nothing
worthwhile behind them.
Jump in the water and
swim south through the
passage, go east to the
water arrows, then north
and west into the next
tank. Grab 2 more water
arrows and climb the
ladder into the room.
Climb the ladder in the
room for a vine arrow,
then go back out into the
hall and east to the
elevator.
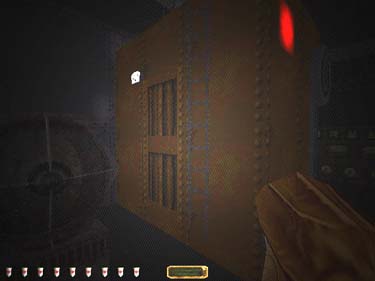
Figure 6
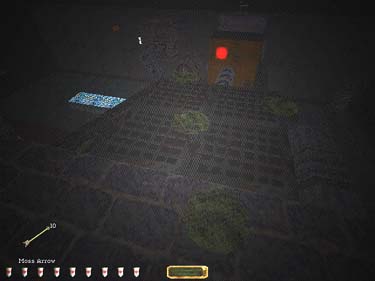
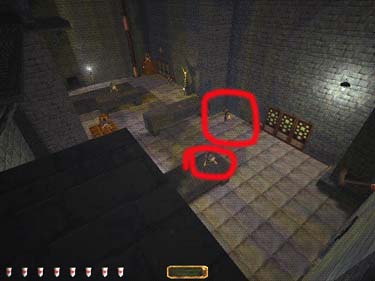
Tower 3
(Downstairs)
This one's relatively easy. Follow the patrols
clockwise to the
northwest corner of the
room. Be careful not to
walk on the metal plates
when the patrols are close - most of the time
you can go around the
other side of the pillar.
Call the lift down and
hide in the small shadow
in the corner, then go up
and change the switch.
When you're finished,
you can usually go
counter-clockwise back
to the ramp if you time it
right.
Tower 4
Upstairs go east through the room with the desk
(there's a Bantam Node
in the toolbox), into the
doorway of the giant
room with the mech
beast at the south end
near the elevator. You
may be tempted to lure
him away with a
noisemaker, but don't -
you'll alert the mech
beasts in the adjacent
room. Go left around the
big water reservoir and
into the shadow of the
southernmost doorway,
then shoot a noisemaker
across to the doorway
you came from. When he
moves, make a break for
the lift (you may have to
use a few more arrows to
keep him distracted while
the lift comes down). Go
all the way up to the
tower, flip the switch and
go back down to the
platform. Look for the
metal grate on the ceiling
above (figure 7). Climb up
to the rafters
and cross the room
(beware the camera - if it
sees you, there are turret
bays that will open and
start shooting at you).
When you reach the
north end of the room,
look for a metal grate (figure 8) on the ceiling.
Use a vine arrow to jump
across to the vent shaft.
|
|
|
Figure 7
|
Figure 8
|
Tower 5
(Computer Room)
Follow the shaft east
to the Computer rooms. Quick save here. Emerge
on a catwalk above the
main room, go through the
room with the desk and
the Quicklime Mixture
and into the south room.
You must flip two
switches in here to open
the gate to the lift for the
tower. Shoot a moss
arrow on the walkway and
to the floor beyond. The
switch is on the far side
of the second row of
computer banks directly
in front of you. Study the
timing of the mech
beasts. You'll notice that
at certain points, the two
nearest you will face away
from each other and away
from your hiding place.
When the mech beast in
the second row passes you
heading north, and the
one nearest you passes
going south, you should
be able to run and fall to
the floor, flip the switch (figure 9), and run south to
end of the computer bank
on the right (figure 10). By
this time, the beast in the
first row should have
turned and headed north.
Follow him to the door
on the left (figure 11). Use a
moss arrow to cover the
metal flooring, then exit
and go north to the next
doorway on the left. Quick save your game.
|
|
|
Figure 9
|
Figure 10
|
|
|
Figure 11
|
Wait for the closest
mech beasts to pass you
going south, run south to
the shadow of the
computer bank, then wait
for the middle beast to
head south, follow him
and flip the switch on the
right (figure 12). Walk
directly in a straight line
to the lift (figure 13) -
don't explore. A mech
beast is parked in the
room to the right, and
there is a turret on each
side of the door you just
came through. Take the lift
up to the ledge and ride
up to the tower. You
should be able to exit
through the nearest door
on your right fairly easily
(beware the metal
flooring).
|
|
|
Figure 12
|
Figure 13
|
Tower 6 (Turret
Room)
Cross through the large
room to the northern most
doorway beyond the
water tanks. Hide in the
doorway (beware the
patrolling mech beasts
and spiders). The middle
of the three shafts on
your right in the next
room leads back up to
the vent shaft you used
earlier. Go north/right in
this room (grab the 2
frog eggs in the corner)
and into a large 'chapel'
filled with spiders. You
can use the shadows near
the posts and altar to
cross the room, or make
a dead run across the
platform for the gate in the northeast corner.
Close the gate behind you
if you attract any spiders.
This would be a good
place for a hard save.
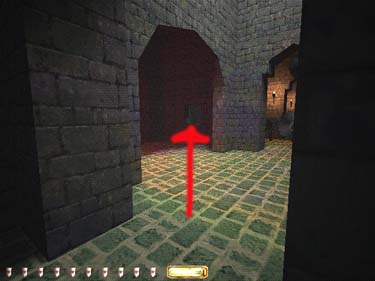
You'll emerge in the Turret room. Quickly
make a left and head east
to the doorway with the
green lights (figure 14). This
room is very dangerous,
so make sure when you're
standing still that you're
in a safe place. Quick save often.
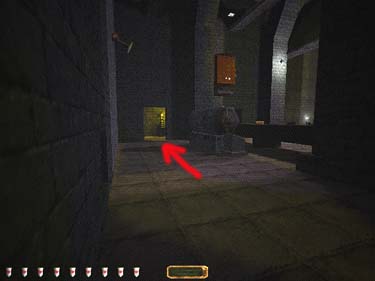
Figure 14
You'll need to open
the gate via the switch on
the east wall to access the
lift in the southwest
corner of the room.
Climb the ladder and
quickly cross the bridge.
Grab the sunburst device
and the two fire arrows
on the floor by the vine.
Cross the next catwalk
and go down the ladder.
In this small space you'll
need to stay in shadow
while leaning around the
corner to the left and
flipping the switch for the
tower gate (figure 15).
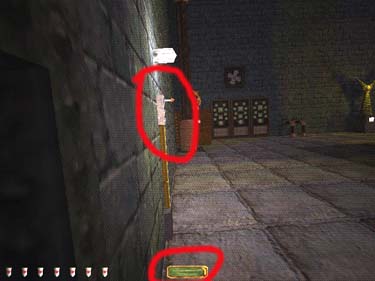
Figure 15
Go back up the ladder
and south to the next
ladder. You can use the
sunburst device near one
of the turrets here (figure
16), but be warned that
lighting a fire arrow
blows your cover - if you
can see them, they can
see you. Run full speed
across the catwalk,
crouching to get around
the corner - then jump to
the small corner pedestal
at the end - go to the
back corner and wait for
the fireworks to stop.
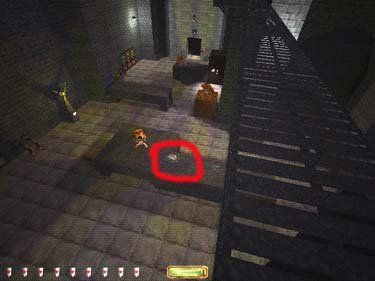
Figure 16
Throw a sunburst
device to the floor
between the two turrets
(as in figure 17) and
detonate it using a fire
arrow. You may want to
stay to the south side of
the pedestal to be out of
range of the turret on
your immediate left. This
should give you enough
room to get to the lift (figure 18).
|
|
|
Figure 17
|
Figure 18
|
Shoot a vine arrow
into the far side of the
metal grate beside you
and rope down to the
safety of the corner (figure
19). Note: Make sure you
shoot this arrow to the
lower far corner of the
grate, or you will have
major problems getting
back onto it when you
leave. Make a dead run to
the elevator on your
right, but stay to the sides
of the room - you're still
a good target. Take the
lift up, switch the tower,
then come back out and
grab your vine, going
back the way you came, through the spider room.
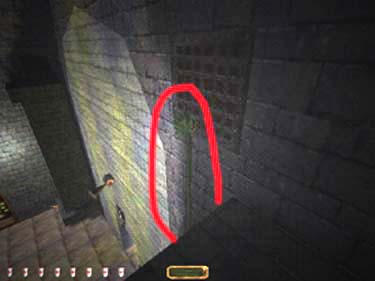
Figure 19
When you reach the
hall, you can pick the
double doors on the
right, but they only lead
to a large dangerous
room with little reward. If
you need an invisibility
potion. Climb the ladder
to the right inside the
doors and take the
catwalk to the last
machine on the right at
the far end of the room.
Flip the switches, then get
the invisibility potion
from the room in the
corner (there's also some
building supplies in
there).
Go south through the
room with the three shaft
entries and make a right into the
barracks area (if you can't
get down the hall, don't
forget you can use the
middle duct entry to go
back to the large room
with the water reservoirs and try it from the
southern doorway - less
light to sneak through).
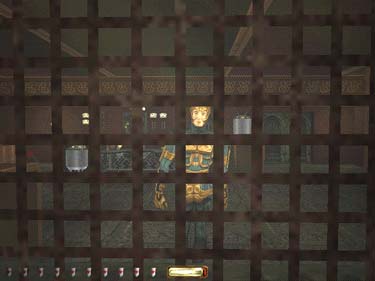
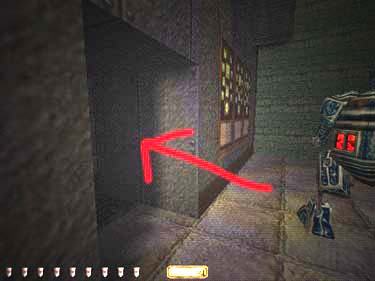
Tower 7
To clean out the
crates, use the niches
along the walls to hide in,
and loot the crates when
the camera turns away (figure 20).
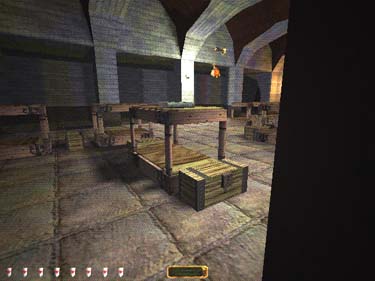
Figure 20
There's a gas mine, broad head, slow fall potion, healing potion,
and a flash bomb between
all the crates. Work your
way counter clock wise
around the room and exit through the northwest door.
You'll see an elevator on
your right- go upstairs
and say hello to Karras
(don't bother trying to
blow the door - you can't - even with several
sunbursts. Regardless,
there's nothing of use or
interest in the room
anyway).
Continue west, then
north through the room with
the flickering lights.
Grab the frog egg near
the wall and observe the
mech beast patrol
patterns in the next few
corridors. There are
several ways around:
- Shortest: Go diagonally
northwest to room with
the cauldron and jump through the small window (figure 21) (you can do this
by jumping into the
window sill, then
crouching to squeeze through). Go north through the
next window (figure 22)
then west to the long hall
with the lift at the end.
|

|
|
Figure 21
|
Figure 22
|
- Longest: Take a speed
potion and run across the smashing piston, mantle onto the
conveyer (avoid the fire)
and go to the
northernmost room.
Climb the ladder, go
down the slide into the
room with the green light,
take a left and go to the
end of the hallway. Go
right at the toolbox with
the flare and go to the
lift at the end of the hall.
-
Most Dangerous: Go left through the blades and north
to the room with the
green light, then south to
the long hall on the
right.
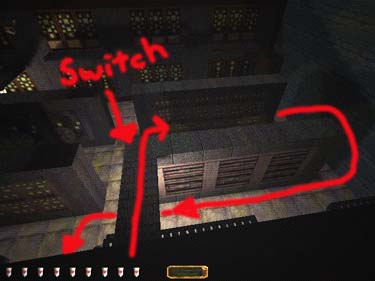
Whichever way you
go, when you're finished
with the tower. Go back
to the switch on the
floor, and take the secret
passage to the Tower 8
area (figure 23).
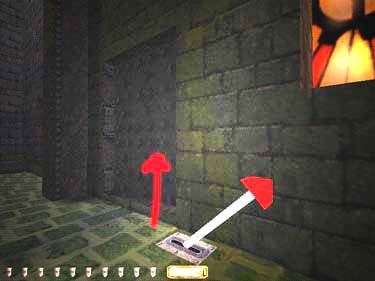
Figure 23
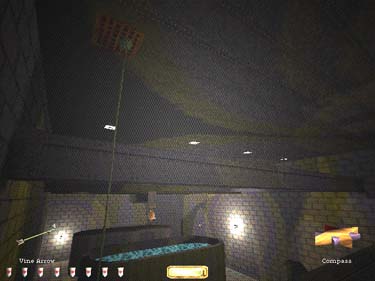
Tower 8
Cross the moveable
bridge on the north (figure
24) (you can get some
water arrows from the
pool first). On the other
side of the canyon,
beware the camera in the
little cubby on the north,
but it should be fairly
easy to sneak by the mech
beast. Go to the
southwest comer, grab a
the frog egg and go up to
the tower. Come back
down after switching the
signal and push the
button on the left
wall (figure 25) to bring the
bridge down to you. Exit
to the southeast and hide
in the shadows of the
round room.
|
|
|
Figure
24
|
Figure 25
|
Follow the patrols to
the east exit (using the
shadows and niches on
the wall to avoid them).
Go south out of the
room with the flickering
lights to the south hall,
then out to the north
apse in the south. Head
back south through the halls
and bays until you reach
the front doors.
Once again you've
saved the City - now it's time
to play some fan missions.
Back to Index / Back to Masks
Travel to: Keepers' Chapel / Strategy Index /
Thief- TheCircle.com (home)
/ Go Back
|